Introduction
Meet Intel Edison
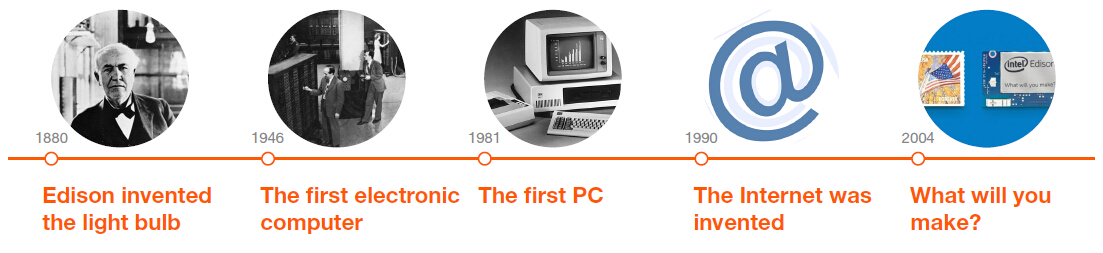
The Intel Edison is a powerful microprocessor with integrated Wi-Fi module. Its size is amazingly as small as a postage stamp. With its powerful computing capability and extremely low energy cost (as low as 1W), it‘s an excellent tool for portable wireless device studying and developing. Comparing with the first electronic general-purpose computer, the ENIAC, which was as large as 2.4m x 0.9m x 30m and weighed 27 tons, you will definitely be amazed by the improvement brought by our modern technology. Just as those big events in the time line below, the invention of Intel Edison may bring us the same amount of excitement.
Bring your cup to life! Wants to interact with your Facebook friends through a cup? Here it is! With a few electronic components and a simple program, this cup is now able to send notifications through its LED indicator when a massage pops up on your Facebook page.

The Devastator Tank Mobile Platform
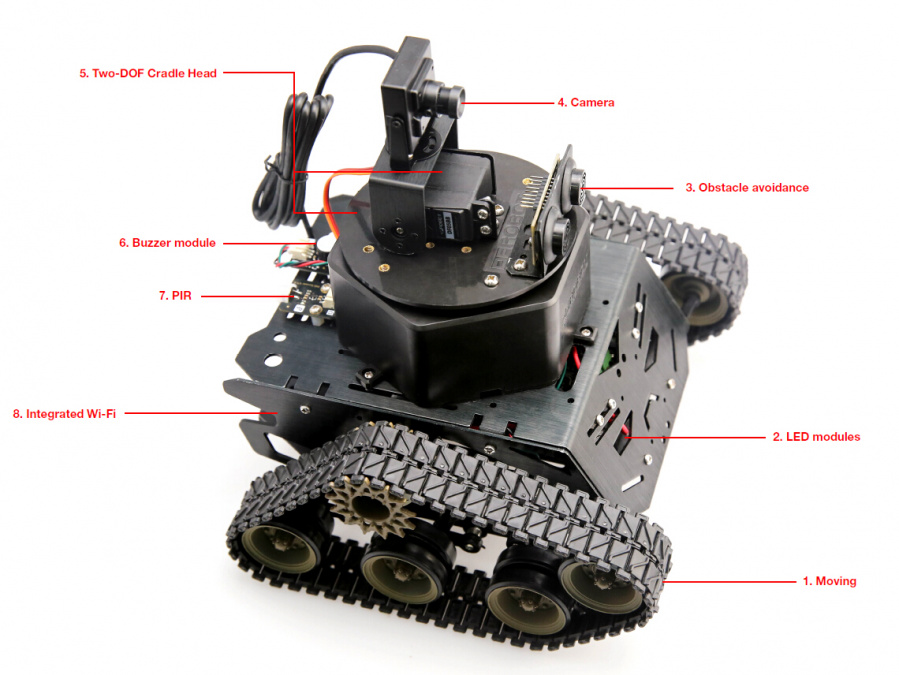
The Devastator Tank Mobile Platform is a set of robotic kits controlled by the Intel Edison microcontroller. Its outstanding mobility allows it to travel over various terrains. With an ultrasonic distance sensor and a two-DOF cradle head, the Devastator is able to detect and avoid obstacles. Moreover, Equipped with integrated Wi-Fi module, it can be attached to internet and connected to your own devices so that you can control its motion and view the real-time images captured by its camera wirelessly.
Romeo for Edison
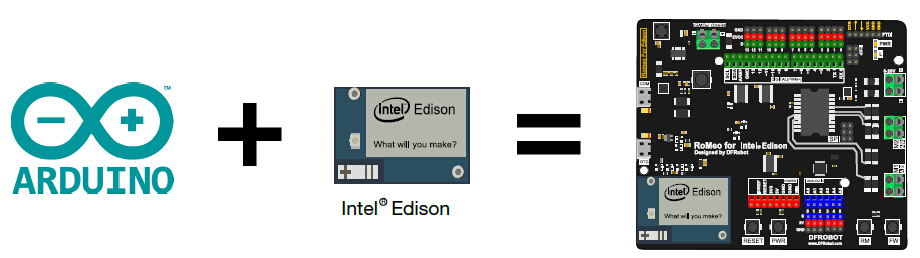
Arduino platform is an open source platform. Due to its simplicity and functionality, it has been widely used in smart device development. Based on Arduino platform, we developed the Romeo for Edison, a more powerful, functional and user friendly expansion board exclusively designed for robotic uses. The Romeo for Edison micro Expansion board integrates a 2-path motor driving module and a servo driving module in an ID-card sized mother board, which largely simplifies the circuit connection and saves a significant amount of space. Together with its 14 Digital output pins with optional external power supply and 6 analog input pins, building a robot would never be so easy.
Tutorial
Chapter 2: Run! Devastator!
In this chapter , we went through the hardware assembling procedure, now it's the time to get it moving! In the following sessions, we will show you how to set up a simple motor driving program step by step.
Moving Mechanism
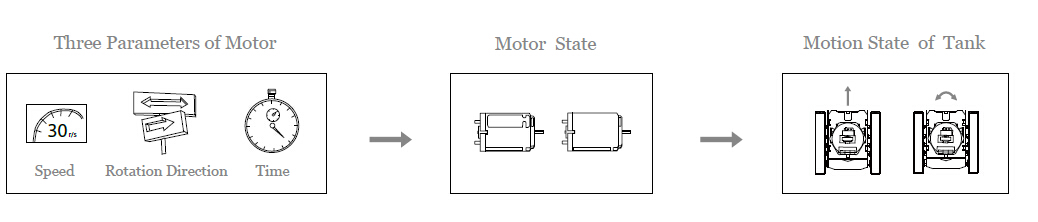
The mobility of the Devastator is realized by the motions of its motors on each side. The motion of each motor follows the signal sent by the micro controller. To be more specific, 3 parameters are included in a signal, each determines motor’s angular speed, rotation direction and corresponding time duration.
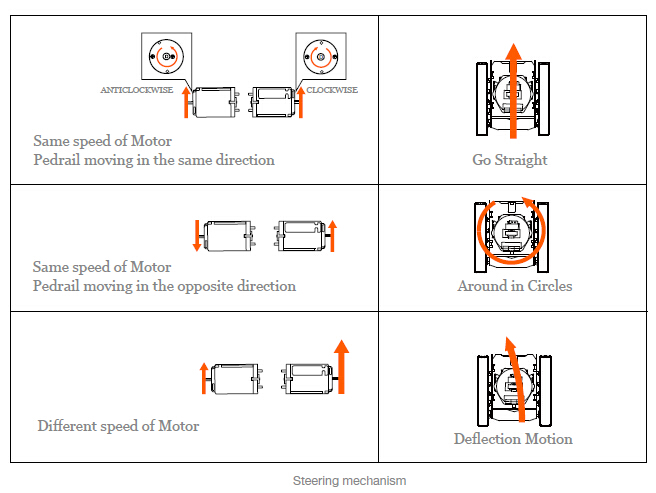
How To Steer The Devastator
The steering angle is determined by the speed difference between its two pedrails. When both pedrails are driven at the same speed, our robot may either go straight forward or backward. However, when speed of these two motors are inconsistent, the larger the difference is, the bigger its steering angle will be. Note: as motors are installed to be oriented in opposite directions, an anticlockwise rotation of the left motor and a clockwise rotation of the right motor drives pedrails in the same direction.
Read the PDF(tutorial chapter2) for more details
Chapter 3: Expansion Modules
In chapter 2, we learned how to control the movement of the Devastator through programing. However, it’s still far from enough for the Devastator to be capable of interacting with people. In the following sessions, we will help you add even more functions to make our robot send feedback to the people nearby.
LED module and Buzzer module
LED module and Buzzer module are output modules controlled by digital signals. Due to simplicity, they are commonly used as light and sound indicators for robots.
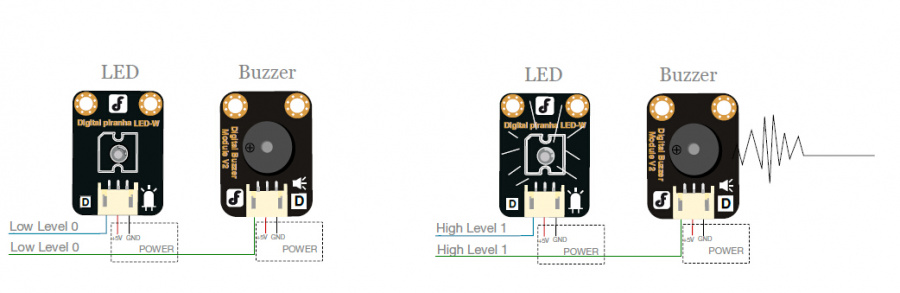
In digital circuits, “LOW (0V)” represents for an “off” signal (0) and “HIGH (5V)” represents for an “on” signal (1). However, in practical, voltage of a signal may not be exact. Normally, the voltage of a LOW signal may range from 0V0.25V and the voltage of HIGH a signal may range from 3.5V5V. Take the LED module as an example, a LOW signal turns the light off while a HIGH signal turns the light on. The same rule also applies to the buzzer module. Check the circuit that
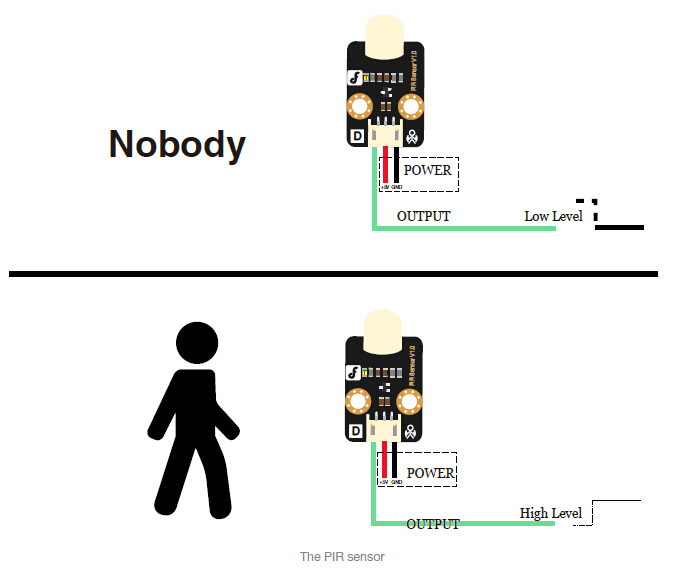
PIR sensor
The PIR sensor is an input module detects infrared radiations with wavelength around 10um exclusively radiated from human body. Its signaling mechanism can be described as following: when someone approaches the sensor, it sends out a HIGH signal as input, vice versa. Therefore, by adding this module, the robot will be able to take actions in reaction to someone passing by.
Read the PDF(tutorial chapter3) for more details
Chapter 4: Build The Devastator To Be An Unmanned Tank
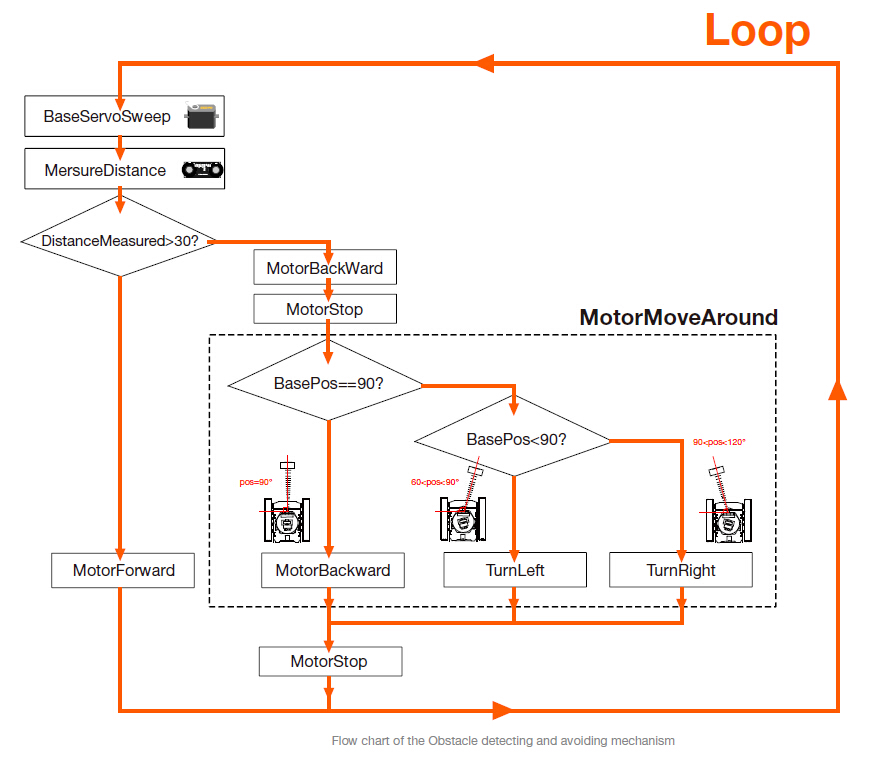
in this chapter, we will briefly explain the mechanism of the ultrasonic sensor module and introduce how to make our robot capable of detecting random obstacles by setting up the pan&tilt kit with the ultrasonic sensor module. By the end of this chapter, we should be getting an unmanned tank which is able to detect and avoid obstacles automatically.
Obstacle Detecting And Avoiding Mechanism
Read the PDF(tutorial chapter4) for more details
Chapter 5: Continuation Of The Assembly Process
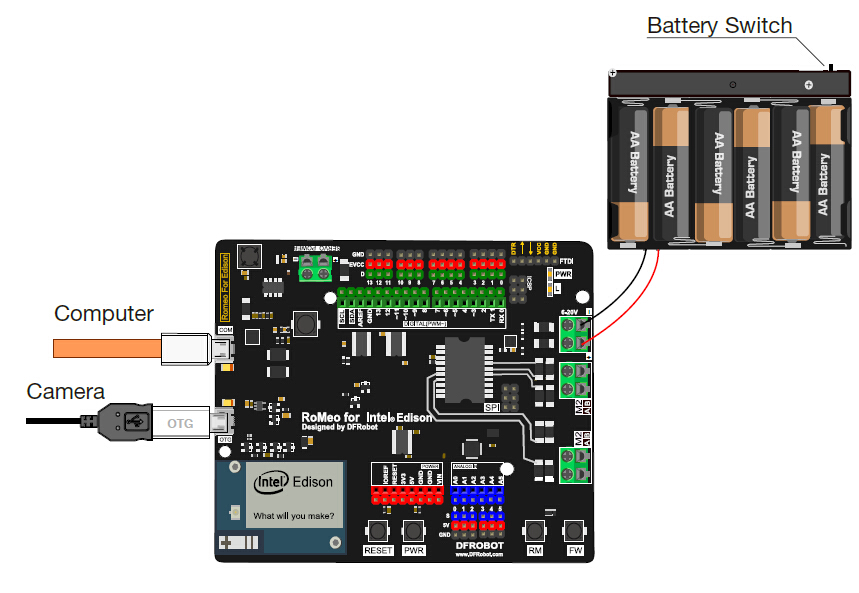
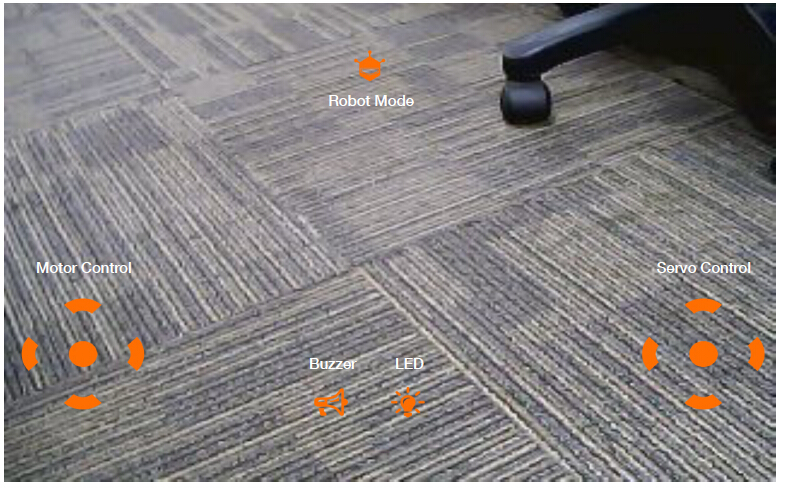
As we mentioned in the introduction, The Intel® Edison microprocessor comes with an Integrated Wi-Fi module which supports wireless control and video streaming. Compare to other functions that we have gone through in pervious chapters, setting up the Wi-Fi function will bring you to an intermediate level of robot control. By setting up the Wi-Fi function, you can not only send commands to your robot through internet or local network, but also receive real time feedback and save it to your computer. In this chapter, we will go through a quick guide to help you set up the Wi-Fi function and use it as a remote controller for your Devastator.
Getting Started
Open your Arduino IDE, select the serial port attached for your Romeo for edison COM port ( varies on different computers ).
Your page should look something like this
Read the PDF(tutorial chapter5) for more details
Related Links
PDF Download (Tutorial of Devastator Tank Mobile Platform with Edison)
Library for Tank Mobile Platform with Edison
More Documents
 Get Devastator Robot Kit from DFRobot Store or DFRobot Distributor.