


TUTORIALS Robotics
 1.Key
1.Key
 Points

How To Play With MiniQ 2WD Complete Kit v2.0- Lesson 1(Get to Know your Robot)
DFRobot
Mar 14 2017 744
1. Key Points
You will learn:
*Recognizing every component of the car
*How to use Arduino IDE and finish some preparation work
Material needed:
*4x AA batteries
2.Introduction
First of all,congratulations on getting such a nice robot kit! This is an interesting and fully functional robot,at the same time, it also can help you learn Arduino well. Make it a light hunter, coffee transporter or obstacle avoiding robot and so on. Now, let’s have a look at our robot:
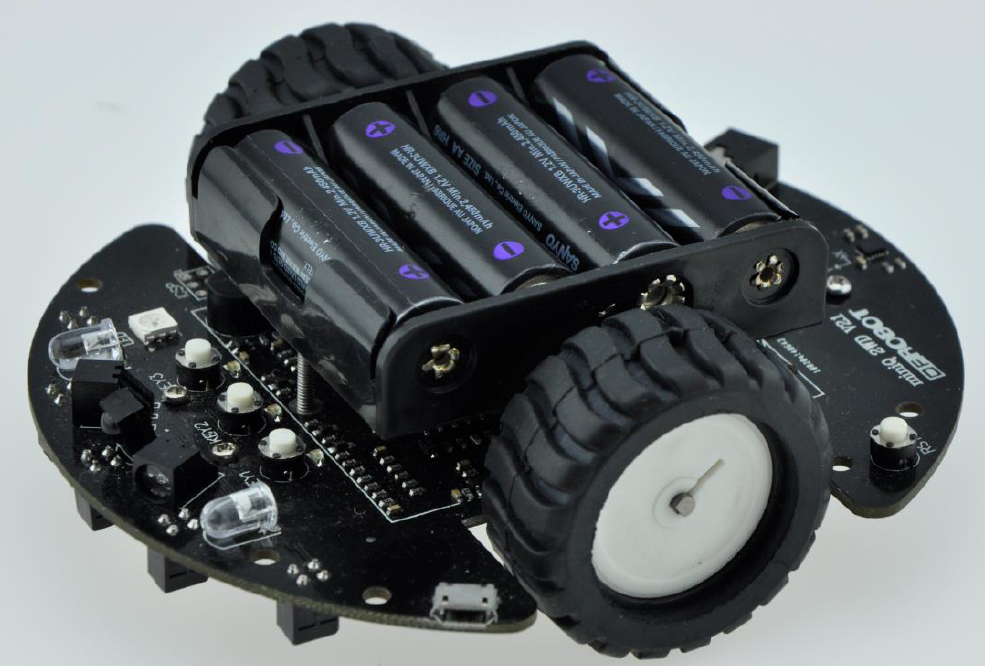
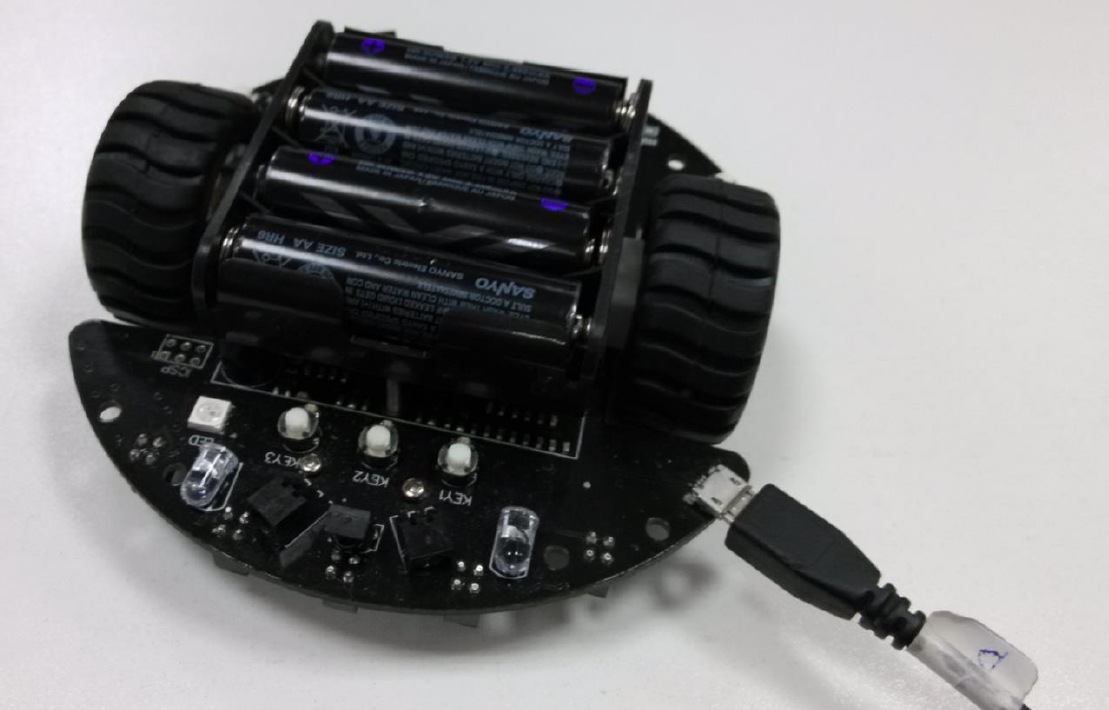
1) MiniQ v2.0
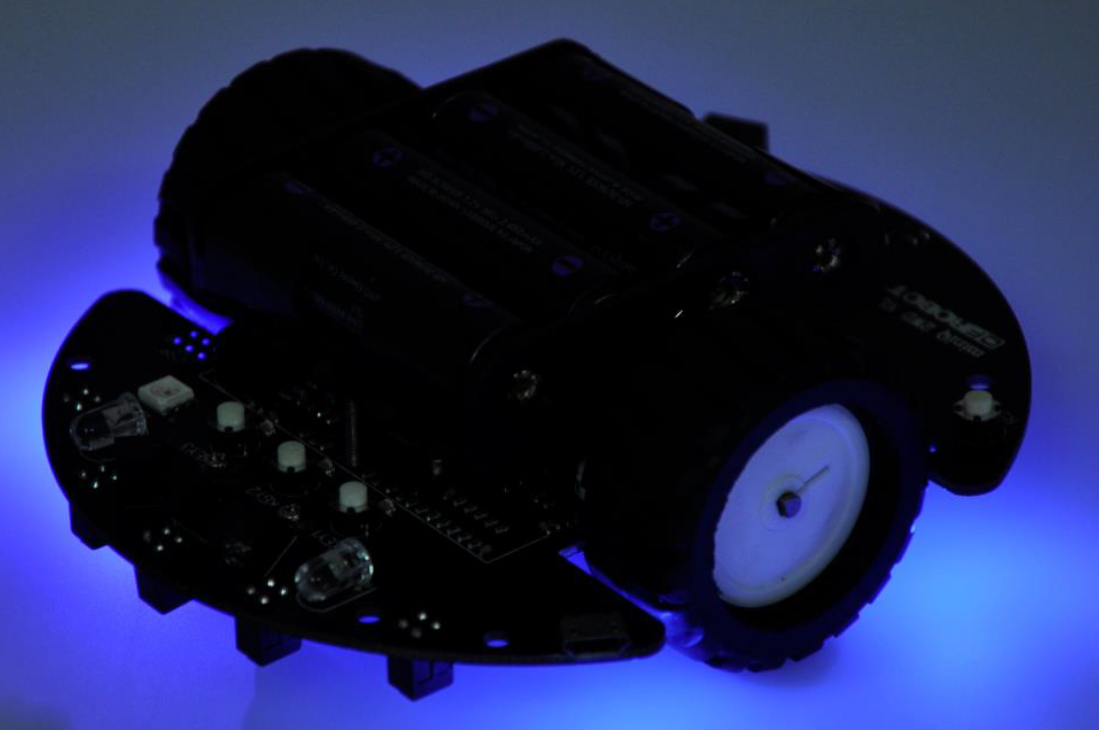
2) LEDs on the bottom of MiniQ V2.0 Components explained:
1.Key 3) Components and locations
4) front view
Function about every component:
1. Infrared transmitter:transmit the infrared signal, the signal can be used for detecting obstacles
2. Photosensitive diode:sensitive with the light, so it can help you get some information about the light
3. Infrared receiver:receive infrared signal, the signal can be used for obstacle avoidance
4. Button:can be programmed for your idea
5. RGB LED:you can change its color use your code, it can show as an alarm and other things you want
6. USB port:upload your code and let your robot talk to your computer
7. Buzzer(passive):be an alarm bell or sing a simple song
8. Controller:runs your code
9. Motor:can be controlled to run forward or backward, so that the car can turn left or right freely
10. Reset button;Reset the robot, the program in the robot will runs again from its initiation
11. Power switch:power switch of the robot
12. Gadgeteer port: 2.0C port, can be used to any 2.0C component
13. Power port:power provided from this port
14. Magnet sensor:can be used for direction measurement
15. Charge port: if your batteries can be charged, you can charge them from this port thus they can be hold in the car
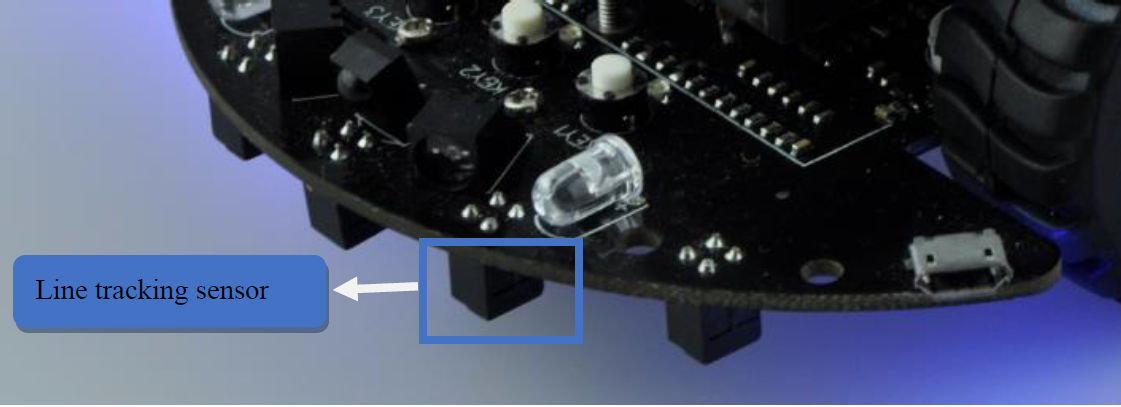
16. Infrared line-follow sensor: can be used for detecting for white or black lines
3. Uploading your first program
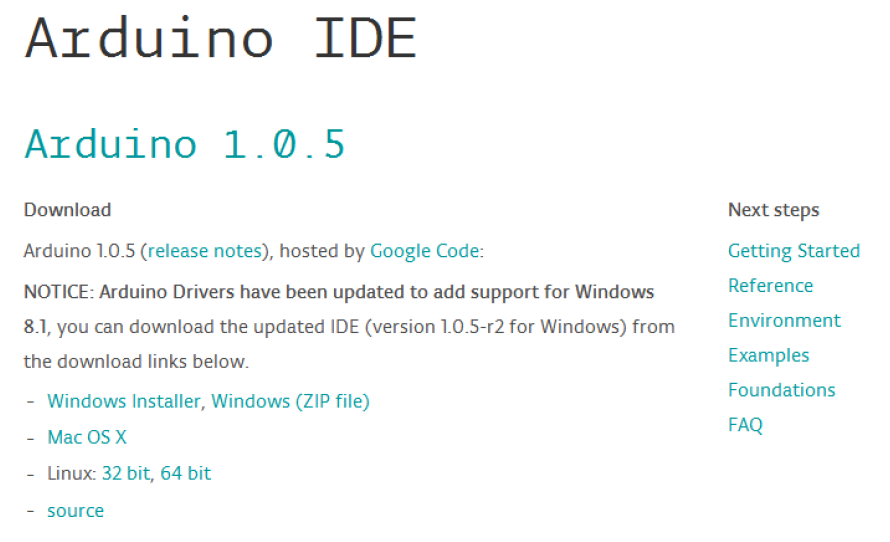
Program controls every step of your robot. So you must know how to upload your program into your robot. And firstly, you need to upload the software, this is the link: ArduinoIDE.
➢ Open the website: http://arduino.cc/en/Main/Software, you will see:
Points5) Upload page
➢ You should upload the right version to fit your system of your computer, take windows
for example: if you finish the upload and open the software, you will see:
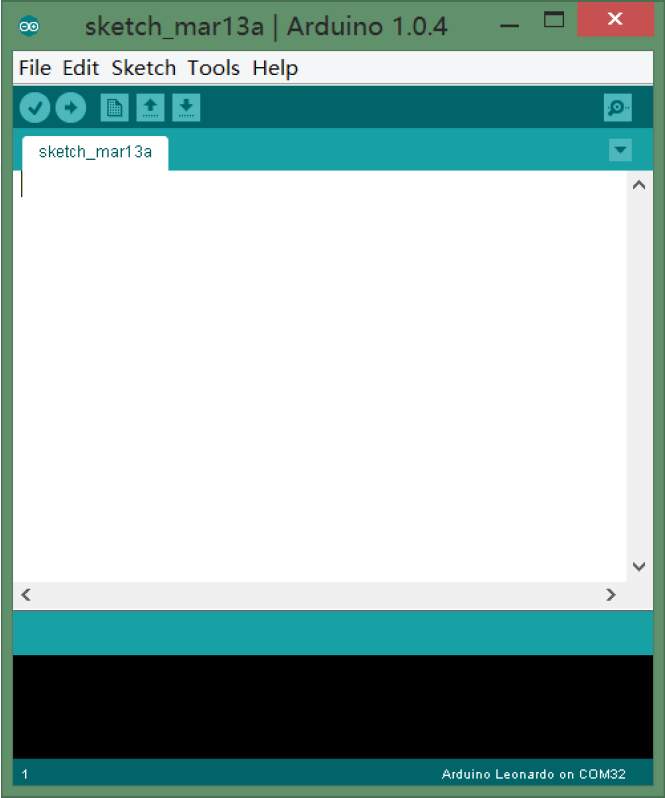
6) ArduinoIDE
➢ OK,connect miniQ to your computer,
7) Connecting the MiniQ
➢ Press the power button, you will see the leds on the bottom of the MiniQ light up, this indicates that the robot gets power successfully
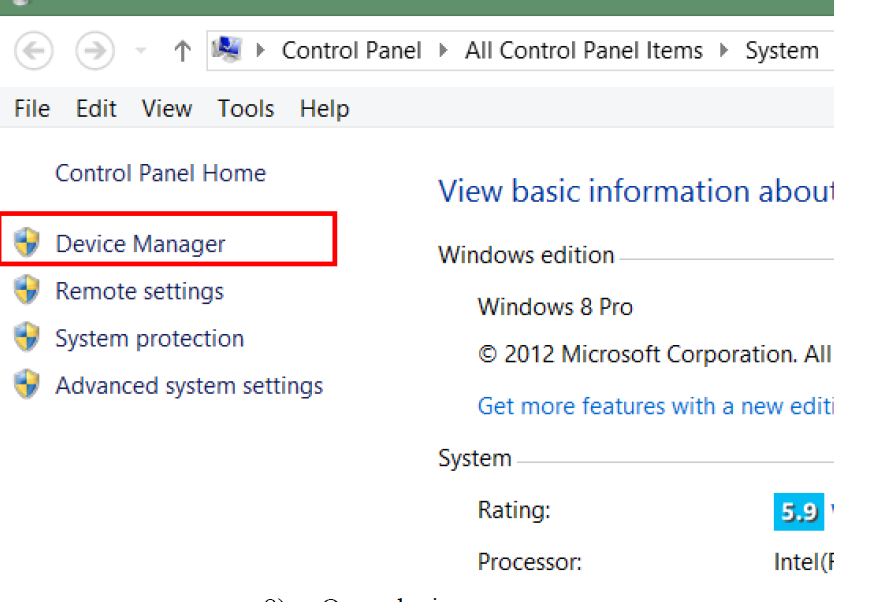
➢ Next step, install the driver. Open the device manager: Right click my Computer→Properties→Device Manger
8) Open device manager
You will see:
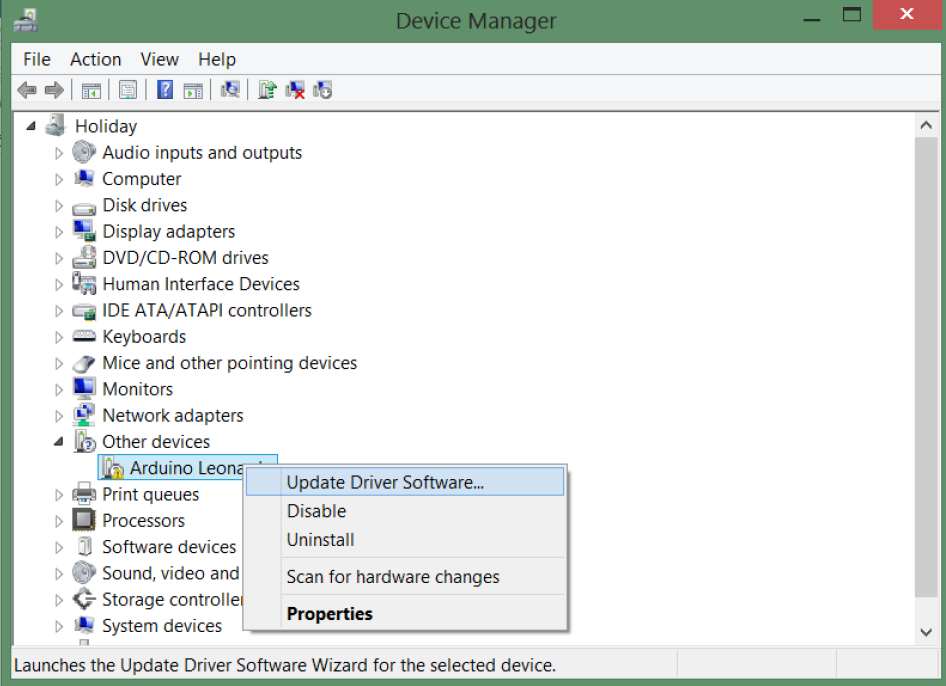
9) Unknow device
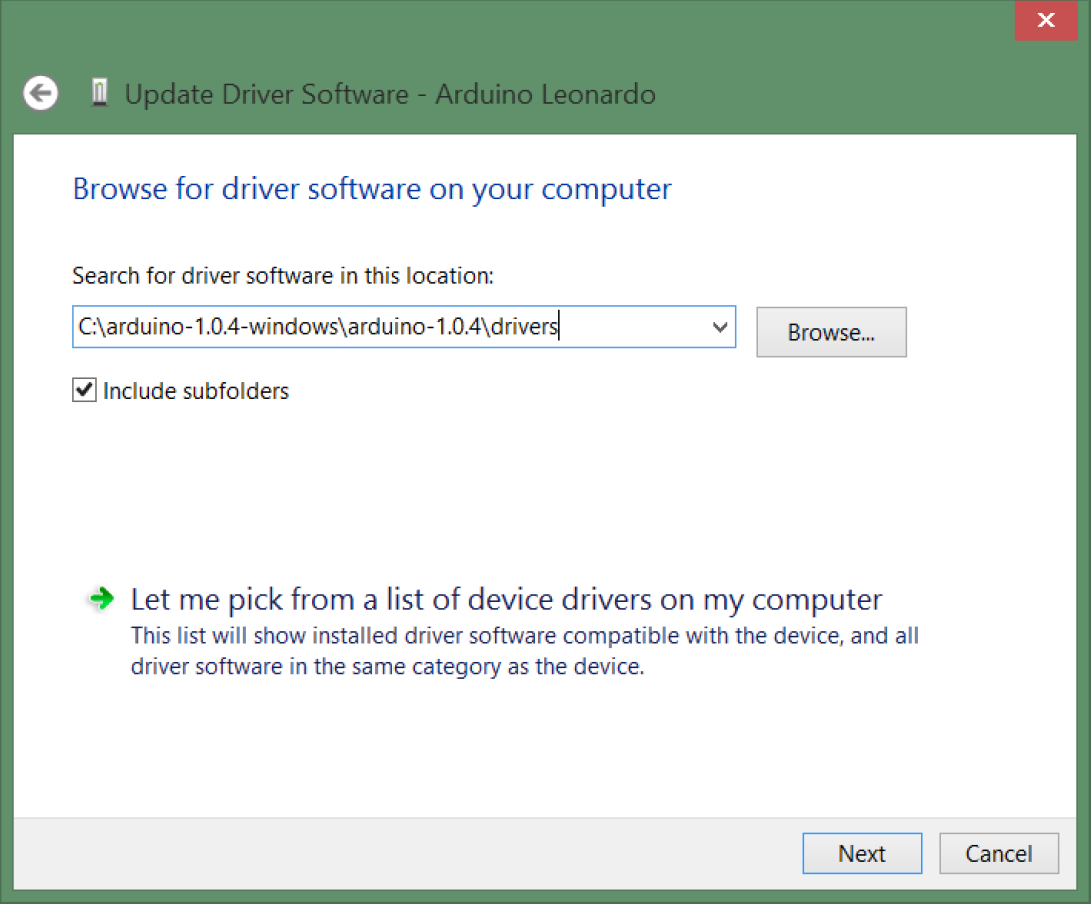
It shows we need to install its driver, you can install it by windows itself but it is faster do it yourself, right click Arduino Leonardo→Browse my computer for driver software→C:\arduino-1.0.4-windows\arduino-1.0.4\drivers→Next,you will finish the installing.
10) Install the driver
➢ After the action above, open the Arduino IDE, you will see:
11) Arduino Serial Port
Click “Tools”→“Board” to choose”Leonardo”, and “Tools”→”Serial Port” to choose the port.
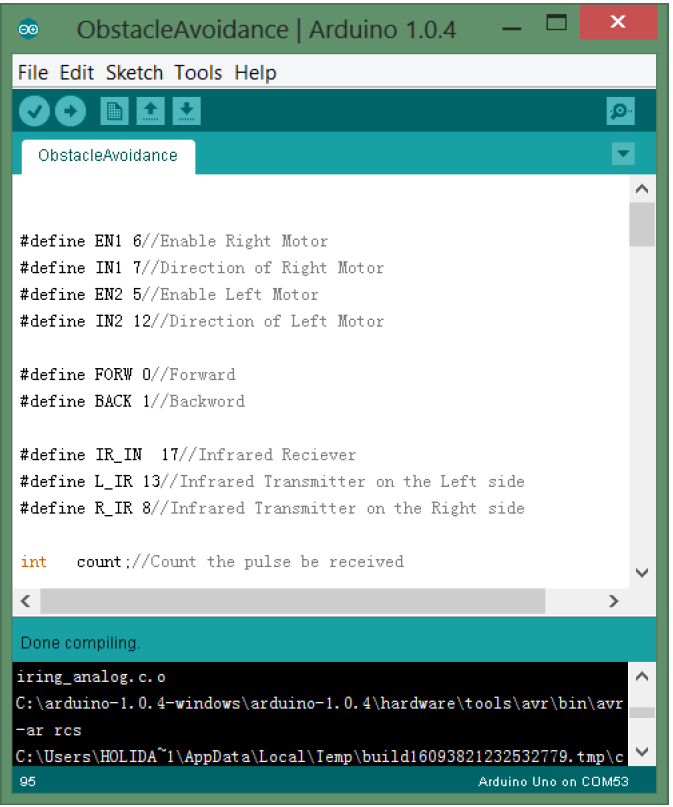
➢ Now,open the file“ObstacleAvoidance.ino”,
12) You need to open this folder
13) Program has bee opened
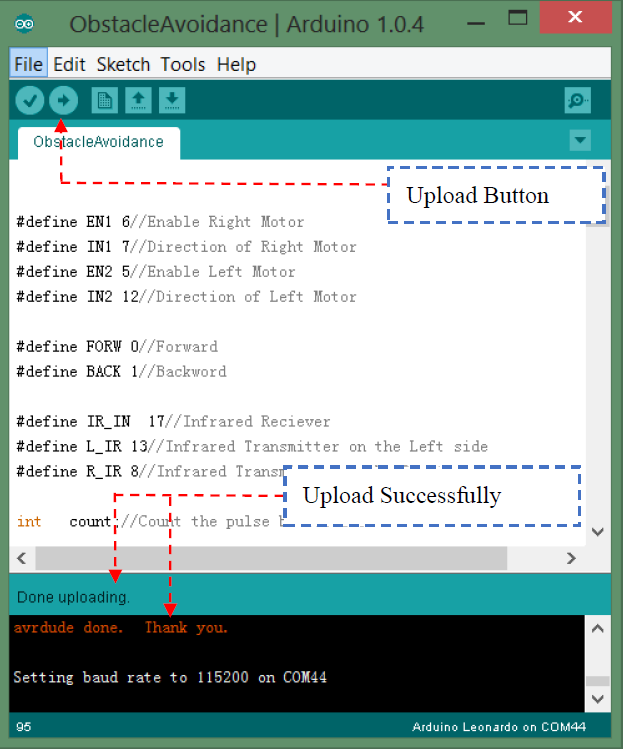
➢ Click the upload button and wait for the the message below.
14) Program upload
Well, take off the USB cable, put your robot on the ground and see what happens, it avoids the obstalce itself, doesn’t it?
4.Pin Map of Connecting
Line follow sensor:
A0--IR0 (No.1 count from the left)
A1--IR1 (No.2 count from the left)
A2--IR2 (in middle)
A3--IR3 (No.2 count from the right)
A4--IR4 (No.1 count from the right)
Photo resistance
A5--AD5
Motors
D5--PWM1 D12--EN1 left motor
D6--PWM2 D7--EN2 right motor
RGB LED
D10--WS2812
HMC5883(Compass)
D2--SDA
D3—SCL
Infrared obstacle avoidance:
Transmitter: IRL--D13 IRR--D8
Receiver:IRS--D17
Button:
D4--AD6
Encoder:
D0--INT2 Right Motor
D1--INT3 Left Motor
Buzzer
D16—MOSI—Buzzer
Next Tutorial: MiniQ 2WD Complete Robot Kit v2.0- Lesson 2(Make some Noise)
REVIEW
Related Product


Recent Blogs

Essential Compatibility Insights for Raspberry Pi 5: What You Need to Know Before Purchase
Discover how to fully harness the Raspberry Pi 5's capabilities, ensuring a smooth upgrade and maximizing your tech projects’ potential.
SELECTION GUIDE Raspberry Pi Apr 19 2024

How to Select SBC (Lattepanda/Raspberry Pi) for Local LLM (LLaMA, LLaMA2, Phi-2, Mixtral-MOE, etc.)
Discover why Lattepanda Sigma is well-suited for local large language model (LLM) operations. Explore its memory and storage capacities compared to other SBCs.
SELECTION GUIDE AI Mar 29 2024

Selection Guide of Linux Systems Compatible with RISC-V Architecture
This article will provide a detailed introduction to several versions of Linux systems, including Ubuntu, Debian, Fedora, OpenSuse, FreeBSD, and OpenBSD, and the compatibility with the RISC-V architecture.
SELECTION GUIDE Mar 27 2024

 Home
Home
 Category
 Shopping Cart
 Me
Me