


TUTORIALS micro:bit The objective of this microbit tutorial is to explain how to turn on, turn off and toggle the LEDs from the micro:bit LED matrix. We will be using the using JavaScript Blocks Editor for developing our code.
NOTE: This article is written by Nuno Santos who is an kindly Electronics and Computers Engineer. live in Lisbon, Portugal. you could check the original article here.
Related Blog Post:
Micro:bit board: an introduction
Mobile Doorbell System with BOSON and Micro:bit
micro:bit JavaScript Blocks Editor: Turning LEDs on and off
DFRobot
Nov 23 2017 756
The objective of this microbit tutorial is to explain how to turn on, turn off and toggle the LEDs from the micro:bit LED matrix. We will be using the using JavaScript Blocks Editor for developing our code.
Introduction
The objective of this post is to explain how to turn on, turn off and toggle the LEDs from the micro:bit LED matrix. We will be using the using JavaScript Blocks Editor for developing our code.
We are going to use a delay function inside some loops to turn on and off all the LEDs of the board, one at each time. Nonetheless, at the time of writing, the mentioned delay function doesn’t introduce the delay specified as input on the micro:bit simulation mode of JavaScript Blocks Editor.
Thus, the final code will only work correctly on the board. Nonetheless, the functions to control the LEDs work well on simulation, so we can use them individually to test.
The functions to use
As usual, we have very simple to use functions that allow us to control the LEDs of the micro:bit matrix, which are available on the led namespace.
To turn on a specific LED, we simply call the plot function of the led namespace and pass as input both the x and y coordinates from the LED we want to light. The x coordinate corresponds to the horizontal axis and is counted from left to right, and the y coordinate corresponds to the vertical axis and is counted from top to bottom [1]. Both the x and y coordinates range from 0 to 4 [1].
So, if for example we want to light the first LED we pass the coordinates (0,0) and for the last LED we pass (4,4).
led.plot(0, 0);
led.plot(4,4);
You can try this previous code on the simulation mode and confirm that both the first and the last LEDs of the matrix will be turned on, as shown in figure 1.
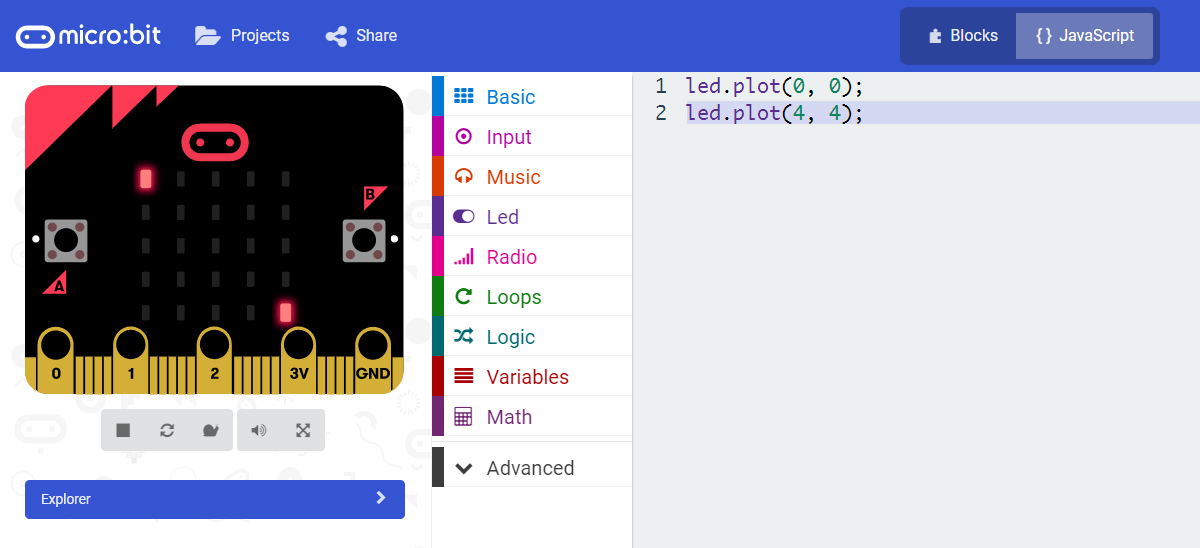
Figure 1 – Turn on LEDs on the micro:bit simulation.To turn off a specific LED, we simply need to call the unplot function from the led namespace, also passing as input the x and y coordinates of the LED. The coordinates system works the same way it does for the plot function.
So, to turn off the previously lighted LEDs, we can simply use the following commands and confirm the result on the simulation environment.
led.unplot(0, 0);
led.unplot(4,4);
You can check at figure 2 that the LEDs previously lighted are now off.
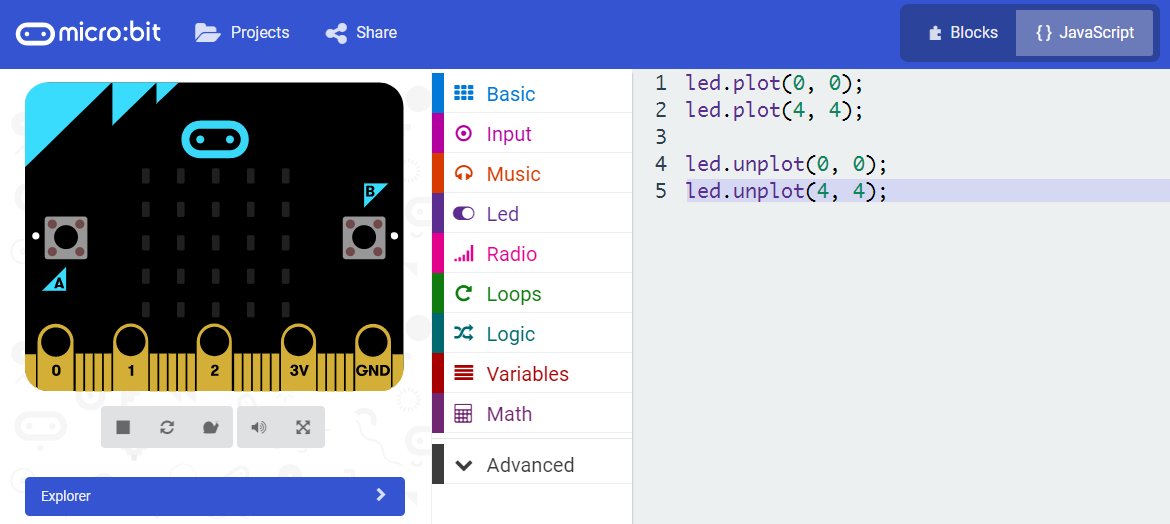
Figure 2 – Turn off LEDs on the micro:bit simulation.Finally, if we just want to toggle the current state of the LED, we can use the toggle function of the same namespace, passing as input the x and y coordinates of the LED, again using the same coordinates system.
led.toggle(2, 2);
You can check at figure 3 the toggled LED, which is now turned on.
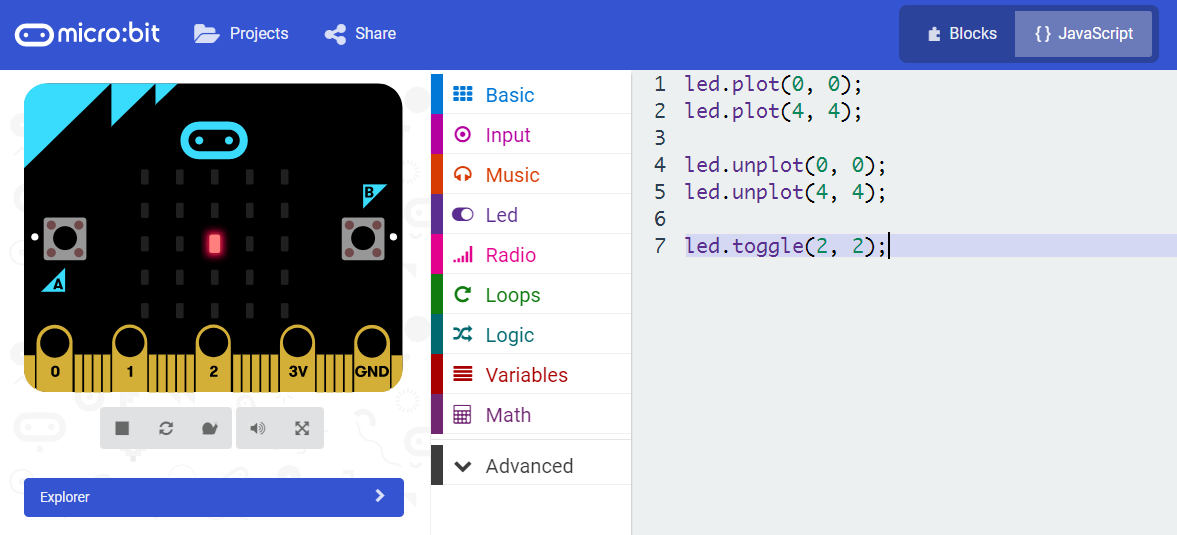
Figure 3 – Toggle LED on micro:bit simulation.
The code
Now that we have already introduced the basic functions for controlling the LEDs, we will create a simple program to turn on and off all the LEDs of the matrix, one at each time. First we will do it using the plot and unplot functions and then using the toggle function.
So, as said before, both x and y coordinates range from 0 to 4. Thus, we will perform the LED actions inside two loops ranging from 0 to 4. The outermost loop will iterate the x coordinate and the innermost loop will iterate the y coordinate.
Since all the 5 iterations of the innermost loop will execute before the outermost loop goes to the next iteration, then the LEDs of column 0 will light row by row, then the LEDs of column 1, and so on.
In order to introduce a small delay between each iteration, we will use the waitMicros function of the control namespace, which blocks the execution for the number of microseconds specified as input. In this example I will delay 2000000 microseconds, which corresponds to 2 seconds, but you can play with other values.
for (let x = 0; x < 5; x++) {
    for (let y = 0; y < 5; y++) {
        led.plot(x, y);
        control.waitMicros(2000000);
        led.unplot(x, y);
    }
}
Next we will achieve the same effect but using the toggle function. In this case, we call the toggle function at the beginning of the loop to turn on the LED and then call it again after the delay to turn off the same LED.
for (let x = 0; x < 5; x++) {
    for (let y = 0; y < 5; y++) {
        led.toggle(x, y);
        control.waitMicros(2000000);
        led.toggle(x, y);
    }
}
The final complete code can be seen below.
for (let x = 0; x < 5; x++) {
    for (let y = 0; y < 5; y++) {
        led.plot(x, y);
        control.waitMicros(2000000);
        led.unplot(x, y);
    }
}

for (let x = 0; x < 5; x++) {
    for (let y = 0; y < 5; y++) {
        led.toggle(x, y);
        control.waitMicros(2000000);
        led.toggle(x, y);
    }
}
Testing the code
To test the code, simply click the big download button at the bottom left corner of the JavaScript Code Blocks editor, just below the simulation interface.
Then drag the downloaded file and drop it on the micro:bit drive, which appears when you connect it to a computer. Remember that it appears as a USB drive but when we drop the code there it will be automatically uploaded to the board and run.
Upon finishing the procedure, you should see the LEDs light one by one in the previously mentioned order. Then, the procedure will then repeat for the toggling loop.
NOTE: This article is written by Nuno Santos who is an kindly Electronics and Computers Engineer. live in Lisbon, Portugal. you could check the original article here.
He had written many useful tutorials and projects about ESP32, ESP8266, microbit, If you are interested, you could check his blog to know more.
Related Blog Post:
Microbit Tutorials
Micro:bit board: an introduction
5 Easy Steps for you to Quick Start with BBC Microbit
Micro:bit JavaScript Blocks Editor: Hello World
Micro:bit JavaScript Blocks Editor: Turning LEDs on and off
Micro:bit JavaScript Blocks Editor: Detecting button click events
Micro:bit JavaScript Blocks Editor: String interpolation
Micro:bit: MicroPython support
Microbit Projects
Mobile Doorbell System with BOSON and Micro:bit
How To Make A Micro:bit Heart Rate Monitor
Microbit Project micro:bit Laser Target
Micro:bit Surprise box
Microbit Project: Micro:bit Selfie Remote
Micro:bit Project: Light(Mood Lamp)
Micro:bit Project: Yes/No Bear
Smart Fan Control System with Micro:bit
LED writing board (micro:bit compatible)
micro:bit car with DFRobot gamepad
OBLOQ-IoT Module +Micro:bit IoT Flower Watering
REVIEW
Recent Blogs

How to Select SBC (Lattepanda/Raspberry Pi) for Local LLM (LLaMA, LLaMA2, Phi-2, Mixtral-MOE, etc.)
Discover why Lattepanda Sigma is well-suited for local large language model (LLM) operations. Explore its memory and storage capacities compared to other SBCs.
SELECTION GUIDE AI Mar 29 2024

Selection Guide of Linux Systems Compatible with RISC-V Architecture
This article will provide a detailed introduction to several versions of Linux systems, including Ubuntu, Debian, Fedora, OpenSuse, FreeBSD, and OpenBSD, and the compatibility with the RISC-V architecture.
SELECTION GUIDE Mar 27 2024

SIM Series 4G Wireless Communication Modules Selection Guide
A detailed guide to understanding and selecting from DFRobot’s range of wireless communication modules. Perfect for IoT enthusiasts and developers.
SELECTION GUIDE Mar 22 2024

 Home
Home
 Category
 Shopping Cart
 Me
Me