Introduction
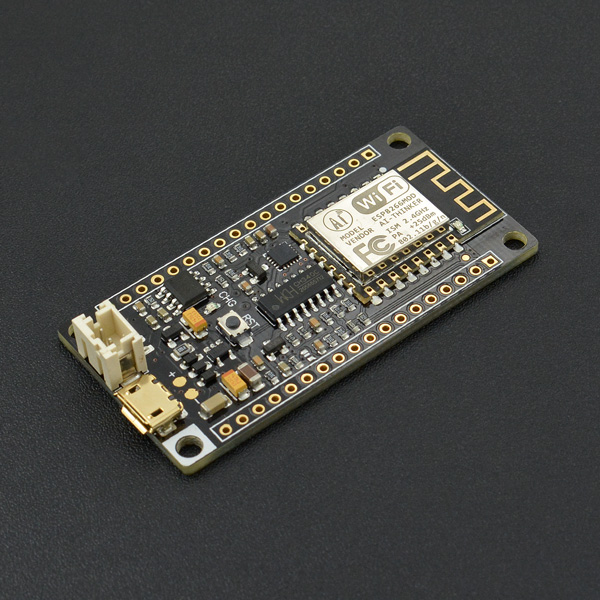
DFRobot FireBeetle is a series of low-power-consumption development hardware designed for Internet of Things (IoT). Firebeetle ESP8266 is a development board integrated with IoT WiFi, TCP/IP, 32-bit MCU, 10-bit ADC and multiple interfaces such as HSPI, UART, PWM, I2C and I2S. In DTIM10, the full power consumption to maintain WiFi connection reached to 1.2mW. Equipped with 16MB outer SPI flash memory, ESP8266 is available for programs and firmware storage. Compatible with Arduino programming enables Firebeetle ESP8266 to lower the barrier of programming. Operator can implement Arduino programming codes directly onto ESP8266 to reduce the difficulty of operating and increase the stability of board.
NOTE: There still remains some bugs to be detected and fixed by developers. In some cases some peripherals may not work perfectly by embedding Arduino sample codes in ESP8266. Much more functions implemented in Arduino are still under development and improvement. An alternative way is to change development tool such as RTOS and MicroPython towards a more operating-friendly experience in some conditions.
Specification
- Operating Voltage: 3.3V
- Input Voltage (limits): 3.3~5V (Lithium Battery:3.7V & USB:5V)
- Microcontroller: Tensilica L106 (32-bit MCU)
- Clock Speed: 80MHz (Maximum: 160MHz)
- SRAM:50KB
- External Flash Memory: 16MB
- DC Current in the Low-Power-Consumption: 46uA
- Average Operating Current: 80mA
- Maximum Discharging Current: 600mA (LDO-3.3 Output)
- Maximum Charging Current: 500mA
- Digital Pin x10
- Analog Pin x1
- SPI interface x1
- I2C interface x1
- IR interface x1
- I2S interface x1
- Interface: XH2.54mm Pin (No soldering default)
- In Combination of Wi-Fi MAC/ BB/RF/PA/LNA
- WiFi: IEEE802.11 b/g/n (2.4 GHz~2.5 GHz), not support 5GHz WiFi
- Operating Temperature: -10℃~+55℃
- Dimension: 58 × 29(mm)
- Weight: 24g
Board Overview
FireBeetle Board - ESP8266 is not only compatible with ESP8266 PinMap, but also make a special compatible with Arduino IDE PinMap. Dx (x=0,1,2,3...9)
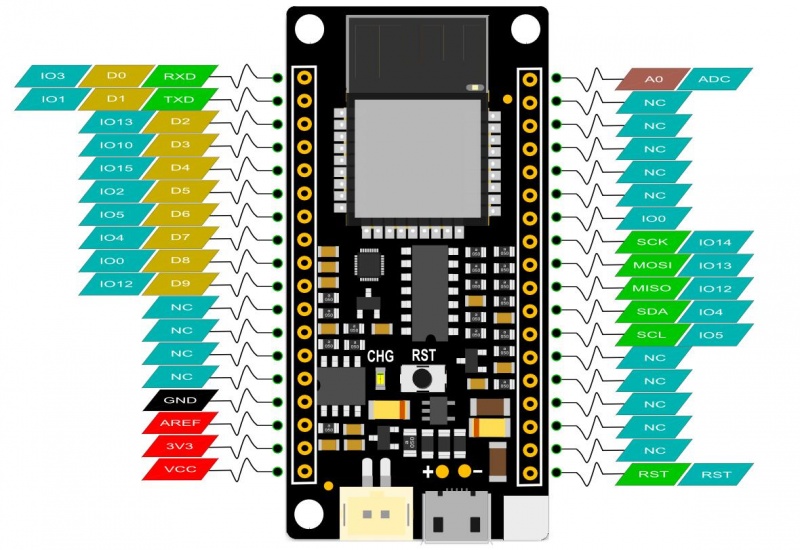
- CHG Blink = not connect battery; Light on = Charging; Light off = Charge complete
Tutorial
In this tutorial, we'll show you some basic operation with FireBeetle-ESP8266 Microcontroller.
Requirements
- Hardware
- FireBeetle ESP8266 IOT Microcontroller x 1
- Micro USB Cable x1
Software
Arduino IDE (newest), Click to Download Arduino IDE from Arduino®
Setup Arduino IDE Development Environment
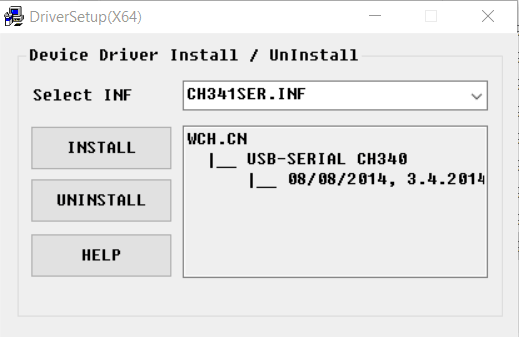
- Plug FireBeetle to your computer, install the driver manually.
- Add FireBeetle Board URL to Arduino IDE
- Open Arduino IDE, File->Preferences, find Additional Boards Manager URLs, copy the below link, and paste in the blank.
For domestic users: http://download.dfrobot.top/boards/package_DFRobot_index.json
For overseas users: https://raw.githubusercontent.com/DFRobot/FireBeetle-ESP8266/master/package_firebeetle8266_index.json
.png)
File->Preferences
.png)
paste url here
- Click OK
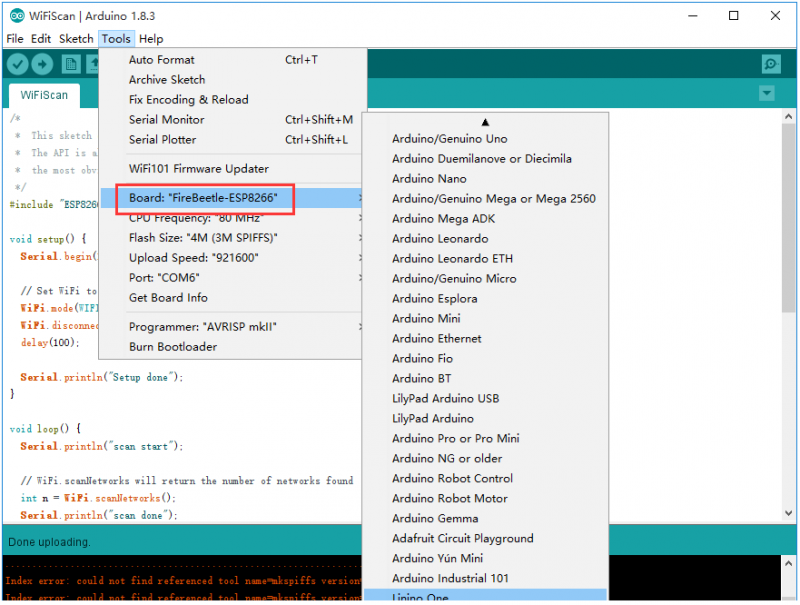
- Open Tools->Board->Boards Manager, waiting automatic update. You'll find FireBeetle-ESP8266
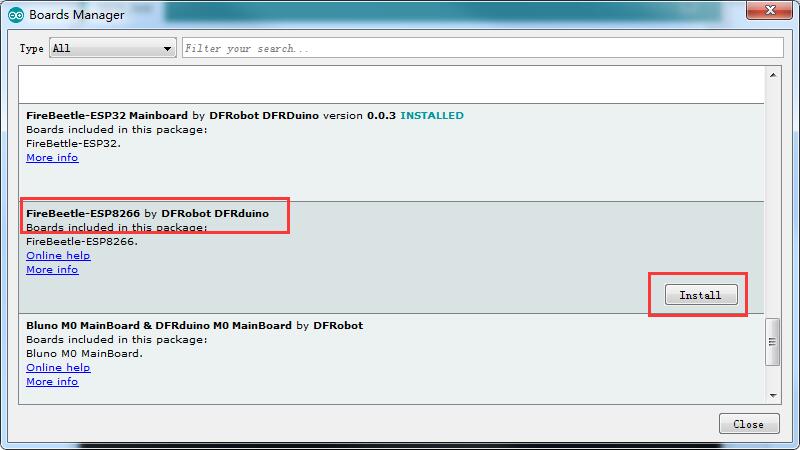
Now, the development environment has been installed, you can use it like a normal Arduino board.
Sample Code - Blink
The default LED for FireBeetle Board-ESP8266 is D5 (IO2), input following code:
// GPIO 2 (D5) has a LED_BLINK attached to it. Give it a name:
int LED_BLINK = 2;
// the setup function runs once when you press reset or power the board
void setup() {
  // initialize digital pin LED_BUILTIN as an output.
  pinMode(LED_BLINK, OUTPUT);
}

// the loop function runs over and over again forever
void loop() {
  digitalWrite(LED_BLINK, HIGH);   // turn the LED on (HIGH is the voltage level)
  delay(1000);                       // wait for a second
  digitalWrite(LED_BLINK, LOW);    // turn the LED off by making the voltage LOW
  delay(1000);                       // wait for a second
}
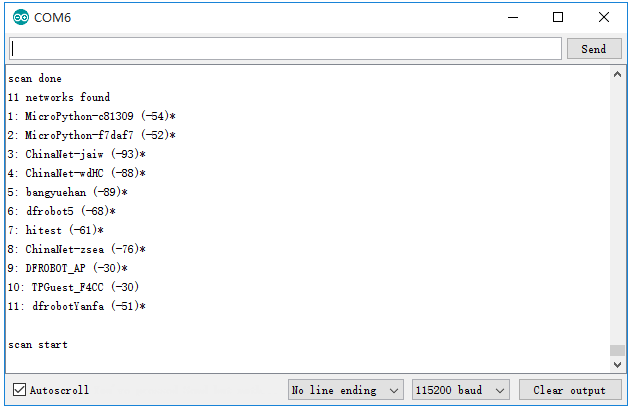
Sample Code - Scan WiFi
After you have installed the FireBeetle ESP8266 development environment, it will comes with a lot of sample code in Arduino IDE, you can find them in File > Examples. The follow sample code scans the around WiFi:
/*
 *  This sketch demonstrates how to scan WiFi networks.
 *  The API is almost the same as with the WiFi Shield library,
 *  the most obvious difference being the different file you need to include:
 */
#include "ESP8266WiFi.h"

void setup() {
  Serial.begin(115200);

  // Set WiFi to station mode and disconnect from an AP if it was previously connected
  WiFi.mode(WIFI_STA);
  WiFi.disconnect();
  delay(100);

  Serial.println("Setup done");
}

void loop() {
  Serial.println("scan start");

  // WiFi.scanNetworks will return the number of networks found
  int n = WiFi.scanNetworks();
  Serial.println("scan done");
  if (n == 0)
    Serial.println("no networks found");
  else
  {
    Serial.print(n);
    Serial.println(" networks found");
    for (int i = 0; i < n; ++i)
    {
      // Print SSID and RSSI for each network found
      Serial.print(i + 1);
      Serial.print(": ");
      Serial.print(WiFi.SSID(i));
      Serial.print(" (");
      Serial.print(WiFi.RSSI(i));
      Serial.print(")");
      Serial.println((WiFi.encryptionType(i) == ENC_TYPE_NONE)?" ":"*");
      delay(10);
    }
  }
  Serial.println("");

  // Wait a bit before scanning again
  delay(5000);
}
Open your Arduino IDE serial monitor:
FAQ
For any questions, advice or cool ideas to share, please visit the DFRobot Forum.
More Documents
 Get FireBeetle ESP8266 IOT Microcontroller from DFRobot Store or DFRobot Distributor.