Introduction
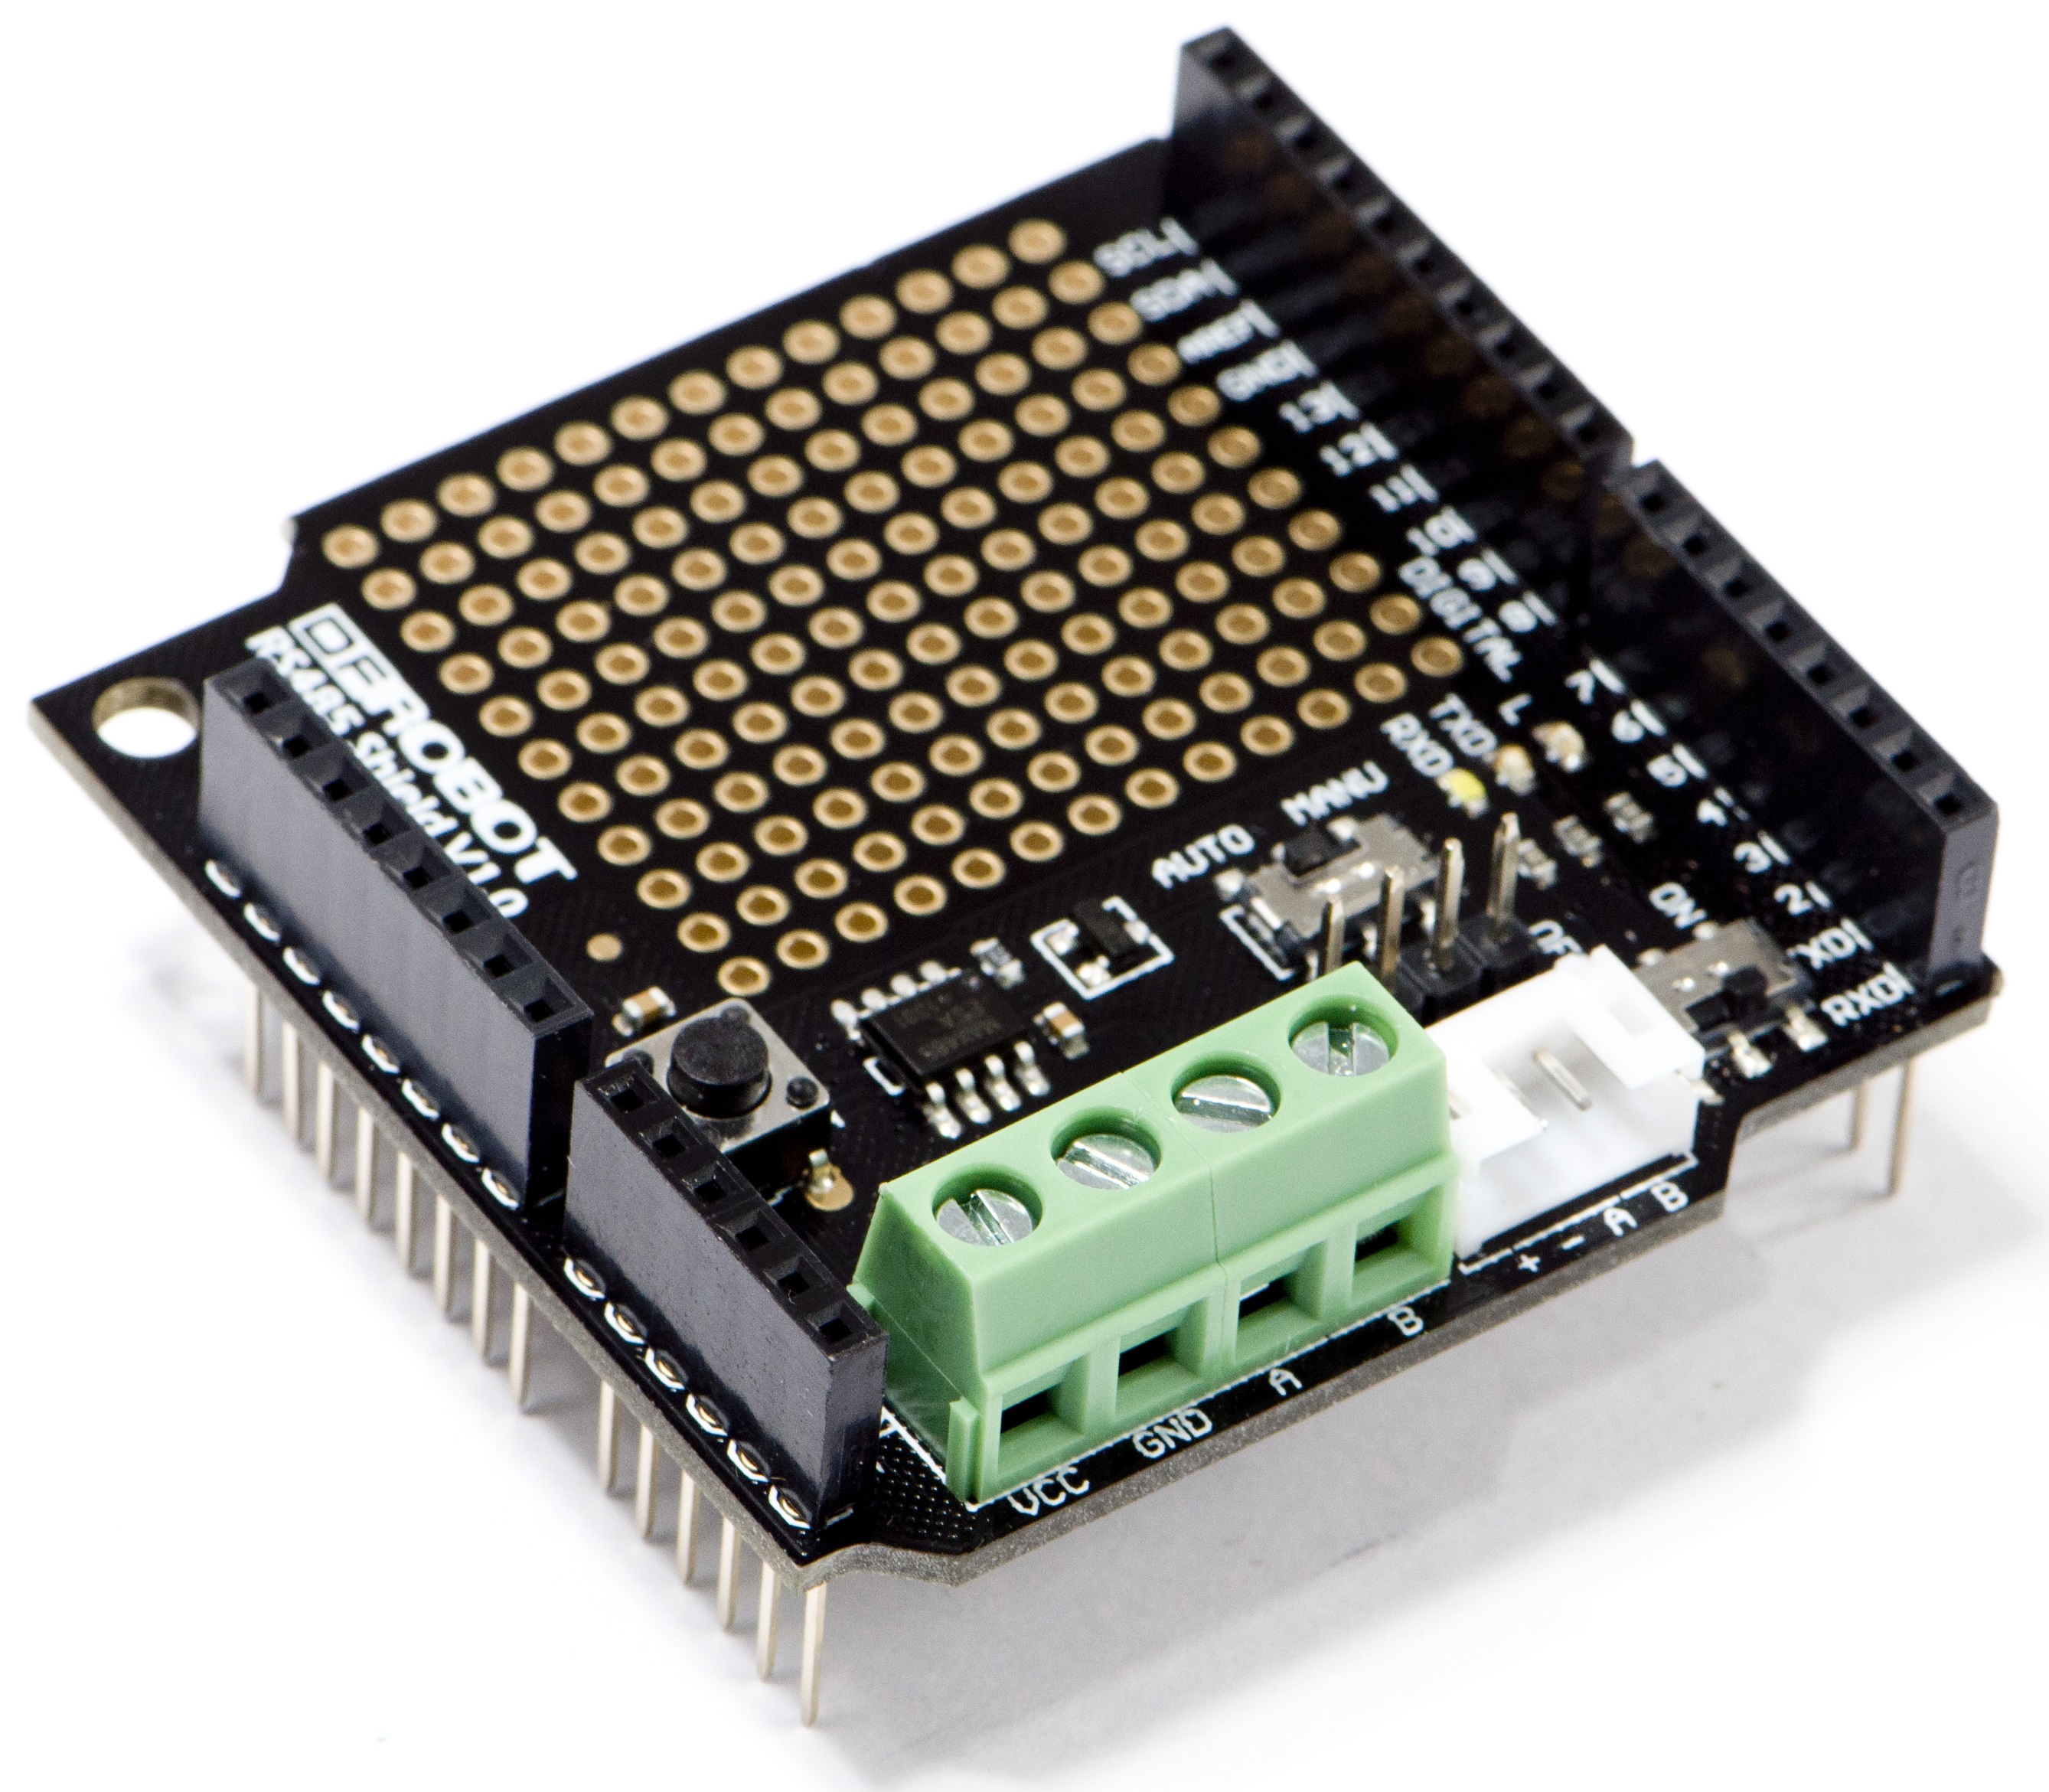
This is an Arduino RS485 shield, especially designed for the Arduino controller board. It can easily convert the UART to the RS485. This shield integrates a standard RS485 port ,a mini RS485 port(PH2.0 interface), RS485 headers, and provides the welding areas, so it's convenient for your DIY design.One key changes automatic and manual transmission mode, which expand the scope of application.
Specification
- Power module: +5.0V
- Module size: 55mmx53mm
- 16 digital IO port (including a I2C interface)
- 6 analog IO port and power
- Operation/programming mode switch
- Automatic/manual transceiver mode switch (When in manual transceiver mode, the enable end is the 2nd digital IO port)
- Transceiver indicating LED
- Standard RS485 interface, mini RS485 interface(PH2.0) and RS485 pins
- Weldable area
- Reset button
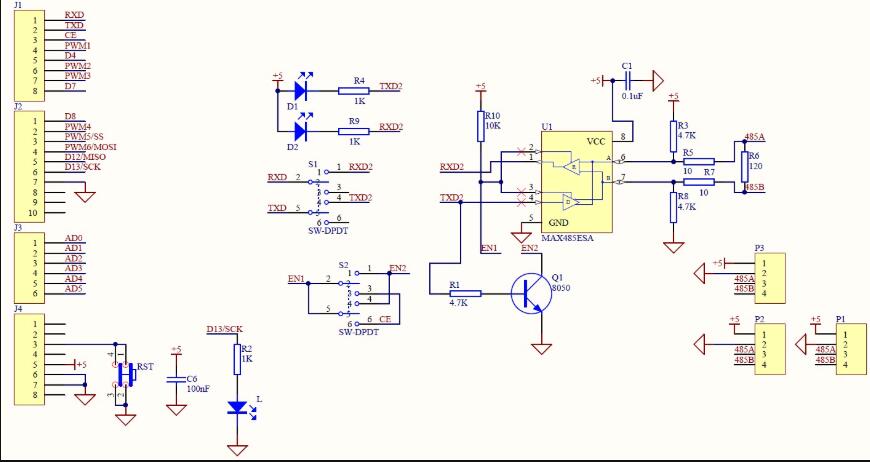
Pin Definition
") Operation and programming mode switch: To OFF, you can download the program for the Arduino controller. To ON , the shield will convert the UART to the RS485.
Transceiver mode switch: To AUTO, the shield is automatically sending and receiving data, so you do not care about operation timing; To MANU, the shield is in manual transceiver status, and the enable end is the 2nd digital IO port. Enabling high-side power Ping to sending state while the low level of the receiving state.
Operation and programming mode switch: To OFF, you can download the program for the Arduino controller. To ON , the shield will convert the UART to the RS485.
Transceiver mode switch: To AUTO, the shield is automatically sending and receiving data, so you do not care about operation timing; To MANU, the shield is in manual transceiver status, and the enable end is the 2nd digital IO port. Enabling high-side power Ping to sending state while the low level of the receiving state.
Simple Application
Use Setups
When the RS485 shield is installed on your Arduino controller, and then you will wire the RS485 shiled with USB-RS485 converter to connect terminals, namely: A pair of A, B on B, GND on GND, then download the following sample code (Note: Downloading code, run / program mode switch must hit the OFF position, otherwise it will lead to the download fails. When downloaded,it is complete to ON, and the shield to normal use). Open serial monitor of Arduino IDE, find USB-RS485 converter corresponding serial port, send characters "V", you can see the LED status may change, and reply "OK".

Sample Code
Automatic Transmission Mode
/*
# This sample codes is for testing the RS485 shiled(automatic transmission mode).
# Editor : YouYou
# Date   : 2013.9.16
# Ver    : 0.1
# Product: RS485 shield
# SKU    : DFR0259
*/
int led = 13;
void setup()
{
  Serial.begin(9600);
  pinMode(led,OUTPUT);
}
void loop()
{
  int temp;
  if(Serial.available())
  {
    temp=Serial.read();
     if(temp=='V'){
      digitalWrite(led,1-digitalRead(led));
    Serial.println("OK");
     }
  }
}
Manual Transmission Mode
/*
# This sample codes is for testing the RS485 shiled(manual transmission mode).
# EN=2;
# Editor : YouYou
# Date   : 2013.9.16
# Ver    : 0.1
# Product: RS485 shield
# SKU    : DFR0259
*/
int led = 13;
int EN = 2;  //Definition RS485 shield enable terminal (the 2nd digital IO ports),
//high for the sending state, the low level of receiving state
void setup()
{
  Serial.begin(9600);
  pinMode(led,OUTPUT);
  pinMode(EN,OUTPUT);
}
void loop()
{
  int temp;
  digitalWrite(EN,LOW);    //Enable low, RS485 shield waiting to receive data
  if(Serial.available())
  {
    temp=Serial.read();
     if(temp=='V')
     {
      digitalWrite(led,1-digitalRead(led));
      digitalWrite(EN,HIGH);    //Enable high, RS485 shield waiting to transmit data
      Serial.println("OK");
      delay(10);    //Delay for some time, waiting for data transmitted
     }
  }
}
Document
Related Products
URM04 v2.0 Ultrasonic Sensor(SKU: SEN0002) URM04 v2.0 USB to RS422/RS485 Cable(SKU: FIT0272)
 Go Shopping RS485 Shield (SKU: DFR0259)
Category: Home > Arduino >Arduino Shields