Introduction
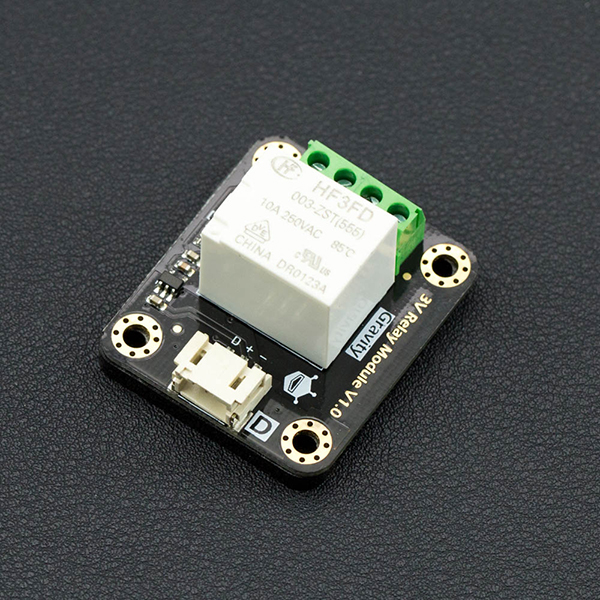
Introducing the Gravity Digital Relay Module – the latest addition to DFRobot’s Gravity series! This module is a little different to the other relays in our store - not only is it compatible with 5V Arduino boards, but also with Raspberry Pi, BBB (BeagleBoard Black), mbed, Intel Joule, Arduino 101 and other 3.3V devices. It is specially designed for low-voltage devices and works well under 3.3V power supplies, just like the Raspberry Pi relay board. In addition, the module has a wide range of power inputs. In our tests, once it reaches 2.8~5.5V, it can also support 1.8V devices. DFRobot’s Digital Relay Module uses a high quality 3V relay. It can handle up to 10A current and mechanical parts are guaranteed up to 100 million uses. An on-board indicator LED demonstrates the relay’s state. Terminals include normally open (NO) and normally closed (NC). The module uses a Gravity-3 pin interface, which requires no soldering for convenient plug and play usage.
| Children under 8 years old do not use this module. Please do not put it on the conductive object when in normal use. Need to check the circuit before power on, in order to prevent short circuit. Do not use this module in a system involving personal safety. |
|---|
Specification
- Operating Voltage: 2.8V ~ 5.5V
- Input Signal: High Level (≥2.8V); Low Level (≤0.5V)
- Max Switching Current: 10A
- Max Switching Voltage: 35VAC; 30VDC
- Rating Load: 10A@35VAC; 10A@28VDC
- Max Switching Power: 300W
- Operate Time: ≤10ms
- Release Time: ≤5ms
- Dimension: 38*33*20 mm /1.5*1.3*0.81 inches
- Mechanical Life: 1 million times
- Electrical Life: 50 thousand times
- Weight: 20 g
Board Overview
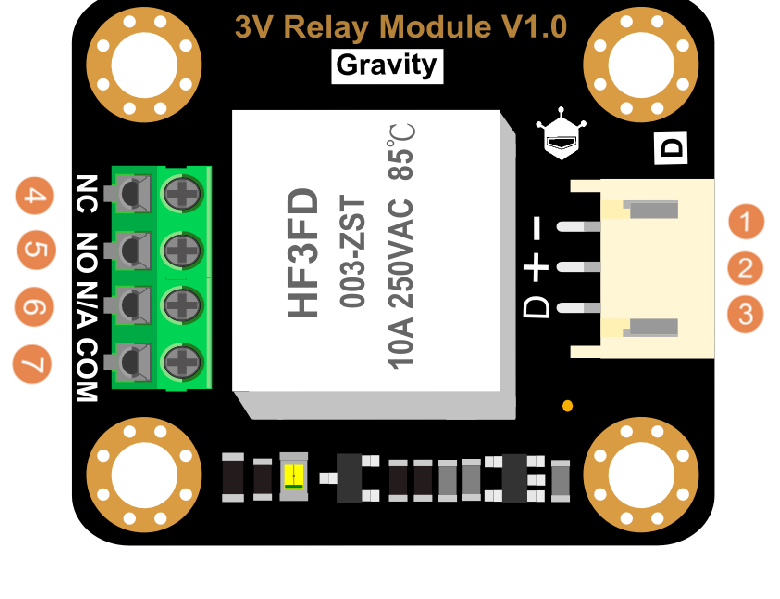
| Num | Label | Description |
|---|---|---|
| 1 | - | GND |
| 2 | + | VCC |
| 3 | D | Control signal |
| 4 | NC | Normally Closed |
| 5 | NO | Normally Open |
| 6 | N/A | Empty Terminal |
| 7 | COM | Common port |
Tutorial
Requirements
Hardware
- DFRduino UNO (or similar) x 1
- Digital Relay Module x1
- 1.5V AA battery (or other power supply) x2
- LED lights (or other electrical equipment)
- Jumper wires
Software
- Arduino IDE, Click to Download Arduino IDE from Arduino®
Connection Diagram

Sample Code
/***************************************************
 Digital Relay Module  (Arduino & Raspberry Pi compatible)
 <https://www.dfrobot.com/wiki/index.php/Gravity:_Digital_Relay_Module_(Arduino_&_Raspberry_Pi_Compatible)_SKU:_DFR0473#Connection_Diagram>

***************************************************/
/***************************************************
 This example shows how to use 3V Relay Module(DFR0473).
 Created 2016-12-20
 By Free Li <Free.Li@dfrobot.com>

 GNU Lesser General Public License.
 See <http://www.gnu.org/licenses/> for details.
 All above must be included in any redistribution
****************************************************/
/***********Notice and Trouble shooting***************
1.Be ware of electric shock and burn out the circuit board.
2.The input voltage of this module is 2.8 ~ 5.5V.
****************************************************/


const int RelayPin = 2;

void setup() {
  pinMode(RelayPin, OUTPUT);
}
void loop() {
  digitalWrite(RelayPin, HIGH);   //Turn on relay
  delay(1000);
  digitalWrite(RelayPin, LOW);   //Turn off relay
   delay(1000);
}
Expected Results
- The LED will change it's state every seconds,and you will hear a loud of pop at the same time.
- When the module gets HIGH signal, NO terminal is connected with the COM port, and the LED is ON.
- When the module gets LOW signal,. NO terminal is disconnected from the COM port, and the LED is OFF.
Relay Principle
When the relay works, the electromagnetic switches off, which makes the circuit closed. When the electromagnet is powered off, the electromagnet loses magnetism, and the circuit is switched off. Therefore, the relay is used to control the operation of the circuit breaker switch.
The advantage of using relay control circuit is to control high voltage with low voltage input.

As shown below, this is a schematic diagram of the water level alarm. when the water level reaches the metal block A, the circuit will be bright red light, otherwise the circuit will be a green light.

FAQ
| Q1. Working principle: |
|---|
| A. In brief, a relay is an electronic switch, which can use a small voltage to control high voltage or high current. |
| For any questions, advice or cool ideas to share, please visit the DFRobot Forum. |
|---|
More
 Get Gravity: Digital Relay Module (Arduino & Raspberry Pi Compatible) from DFRobot Store or DFRobot Distributor.