Introduction
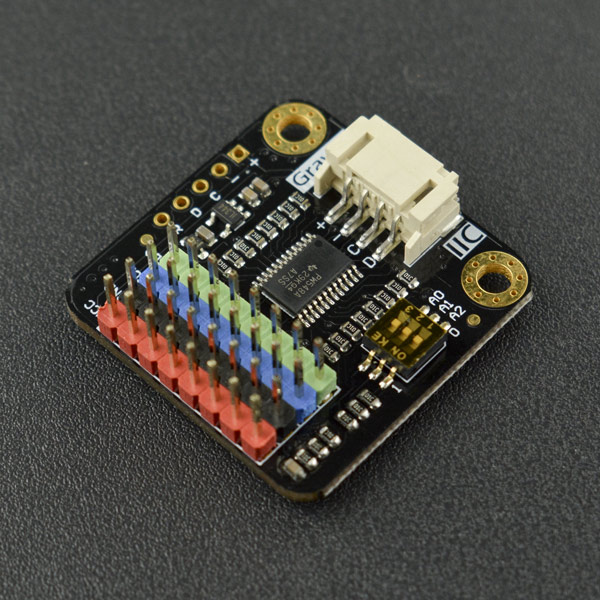
On the same I2C port, DFRobot Gravity: I2C Multiplexer solves the address conflict and enables the normal communication with multiple same-address I2C devices.
You just found the sensor you needed, and you want to wire up two or more to the I2C port of your mainboard, but later you realized that they have the fixed I2C address! That is, you can not use them on the same I2C port! Are you out of luck? Now don’t worry! DFRobot Gravity: I2C Multiplexer can easily solve the address conflict on the same I2C port.
This I2C multiplexer is easy to use, plug and plug and no need to weld. 1 multiplexer has 8 I2C ports, this means you can hook up 8 same-address devices at the same I2C port by 1 multiplexer. The default I2C address of the multiplexer is 0x70, and you can adjust from 0x70 to 0x77. In theory, you could hook up 8 multiplexers on address 0x70~0x77, to control 64 same-address devices. So powerful!
Specification
- Operating Voltage: 3.3~5.0V
- Connector Type: PH2.0-4P
- Interface Level: high 3.3V, low 0V
- Interface Protocol: I2C(IIC)
- I2C Clock Rate: 100K, 400K
- I2C Port Quantity: 8
- Default I2C Address: 0x70 (dial switches all to 0)
- I2C Address Range: 0x70~0x77
- Dimension: 32*32mm / 1.26*1.26in
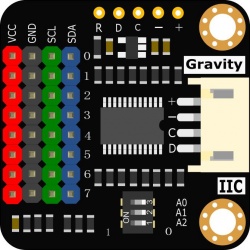
Board Overview
| Num | Label | Description |
|---|---|---|
| + | VCC | Power VCC(3.3~5V) |
| - | GND | Power GND(0V) |
| C | SCL | I2C Clock Line - SCL |
| D | SDA | I2C Data Line - SDA |
| R | RESET | RESET PIN, Active Low |
Dial Switch Description: As shown in the picture above, the dial switchs are all turned to the right(marked with '0') by default, at this time, A2,A1,A0 are all low level, so the default address of the multiplexer is 0x70. If the dial switchs are all turned to the left(marked with ‘1’), then A2,A1,A0 are all high level, and the address is 0x77. You can adjust the dial switchs as needed to set the address. You can set it from 0x70 to 0x77.
Tutorial
This tutorial uses two OLED displays as an example to demonstrate how to use this I2C multiplexer. The OLED display used in this example has the fixed I2C address, so these two OLED displays cannot be directly hooked up to the same I2C port. However, through this I2C multiplexer's transfer, these two OLED displays can be normally used on the same I2C port at the same time.
Requirements
Hardware
- DFRduino UNO R3 (or similar) x 1
- Gravity: I2C Multiplexer x 1
- Gravity I2C OLED-2864 Display (or similar) x2
- Gravity 4pin UART/I2c Cable (or several DuPont Cables) x3
Software
- Arduino IDE (Version requirements: V1.0.x or V1.8.x), Click to Download Arduino IDE from Arduino®
- Library:DFRobot_I2C_Multiplexer Library
Connection Diagram

Sample Code
Please down the DFRobot_I2C_Multiplexer Library,DFRobot_SSD1306 Library,DFRobot_Display Library and install it. How to install Libraries in Arduino IDE
 /*!
  * file Multi_SSD1306.ino
  *
  * Download Display library https://github.com/DFRobot/DFRobot_Display.git
  * Download SSD1306 library https://github.com/DFRobot/DFRobot_SSD1306.git
  *
  * Connect the 2 SSD1306 devices to the port 0 and  port 1 on the i2cmultiplexer respectively and then connect the I2cmultiplexer and Arduino, download this sample.
  * @n The address of I2C and the name of SSD1306 display module can be seen
  *
  * Copyright   [DFRobot](https://www.dfrobot.com), 2016
  * Copyright   GNU Lesser General Public License
  *
  * version  V0.1
  * date  2018-5-10
  */
#include "DFRobot_SSD1306_I2C.h"
#include "DFRobot_I2CMultiplexer.h"
#include "DFRobot_Character.h"
#include "DFRobot_GT30L.h"
#include <Wire.h>
#include <SPI.h>

/*Create an OLED object, the address is 0x3c*/
DFRobot_SSD1306_I2C OLED(0x3c);

/*Create an I2C Multiplexer object, the address of I2C Multiplexer is 0X70*/
DFRobot_I2CMultiplexer I2CMulti(0x70);


void setup(void){
  /*Let the OLED on port 0 display characters*/
  I2CMulti.selectPort(0);       //Select port
  OLED.begin();                 //initialize OLED
  OLED.setTextColor(1);
  OLED.setTextSize(2);

  OLED.setCursor(0,0);          // Set the corrdianate of characters
  OLED.print("device A");       //Display characters
  OLED.setCursor(0,30);
  OLED.print("addr:0x3C");

  /*Let OLED on  port 1 display  characters */
  I2CMulti.selectPort(1);
  OLED.begin();
  OLED.setTextColor(1);
  OLED.setTextSize(2);

  OLED.setCursor(0,0);
  OLED.print("device B");
  OLED.setCursor(0,30);
  OLED.print("addr:0x3C");
}

void loop(void){
}
Expected Results
As shown in the picture below, although these two OLED displays have the same I2C addresses, they work normally after this I2C multiplexer's transfer. 
Software Framework
Through the above example, we have already understood how to use this I2C multiplexer's hardware and software library. Now we summarize further, and get the following software framework. This will help you better understand the software library and apply it to your project.
#include "DFRobot_I2CMultiplexer.h"
#include <Wire.h>

/*Create an I2C Multiplexer object, the default address of I2C Multiplexer is 0X70*/
DFRobot_I2CMultiplexer I2CMulti(0x70);

void setup(void)
{
  I2CMulti.selectPort(0);       //Select Port 0
  ...                           //Initialize the I2C Device on Port 0

  I2CMulti.selectPort(1);      //Select Port 1
  ...                          //Initialize the I2C Device on Port 1

   .
   .
   .

  I2CMulti.selectPort(8);      //Select Port 8
  ...                          //Initialize the I2C Device on Port 8
}

void loop(void)
{
  I2CMulti.selectPort(0);       //Select Port 0
  ...                           //Communicate with the I2C Device on Port 0

  I2CMulti.selectPort(1);      //Select Port 1
  ...                          //Communicate with the I2C Device on Port 1

   .
   .
   .

  I2CMulti.selectPort(8);      //Select Port 8
  ...                          //Communicate with the I2C Device on Port 8
}
FAQ
For any questions, advice or cool ideas to share, please visit the DFRobot Forum. If you have any questions about using this product, please check the FAQ list for that product for a corresponding solution.
More Documents
 Get Gravity: Digital 1-to-8 I2C Multiplexer from DFRobot Store or DFRobot Distributor.