Last Call! We pause shipping on Feb 14th. Order NOW to get your gear shipped before the holiday!
TUTORIALS ESP32ESP8266 The objective of this ESP32 / ESP8266 Arduino Tutorial is to explain how to define structures on the Arduino core. This was tested both on the ESP32 and on the ESP8266. The tests on the ESP32 were performed using a DFRobot’s ESP32 module device integrated in a ESP32 development board. The tests on the ESP8266 were performed on a DFRobot’s ESP8266 development board.
ESP32 / ESP8266 Arduino Tutorial: Using structs
DFRobot
Apr 20 2018 264867
The objective of this ESP32 / ESP8266 Arduino Tutorial is to explain how to define structures on the Arduino core. This was tested both on the ESP32 and on the ESP8266. The tests on the ESP32 were performed using a DFRobot’s ESP32 module device integrated in a ESP32 development board. The tests on the ESP8266 were performed on a DFRobot’s ESP8266 development board.
Introduction
The objective of this post is to explain how to define structures on the Arduino core. This was tested both on the ESP32 and on the ESP8266. Nonetheless, structs are a feature of the C/C++ languages, so this should work on any other microcontroller we can program using the Arduino environment.
Structures are used defined data types that can combine data members of different types. They are very useful to model concepts in a single data type, making it much easier to work with them.
For example, we can use a structure to model a sensor, which may have an ID, a type and a value. Instead of having three distinct variables representing a sensor, we can have it modeled in a single variable of a custom structure we define.
The syntax for defining a structure is the following:
struct [struct name] {
member_type1 member_name1;
...

member_typeN  member_nameN;
};
Note that optionally we can declare variables right after the structure definition. To do it, after closing the brackets and before the semicolon, we simply need to specify the variable names, separated by commas if there are more than one.
To declare variables of the structure type we define, we use the following notation:
struct struct_type_name variable_name;
Then we can access the data members of the struct using the dot operator. We can access them either to read their value or to assign it.
The tests on the ESP32 were performed using a DFRobot’s ESP32 module integrated in a ESP32 development board. The tests on the ESP8266 were performed on a DFRobot’s ESP8266 development board.
The code
The code for this tutorial will be very simple. We will create a structure to model an IoT sensor and then work with its fields.
So the first thing we do is defining our structure, using the notation mentioned in the introductory section. We will have a numeric device id, a type and a value. The two first members will be integers and the third a float.
struct sensor {
  int deviceId;
  int measurementType;
  float value;
};
Moving on to the Arduino setup function, we start by opening a serial connection, to output the testing results of our program.
Serial.begin(115200);
Next we will declare a variable of our previously defined data type.
struct sensor mySensor;
Then we will set the values of each data member, using the dot operator to access them. We will assign some arbitrary values just for testing purposes.
mySensor.deviceId = 944;
mySensor.measurementType = 1;
mySensor.value = 20.4;
Now that we have assigned values to each member of the structure, we will print their values to the serial port. We access them the same way, using the dot operator.
Serial.println(mySensor.deviceId);
Serial.println(mySensor.measurementType);
Serial.println(mySensor.value);
The final source code for this tutorial is shown below.
struct sensor {
  int deviceId;
  int measurementType;
  float value;
};

void setup() {
  Serial.begin(115200);

  struct sensor mySensor;

  mySensor.deviceId = 944;
  mySensor.measurementType = 1;
  mySensor.value = 20.4;

  Serial.println(mySensor.deviceId);
  Serial.println(mySensor.measurementType);
  Serial.println(mySensor.value);

}

void loop() {}
Testing the code
To test the code, we simply need to compile it and upload it using the Arduino IDE.
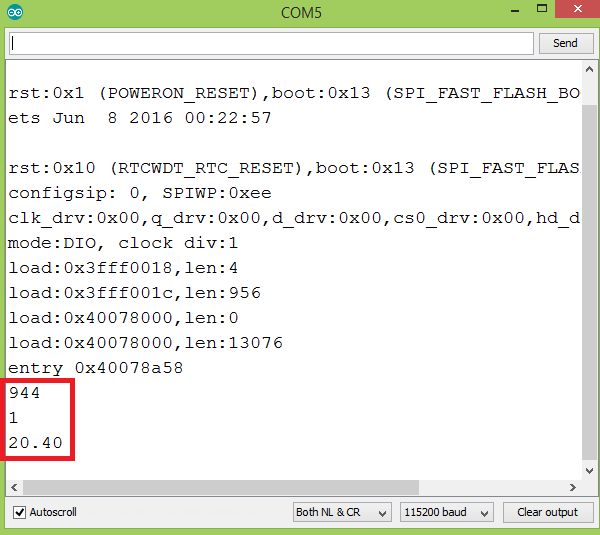
Once the procedure finishes, open the serial monitor of the Arduino IDE. You should get an output similar to figure 1, which shows the values assigned to the members of our structure.


