New: seeMote Cube for visionOS Developers - Build physical input for Apple Vision Pro apps. Learn More ›
micro:bit MicroPython Tutorial 3: Turning on and off the LEDs of the matrix
In this tutorial we will learn how to turn on and off specific LEDs from the micro:bit‘s LED matrix, using MicroPython, including controlling their brightness. If you are looking for a similar tutorial using the JavaScript Blocks Editor, please check here.
The LED matrix is composed by 25 LEDs. Using the MicroPython API, we will be able to control the state of each LED individually. We can specify not only if it is On or Off, but also the brightness.
The code
We will start by importing the display module, which we will use to access the functionality to change the state of the LEDs from the micro:bit’s LED matrix.
from microbit import display
Now, in order to set the state of a given LED, we simply need to call the set_pixel method from the display module.
This method receives as first argument the x coordinate and as second the y coordinate of the LED in the matrix, counting from the top left. Note that both coordinates are zero based, which mean that x and y can vary between 0 and 4.
As third argument, the set_pixel method receives a value between 0 and 9 [1], which indicates the brightness of the LED. The value 0 will correspond to turning the LED Off and the value 9 to turn in On with maximum brightness. Any other intermediate values will set the LED to a different brightness.
So, we will start by turning On the first and last LEDs of the matrix, with maximum brightness.
display.set_pixel(0,0,9) display.set_pixel(4,4,9)
You can check the expected result at figure 1.
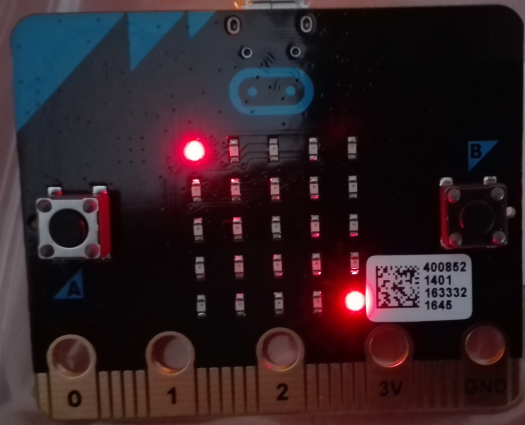
Figure 1 – Turning On the two LEDs of the LED matrix at full brightness.
Now we are going to turn these LEDs Off again by setting their brightness to 0.
display.set_pixel(0,0,0) display.set_pixel(4,4,0)
Finally, we will test the intermediate values for the brightness of the LEDs by iterating by all the possible values with a small one second delay between each iteration of the loop.
To do it, we will use a for in loop between the values 0 and 9 (note that second argument of the range function in the code below corresponds to the stopping number, which is not included in the generated list of numbers [2], which is why we use the value 10 in the code).
In each iteration, we will use the current value as the brightness of the LED. We will use the LED in the center of the matrix for this test (coordinates x and y equal to 2).
At the end of each iteration we will use the sleep function to pause the execution during a pre-defined amount of milliseconds, which we pass as input of the function. We will use the value 1000 in order to wait for a second between each iteration.
for i in range(0,10): display.set_pixel(2,2,i) sleep(1000)
Once you run this last piece of code, the LED in the middle of the matrix should turn on and increase its brightness gradually.

Compare six 4K USB cameras using IMX415, IMX274, and IMX678 sensors across resolution, color, field of view, distortion, Linux, and low-light tests.
REVIEWS
This article is an engineering test note, mainly intended to demonstrate the actual performance of the module in common development scenarios, rather than a laboratory calibration report.
REVIEWS
Visit DFRobot at FAB26 Boston for hands-on AI workshops, open-source hardware demos, and practical insights into K–12 maker education.
NEWS