REVIEWS ArduinoGravity Capacitive Soil Moisture Sensor
Software apps and online services
First, we should know about the basic idea about both the sensors.
Major Issue Faced using Resistive soil moisture sensor
Is there any way to prevent corrosion?
So how to overcome this disadvantage?
Capacitive measuring has some advantages, It not only avoids corrosion of the probe but also gives a better reading of the moisture content of the soil as opposed to resistance measuring
Now let's build it and see the difference
Assembling the hardware
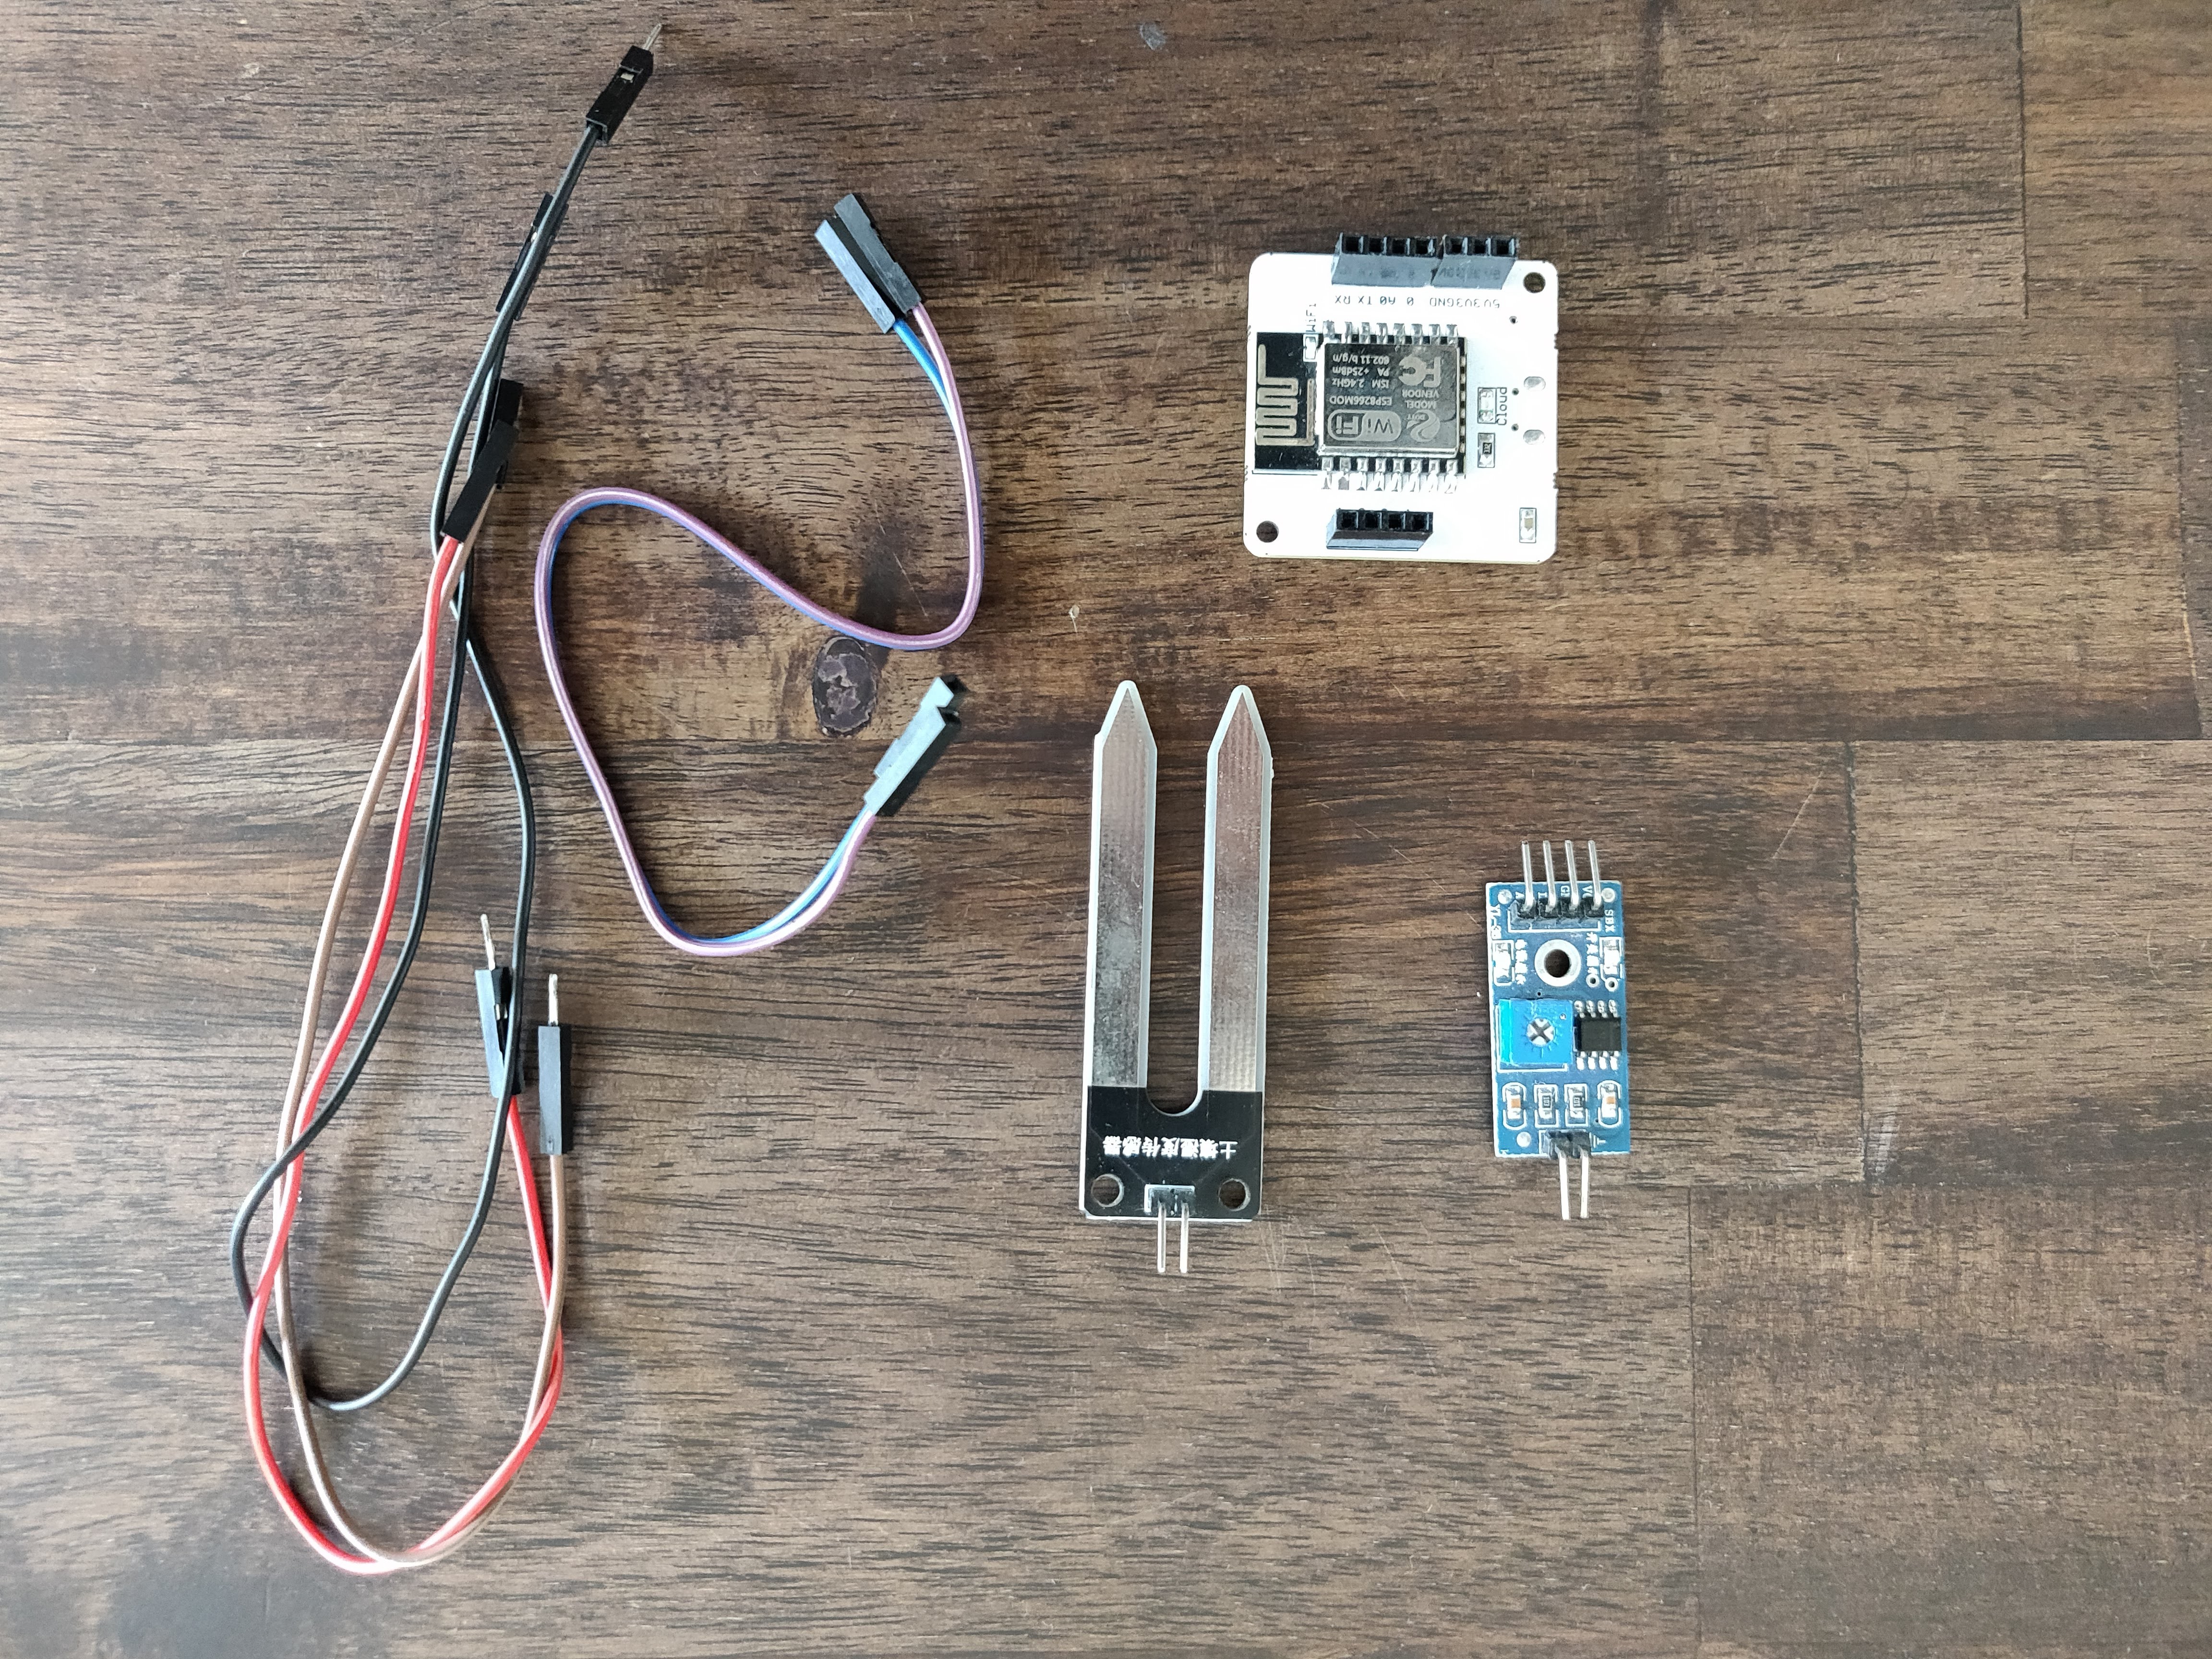
1. Connect the soil sensor circuit with the wire cable included with the sensor.
Connecting Bolt to the cloud
Plotting the graph
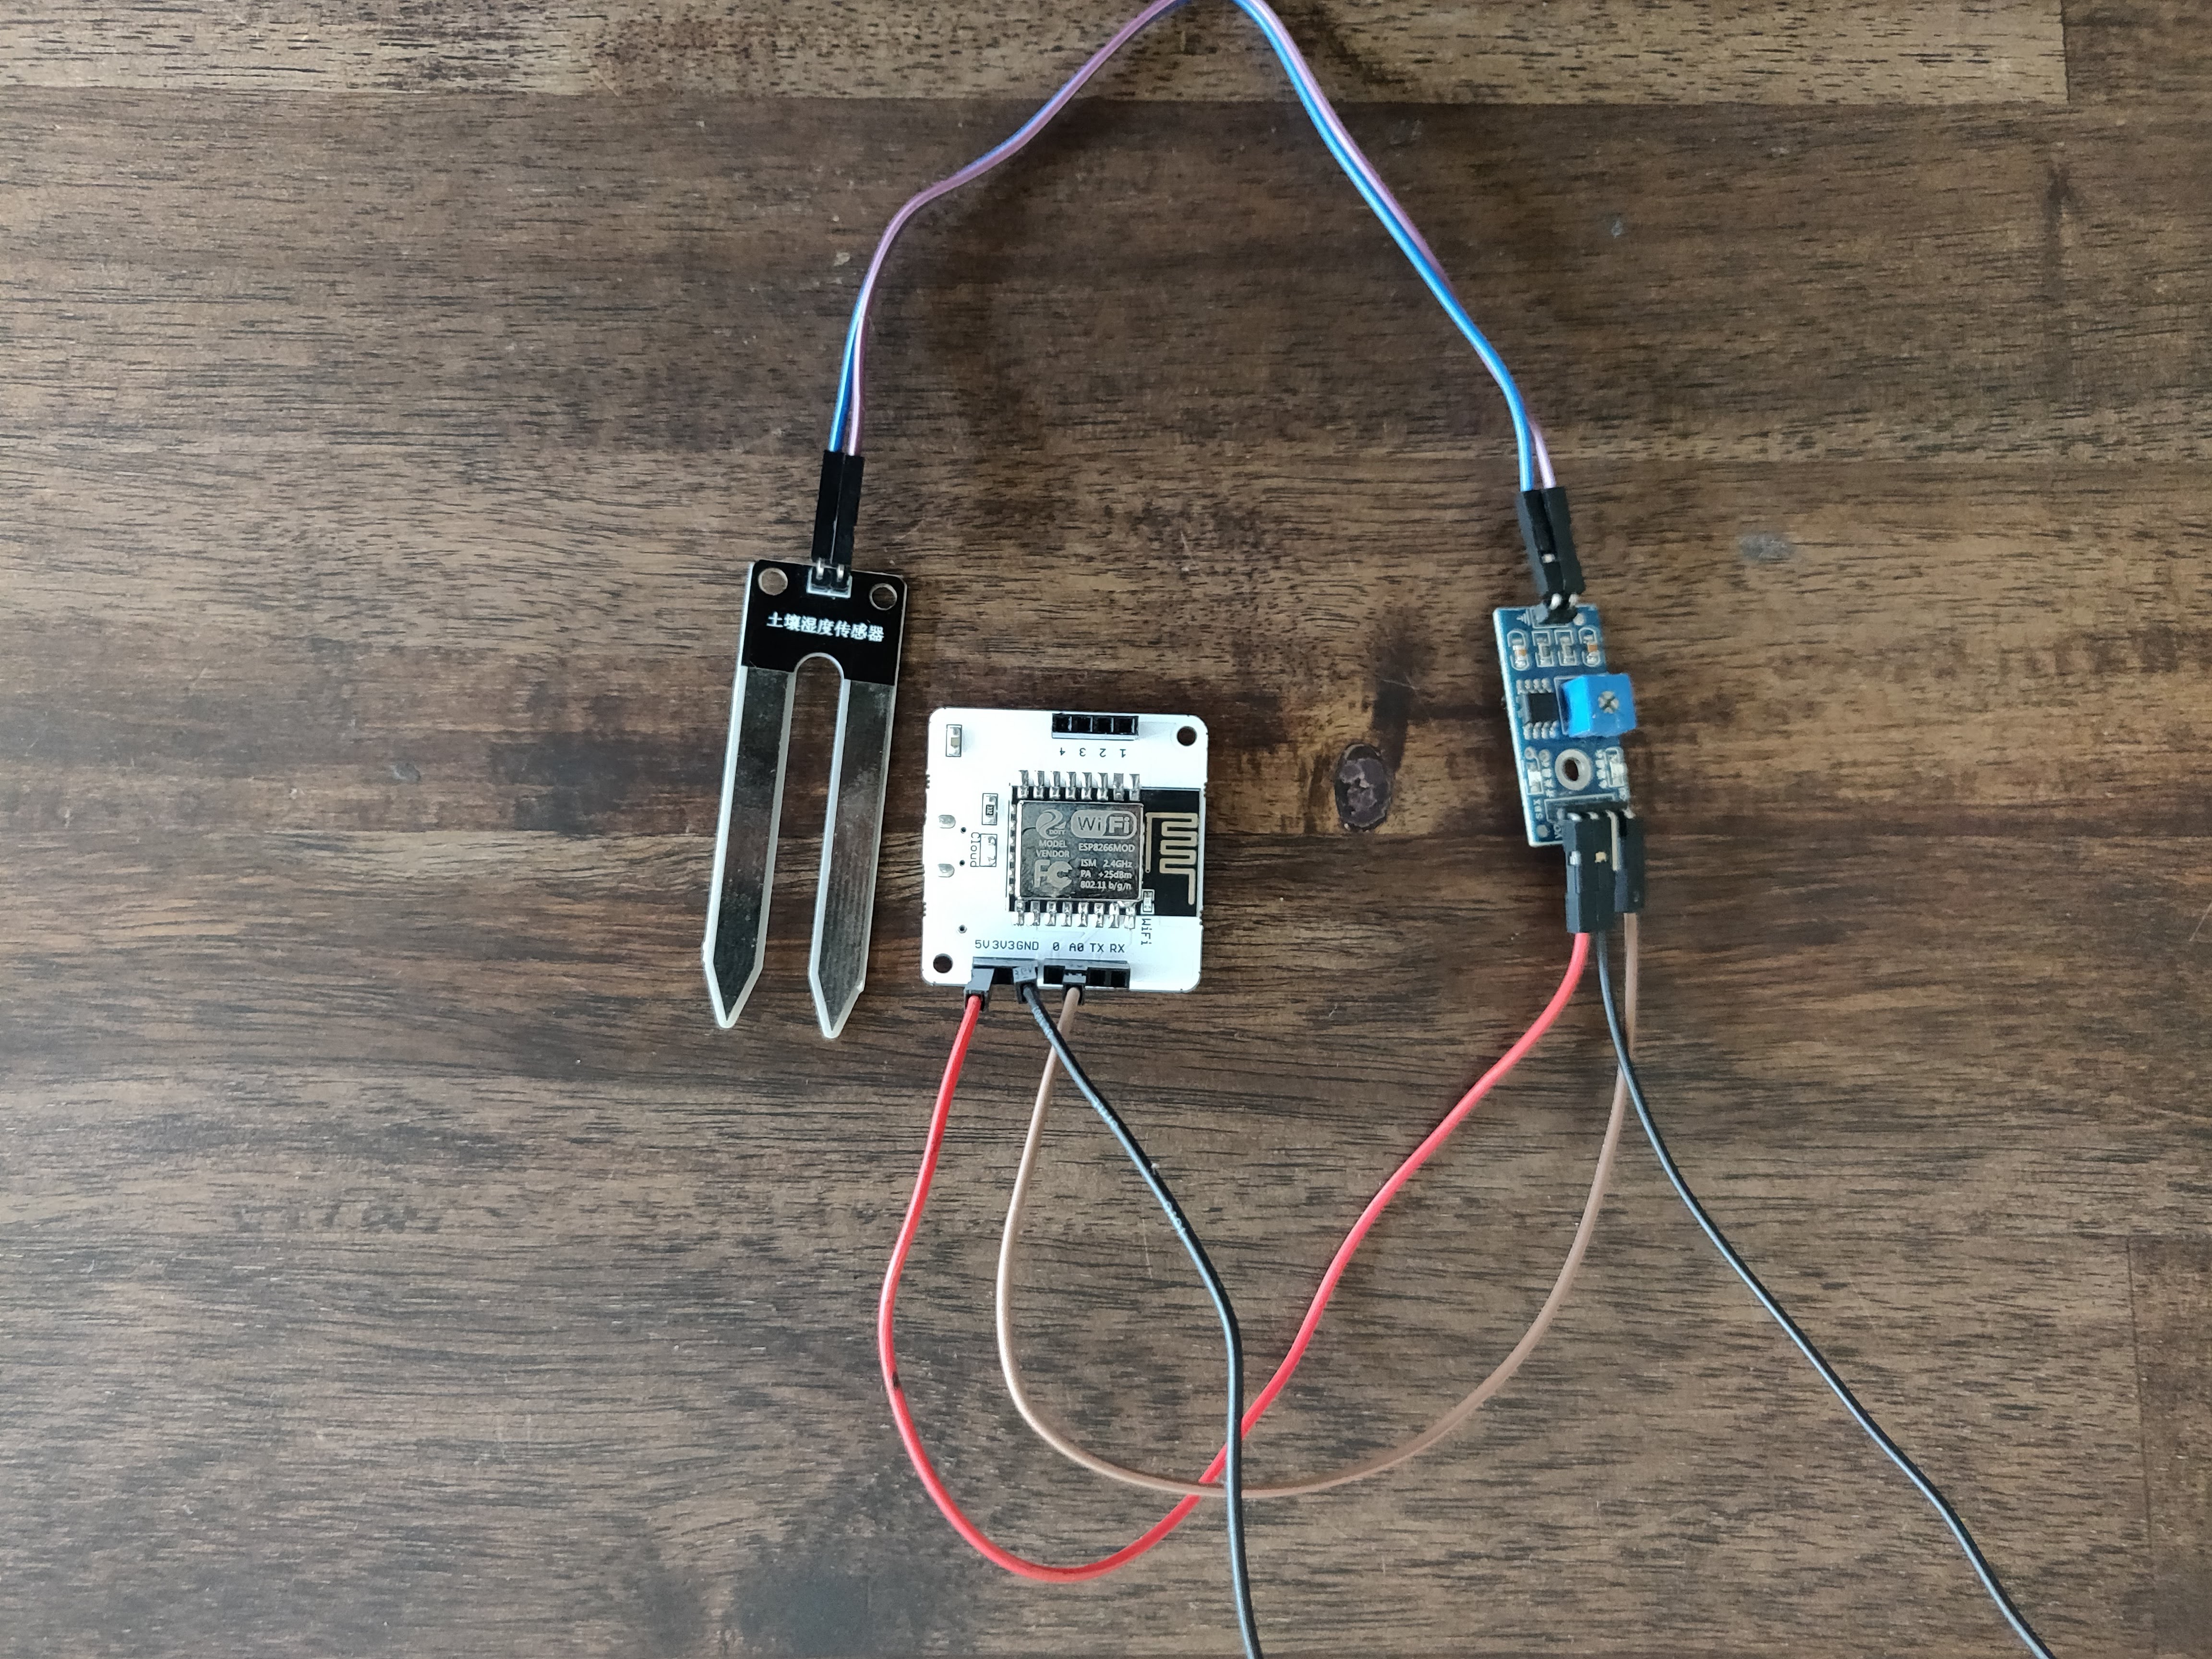
These are circuit connections for resistive soil moisture sensor.
Capacitive v/s Resistive Soil Moisture Sensor
DFRobot
Jan 21 2019 274717
Which one to use? Confused! Look our guide and get your doubts clear.
_Li5VAa4gPg.jpg)
Things used in this project
Hardware components
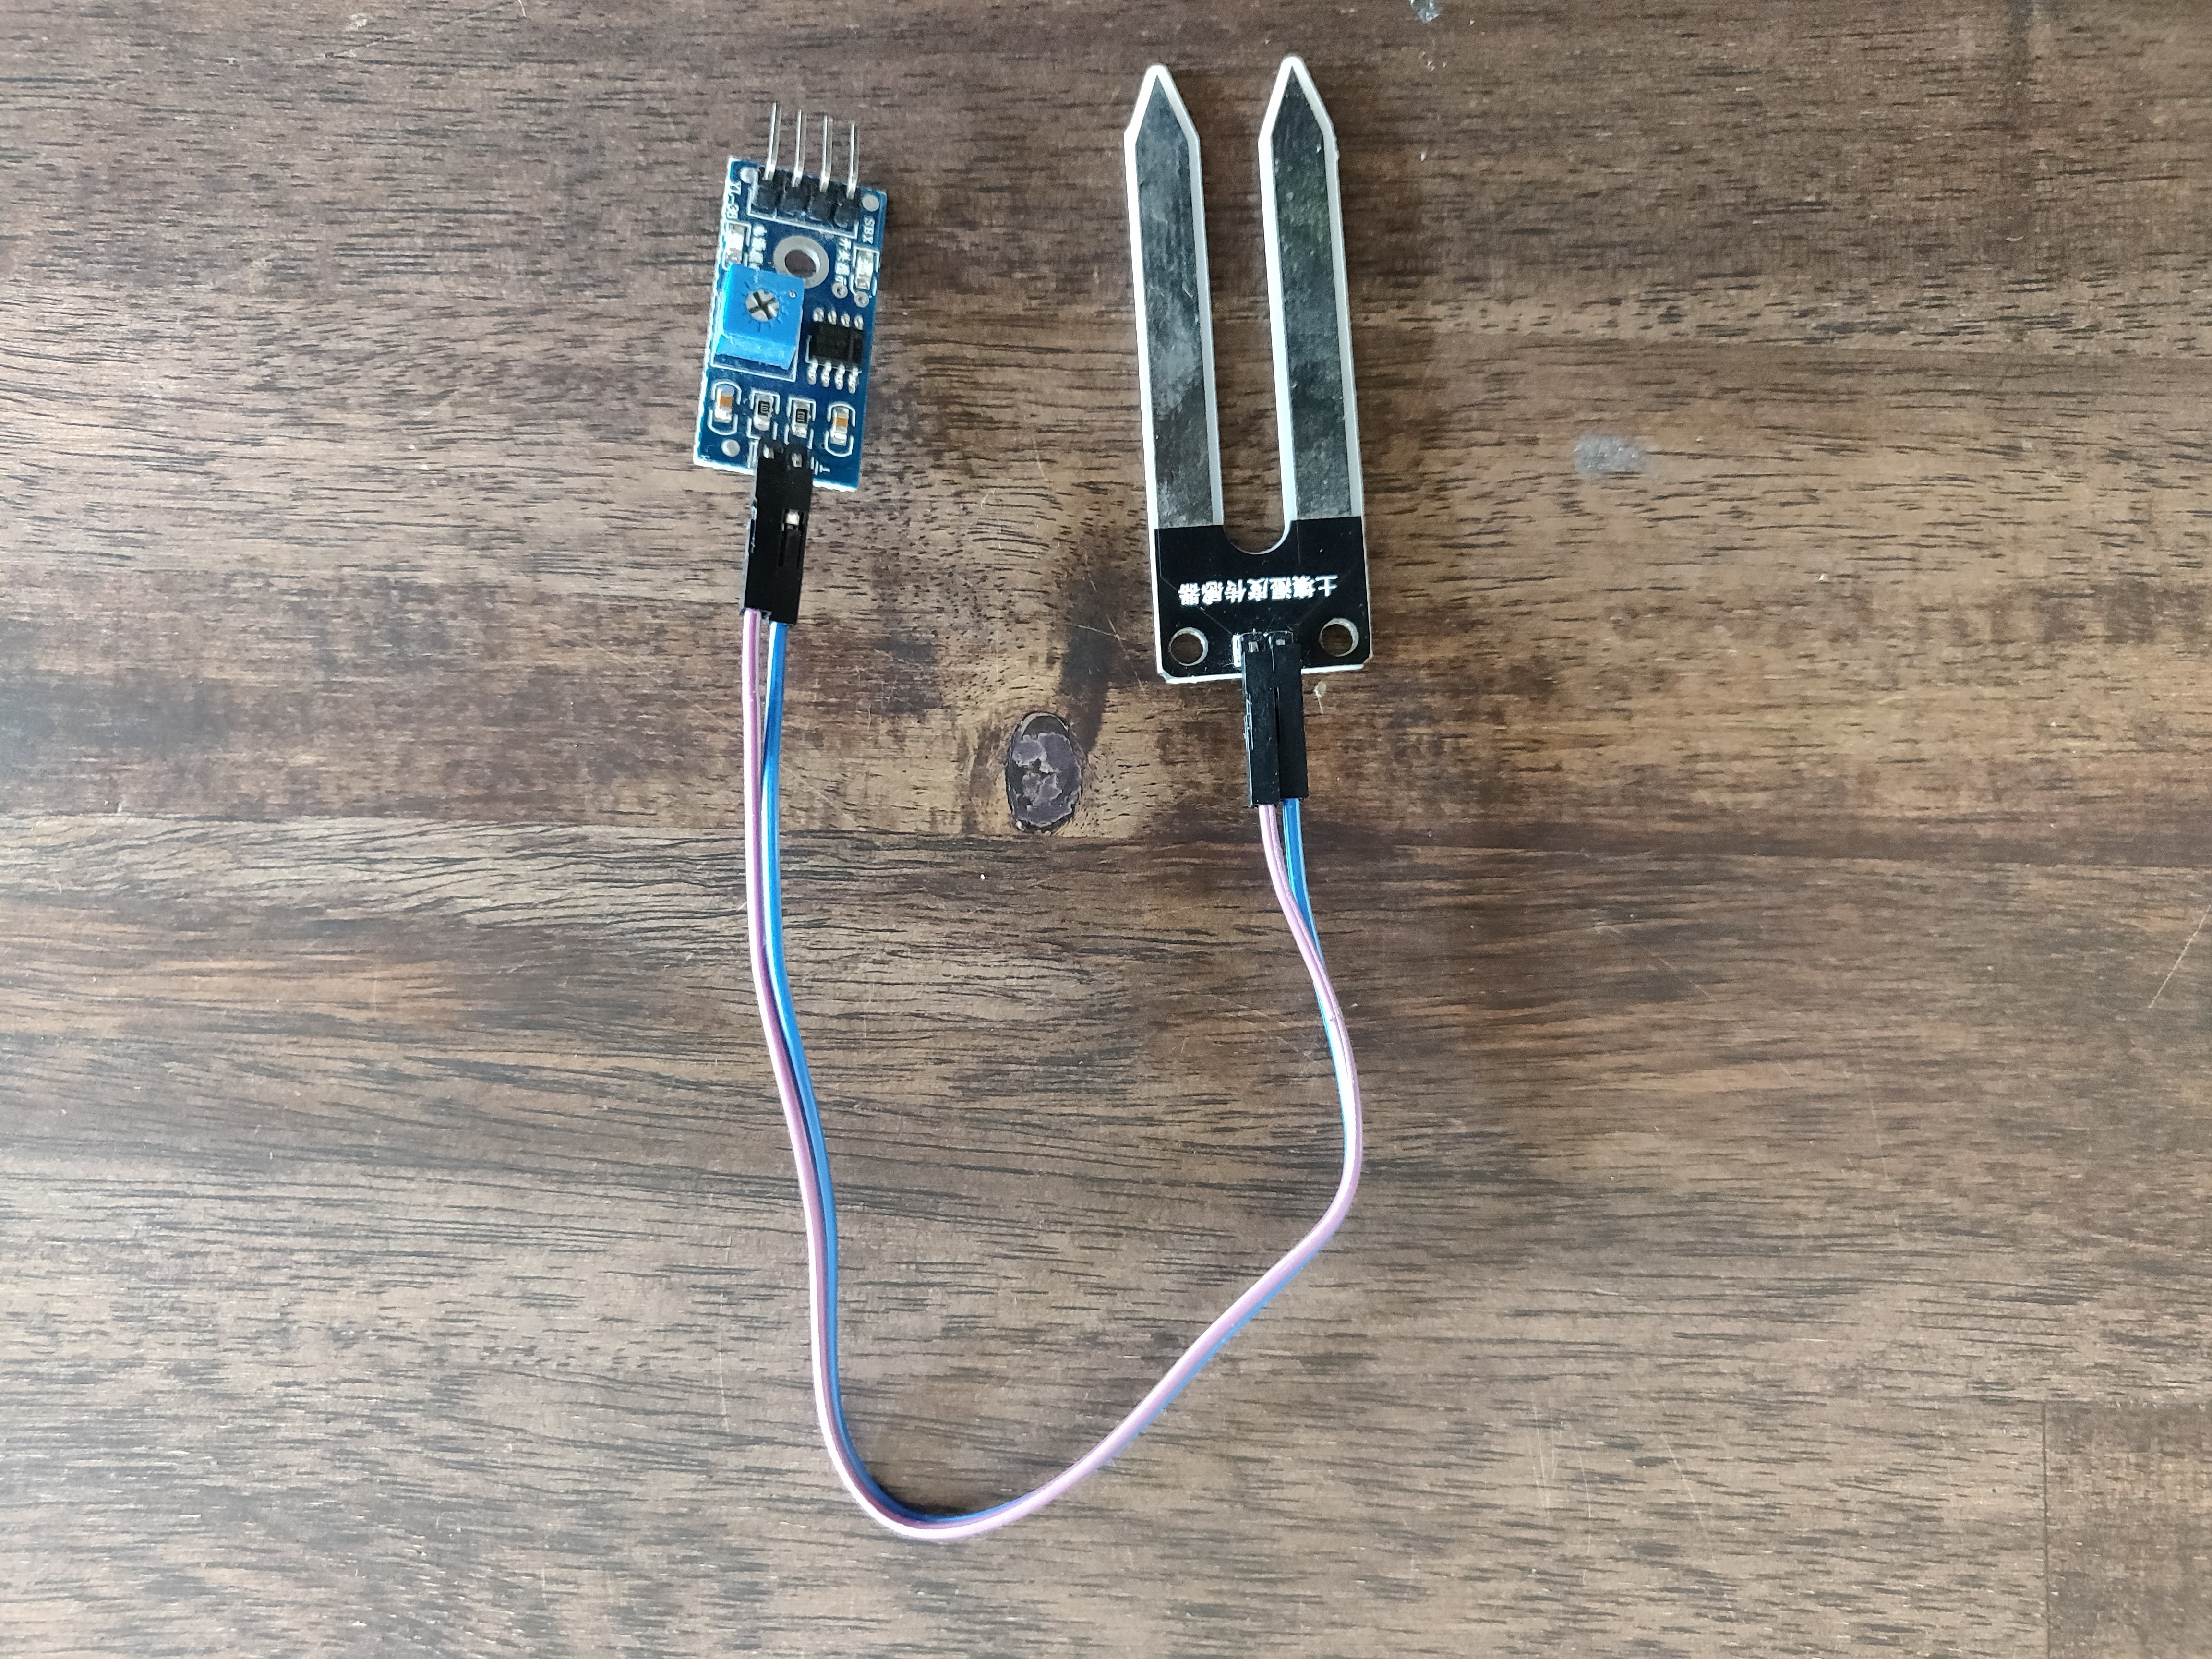
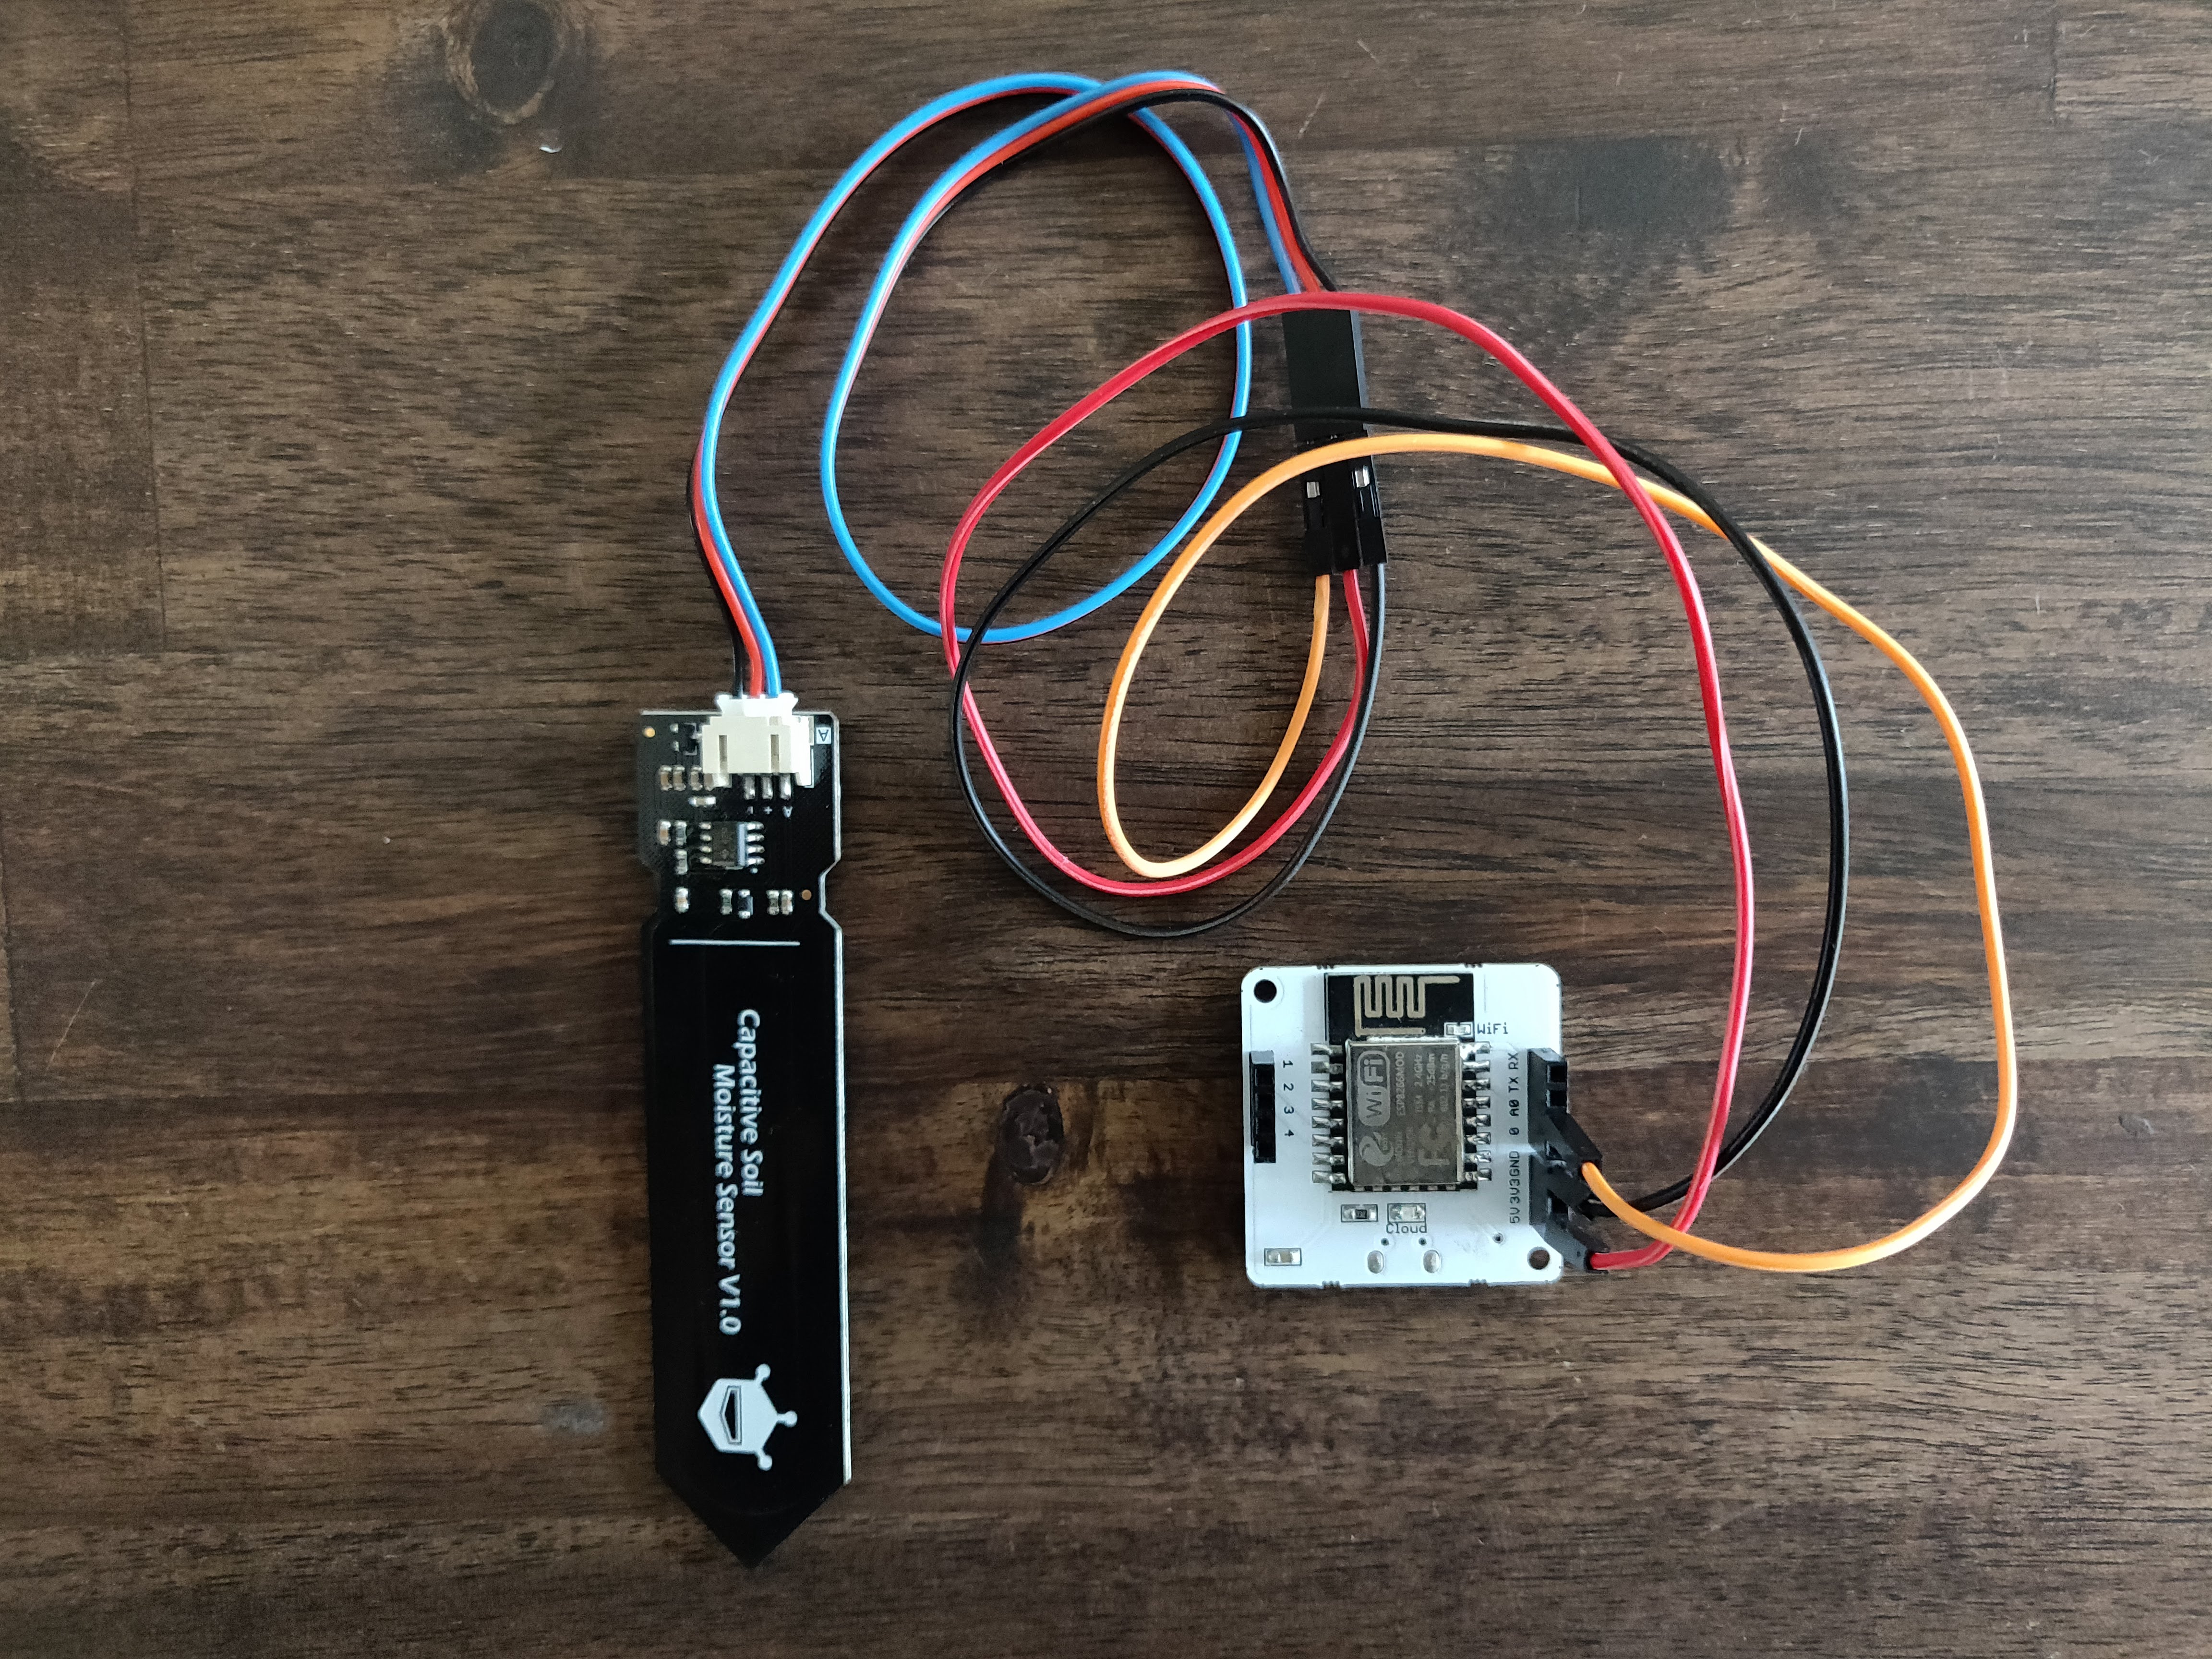
Capacitive Soil Moisture Sensor
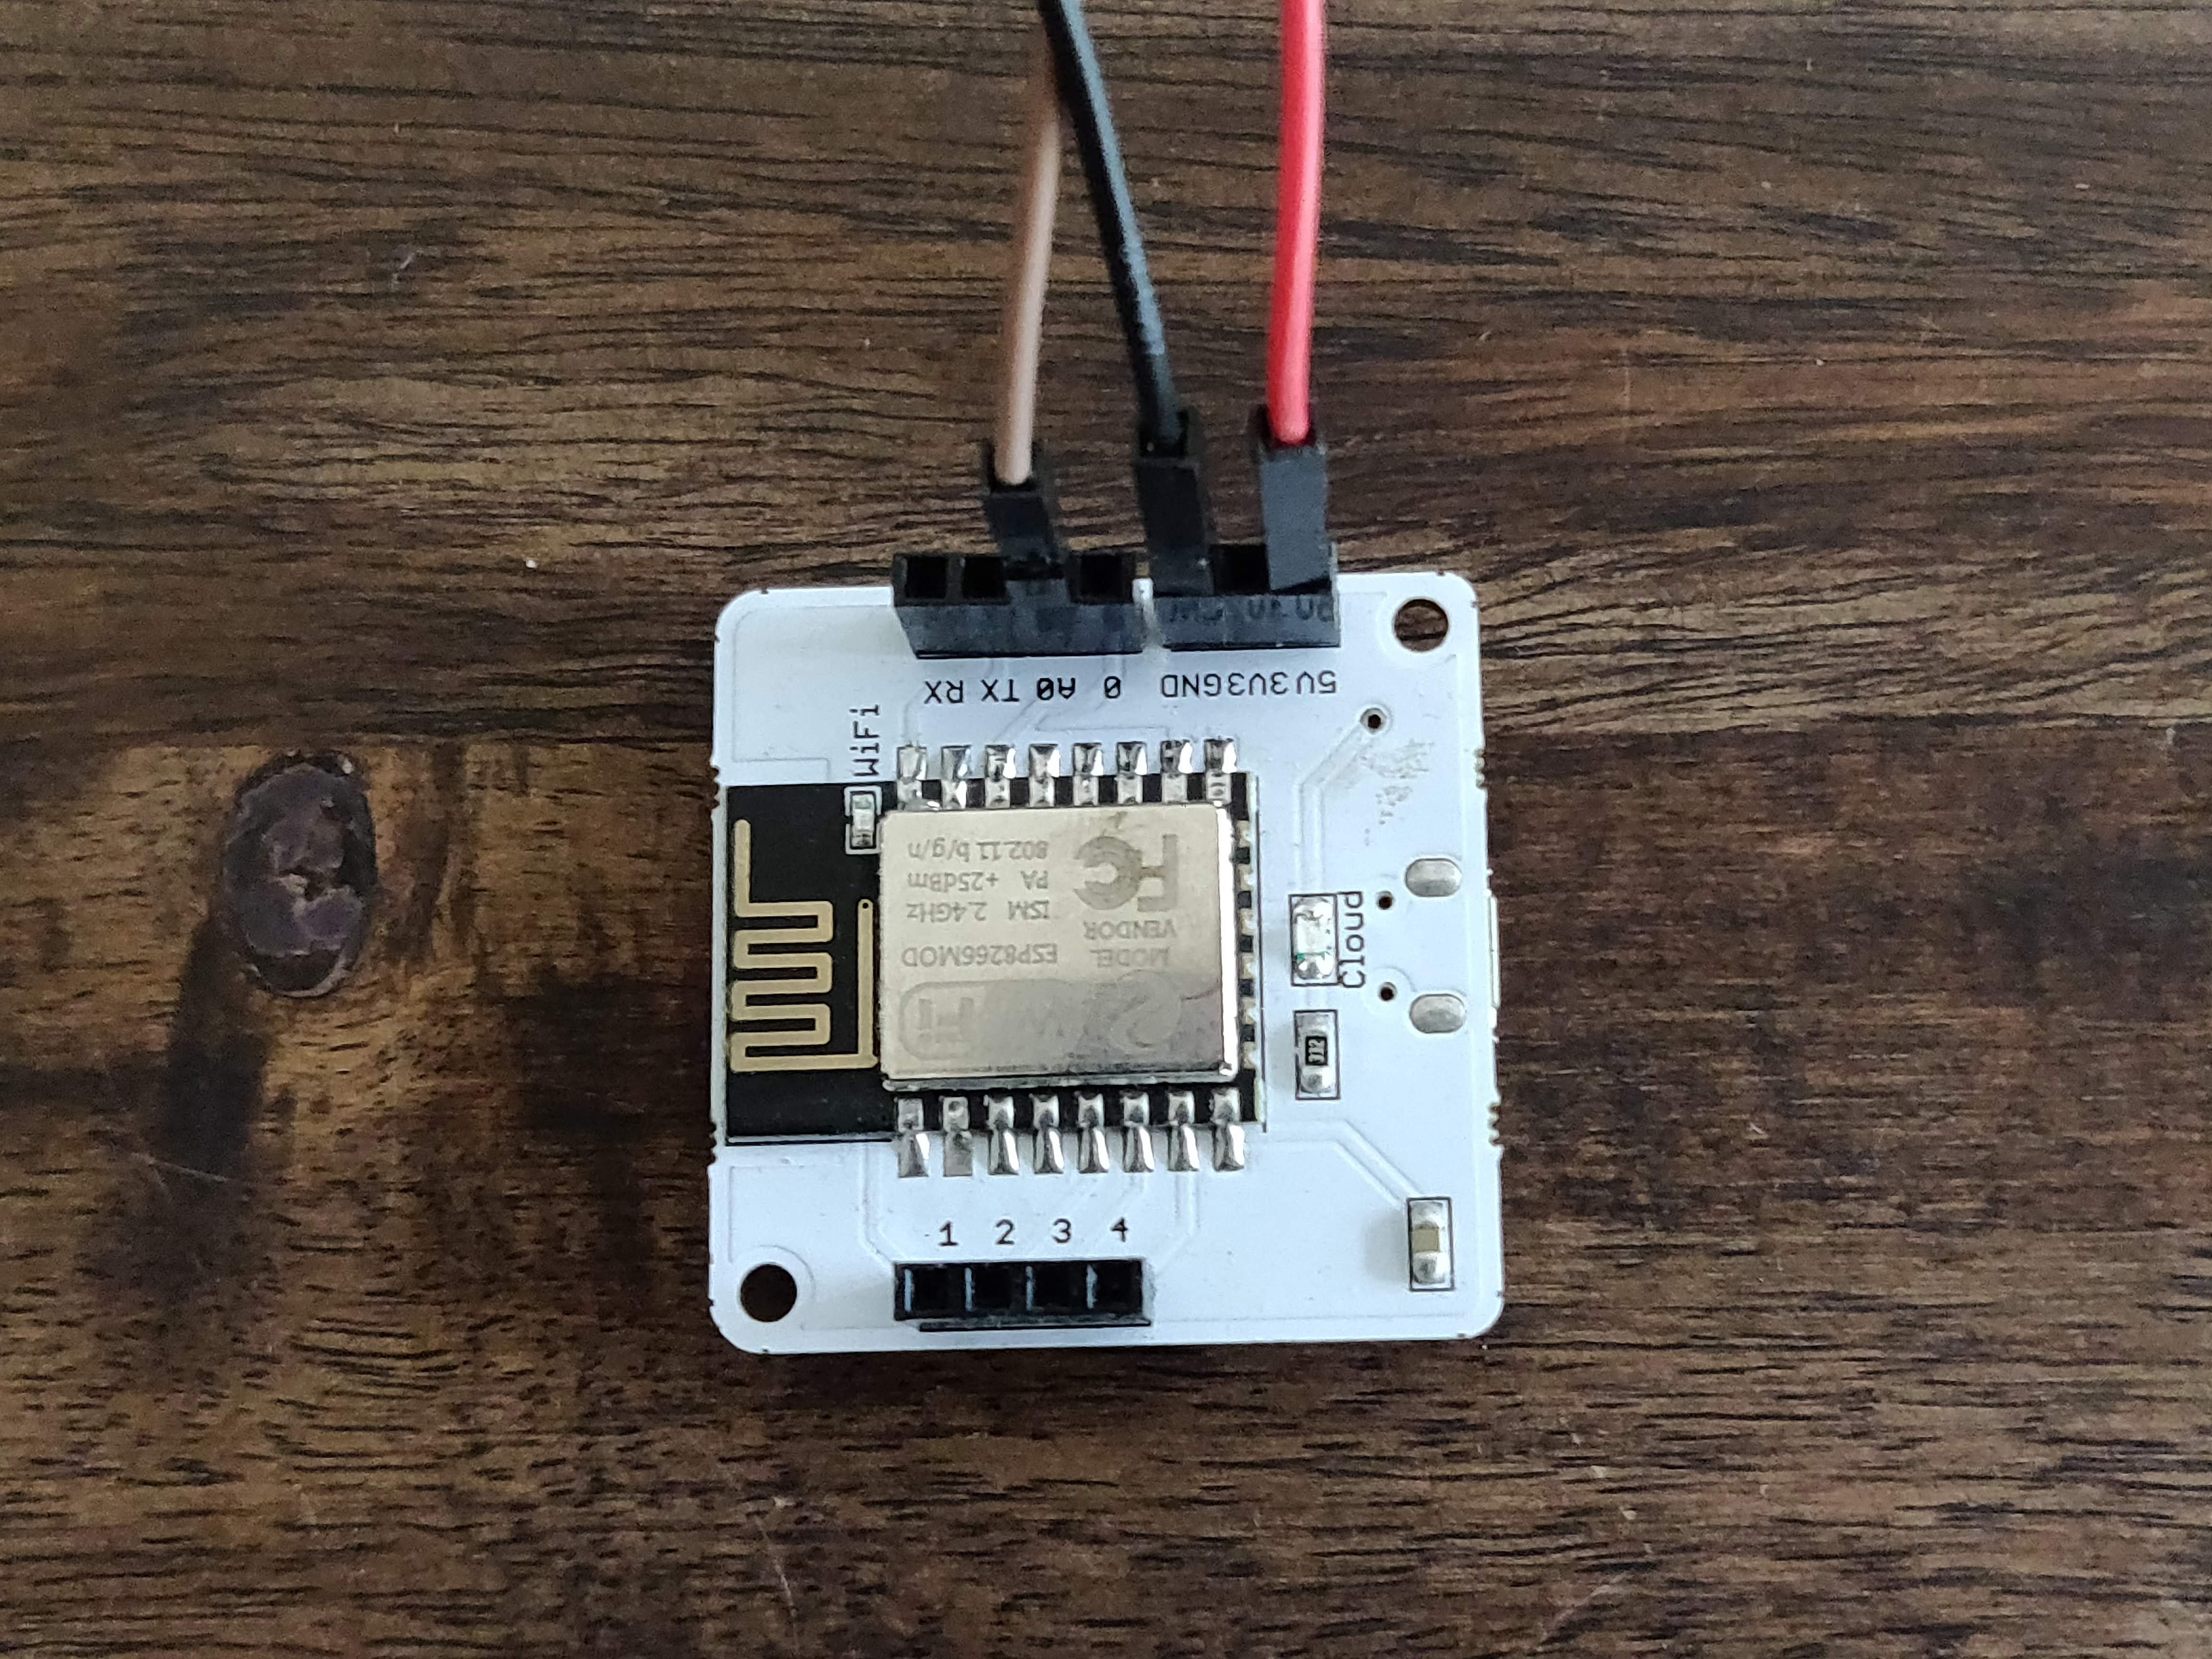
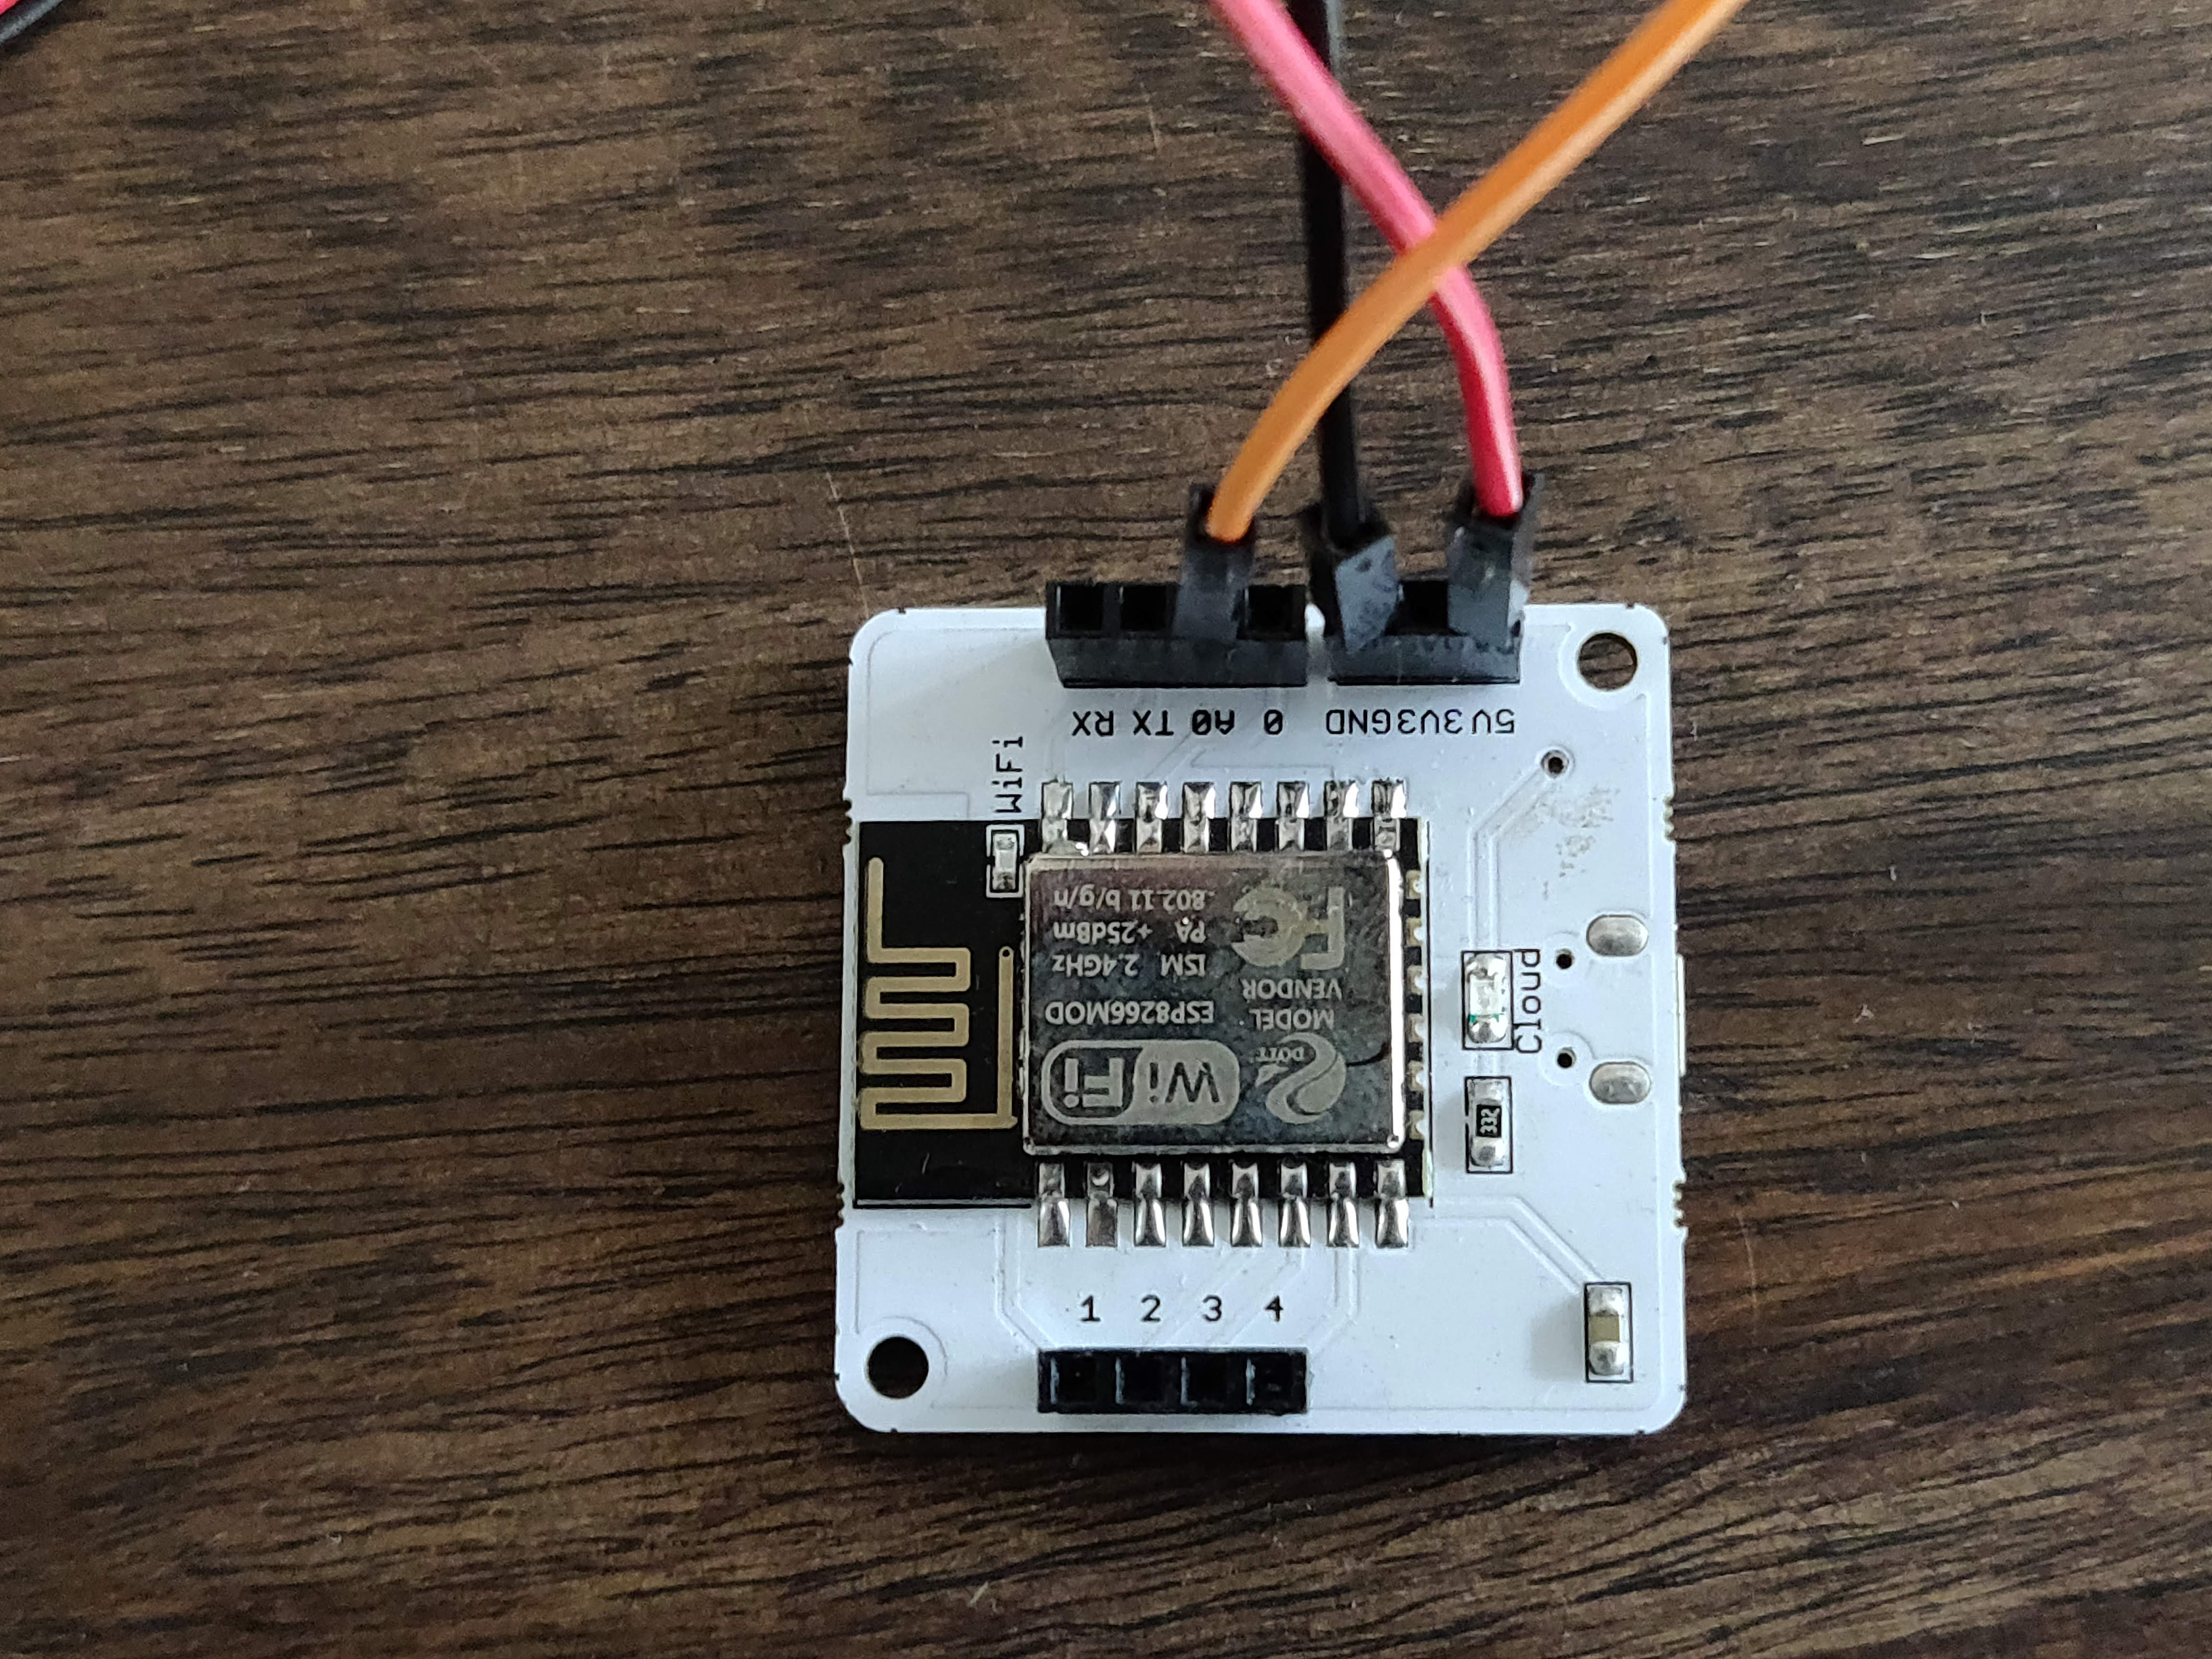
Bolt IoT Bolt WiFi Module
Jumper wires (generic)
Software apps and online services
Bolt IoT Bolt Cloud
Story
Description
We just got to know that the new capacitive sensor is providing greater accuracy in comparison with the old resistive soil moisture measuring sensor. That is why we decided to study both the sensors and find out which one is more better. So let's begin.
First, we should know about the basic idea about both the sensors.
1. Resistive Soil Moisture sensor:
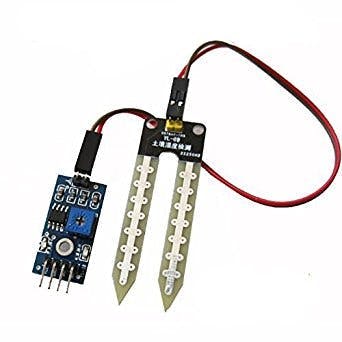
The sensor consists of two probes which are used to measure the volumetric content of water. The two probes allow the current to pass through the soil and then it gets the resistance value to measure the moisture value.
When there is more water, the soil will conduct more electricity which means that there will be less resistance. Therefore, the moisture level will be higher. Dry soil conducts electricity poorly, so when there will be less water, then the soil will conduct less electricity which means that there will be more resistance. Therefore, the moisture level will be lower.
2. Capacitive Soil Moisture sensor:
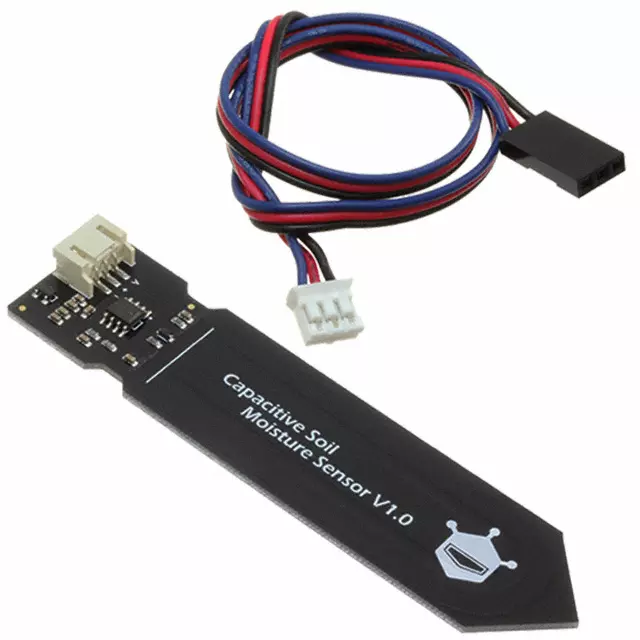
The sensor measures the soil moisture levels by capacitive sensing, rather than resistive sensing like other types of moisture sensor. The ability to prevent corrosion is because it is made of a corrosion resistant material giving it a long service life
The product also includes an on-board voltage regulator which gives it an operating voltage range of 3.3 ~ 5.5V. It is compatible with low-voltage MCUs (both 3.3V and 5V logic). To make it compatible with a Raspberry Pi, an ADC converter is required.
Major Issue Faced using Resistive soil moisture sensor
Now since we have acquired the knowledge about both the sensors lets us dive in deep and know which one is better.
The major issue with resistive soil moisture sensor is the corrosion of the sensor probes, not just because it is in contact with the soil but also because there is a DC current flowing which causes electrolysis of the sensors.
Is there any way to prevent corrosion?
Yes, There are solutions for this, like feeding the sensor with an AC current, but in practice this is at best a pulsating DC. Some people encase their sensors in plaster, but it might result in a slow reaction time as the moisture content of the plaster will always be behind that of the soil.
So how to overcome this disadvantage?
As we see now a days many people have switched to capacitive probes instead of the former to tackle the issue.
Capacitive measuring has some advantages, It not only avoids corrosion of the probe but also gives a better reading of the moisture content of the soil as opposed to resistance measuring
It reality it does not measure moisture (as water is a bad conductor of current), instead it measures the ions that are dissolved in the moisture i.e Adding fertiliser for instance will decrease the resistance of the soil, even though no water is added. Capacitive measuring basically measures the dielectric that is formed by the soil and the water is the most important factor that forms that dielectric.
Now let's build it and see the difference
Gather all the required components!
Assembling the hardware
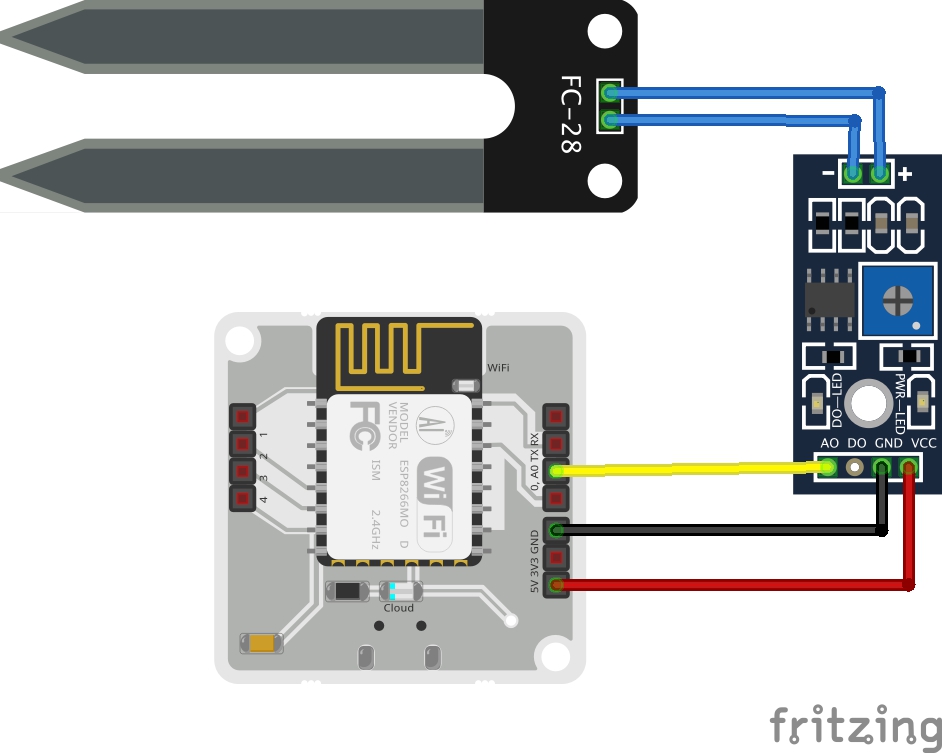
For Resistive sensor:
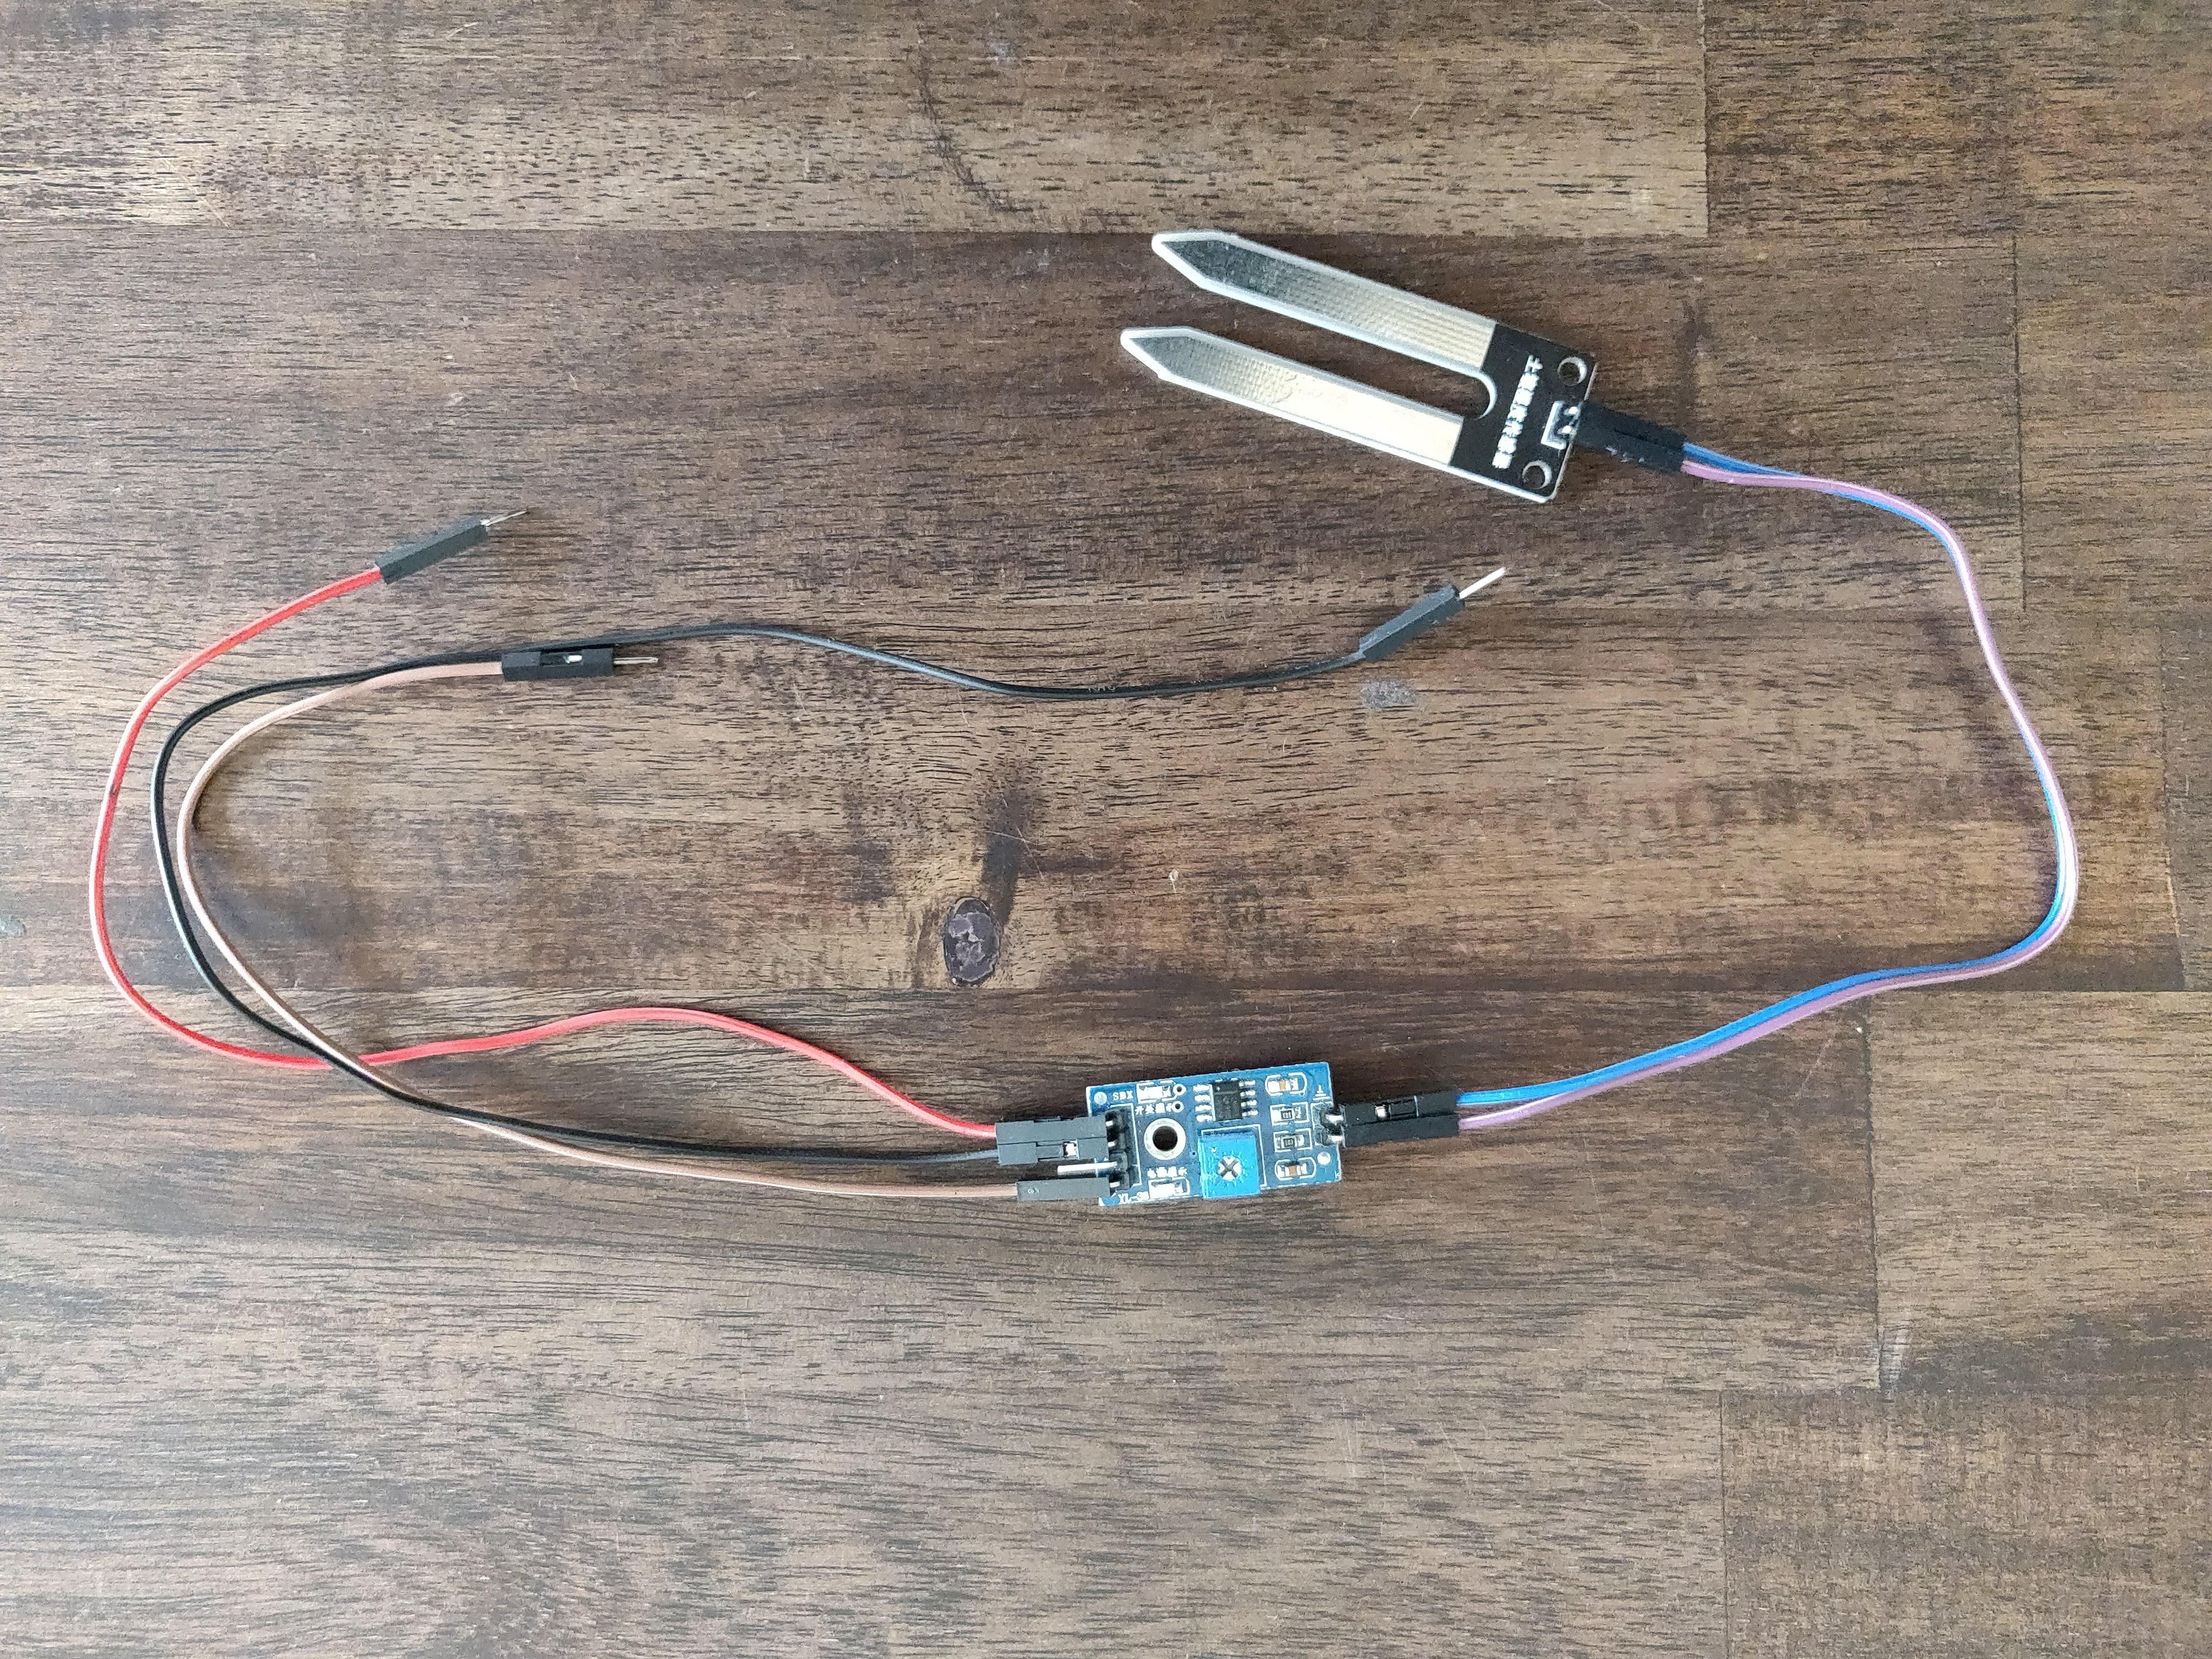
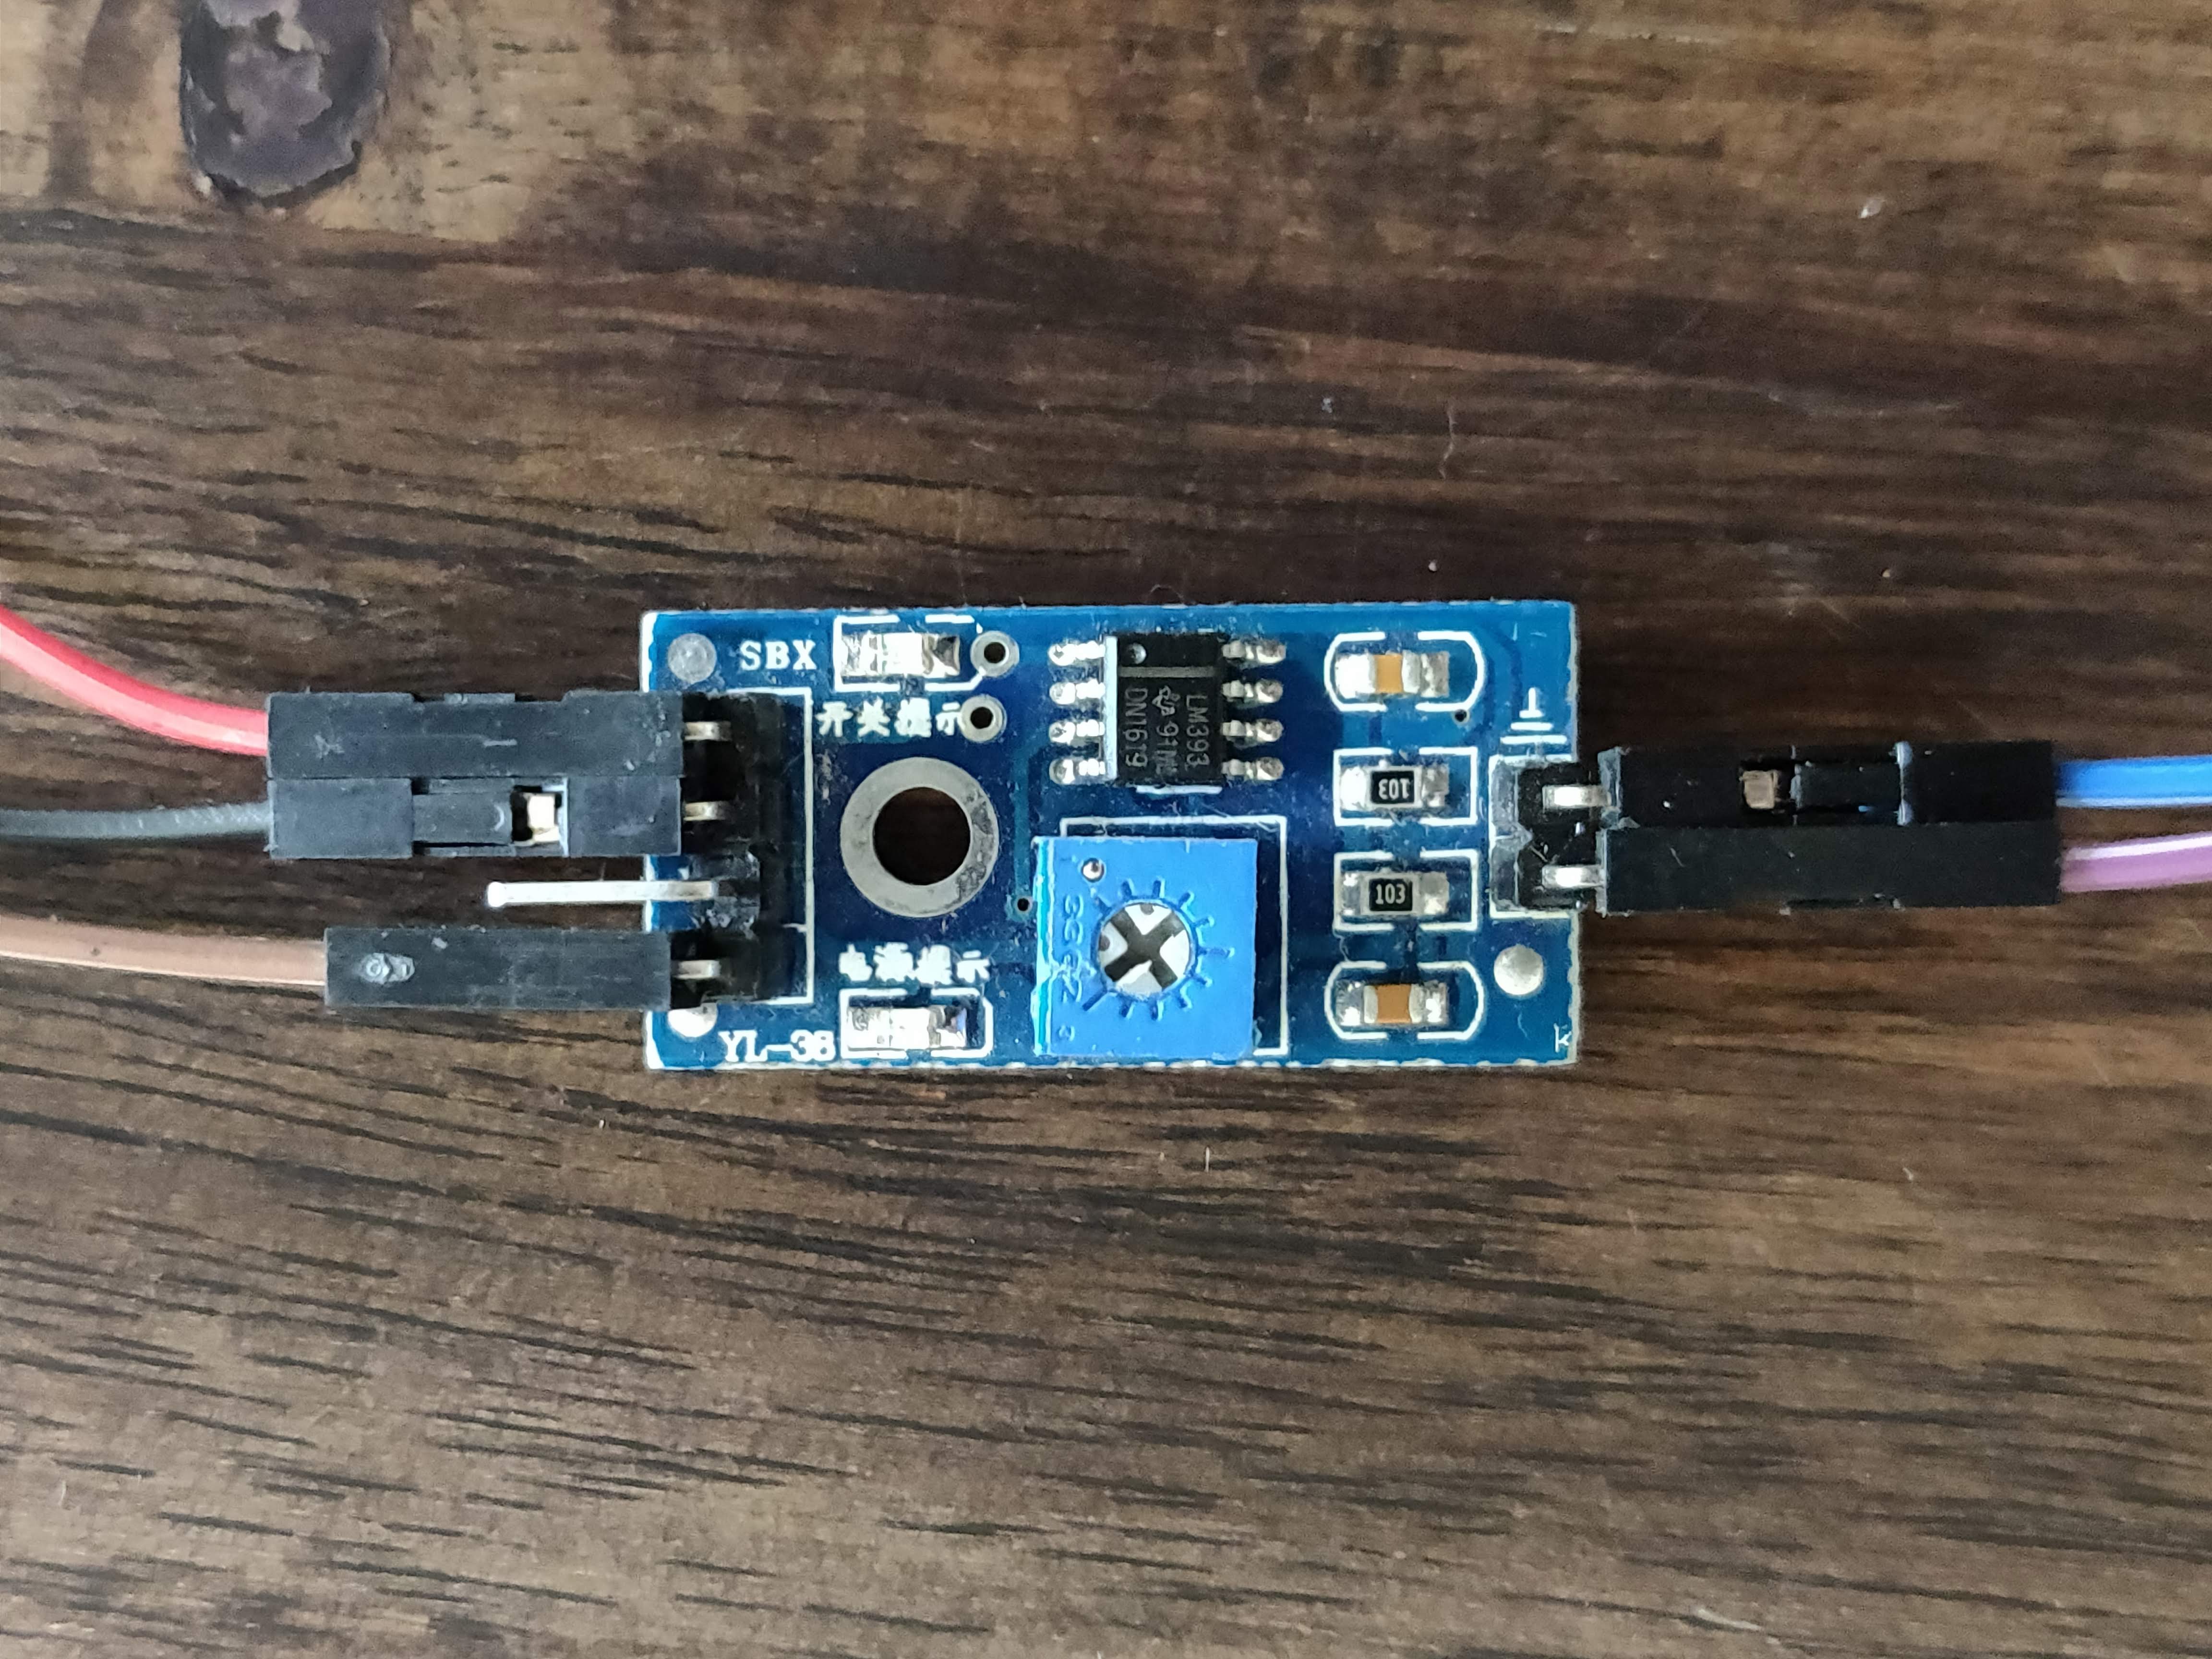
1. Connect the soil sensor probe to it's amplifier circuit using female/female jumper wires.
2. Connect the Vcc, GND and AO (Analog Output) pins of the amplifier circuit to 5V, GND and pin 0 of the Bolt unit respectively.
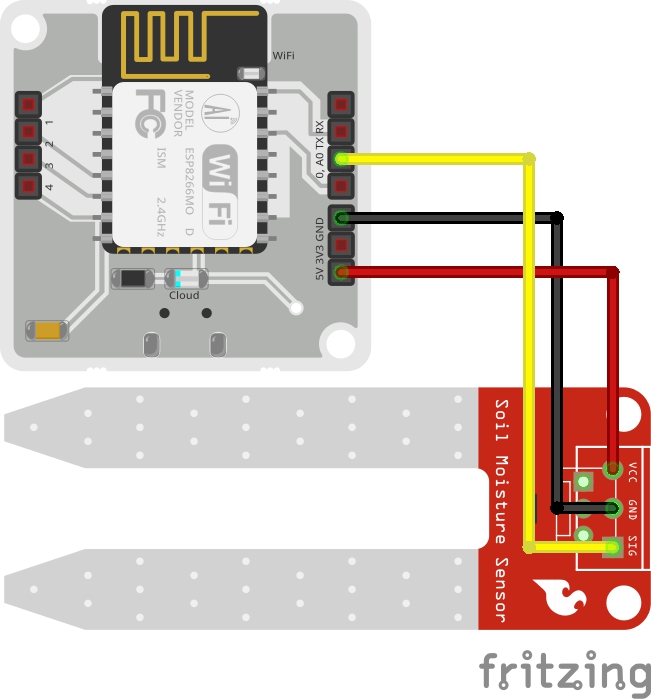
ForCapacitive sensor:
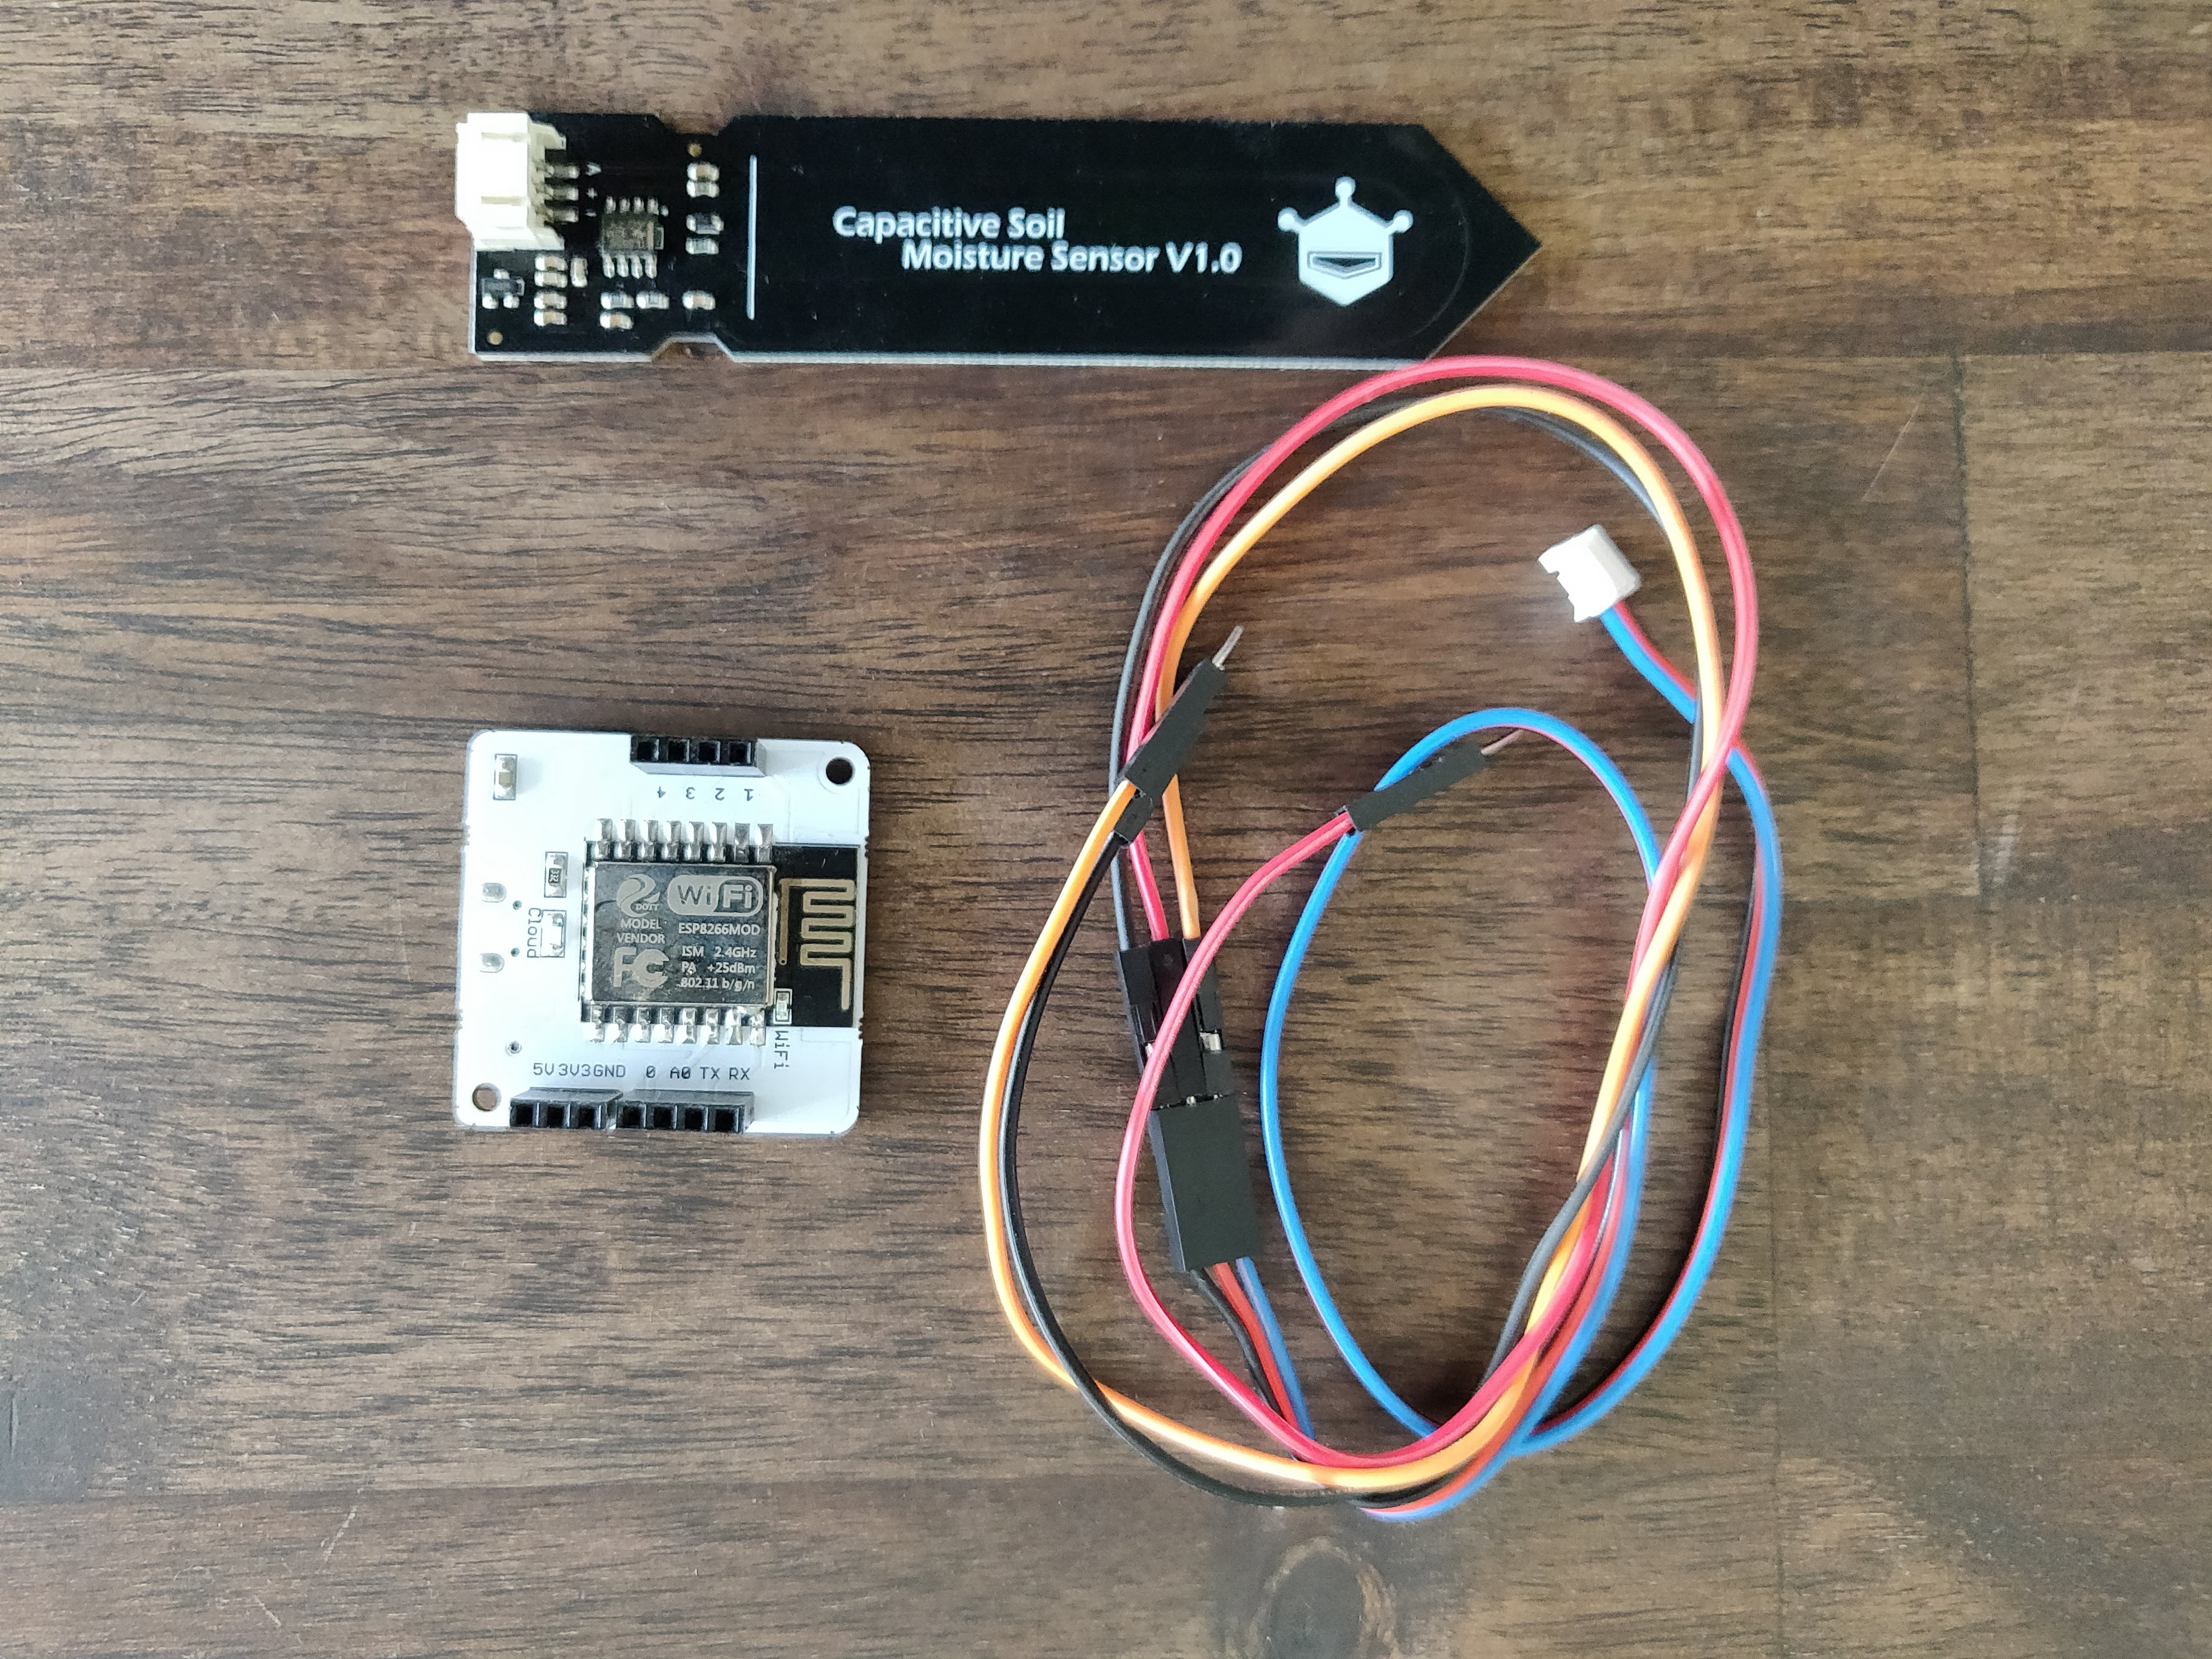
1. Connect the soil sensor circuit with the wire cable included with the sensor.
2. Connect the Vcc, GND and AO (Analog Output) pins of the sensor to 5V, GND and pin 0 of the Bolt unit respectively.
We are done with our setup, now let us link them with the cloud.
Connecting Bolt to the cloud
If you already know how to connect your Bolt device to the cloud then you can skip this step.
To know in detail for connecting Bolt to the cloud click here.
Now since we got our Bolt connected to cloud, let us plot the graph for both the sensor.
NOTE: Connect your both Bolt units to the cloud.
Plotting the graph
1. Visit cloud.boltiot.com and login into your account.
2. Click on 'Product' tab
3. Create a new product for both sensor (let us name them as 'resistive_sensor' and 'capacitive_sensor').
4. Configure both of the products to read data from the 'A0' pin of the Bolt.
5. Save the configurations.
6. Now link one of the Bolt device to resistive_sensor product and other Bolt device to capacitive_sensor product.
7. Deploy the configurations on both the Bolt devices.
9. Click on 'View action' tab to see the graph.
NOTE: If you want to know how to create and configure a product and link it to a Bolt, just click here and see the Plotting graph section.
Schematics
Schematics for resistiveThese are circuit connections for resistive soil moisture sensor.
Schematics
These are circuit connections for capacitive soil moisture sensor. The sensor used in diagram is not capacitive sensor. It is just for representation.
Recent Blogs

The 2026 Guide to Building an Automated Hydroponics System: Sensors & Monitoring
Build a DIY hydroponics monitoring system with pH, EC, temperature, DO, and ORP sensors. Compare Arduino, ESP32, and UNIHIKER setups.
Jul 07 2026

DFRobot Introduces seeMote Cap and seeMote Cube for Apple Vision Pro Developers
DFRobot introduces seeMote Cap and Cube for Apple Vision Pro. Empower your visionOS apps with 6DoF tracking, physical tool integration, and haptic controls.
NEWS Jun 09 2026

Building a Continuous Water Quality Monitoring System? Meet the New RS485 Sensor Series
Discover our new series of 11 industrial-grade RS485 water quality sensors. Featuring IP68 rating, Modbus RTU, optical dissolved oxygen (DO), and Arduino compatibility for continuous IoT water monitoring.
SELECTION GUIDE May 13 2026