New: seeMote Cube for visionOS Developers - Build physical input for Apple Vision Pro apps. Learn More ›
TUTORIALS ESP32 As said in the introductory section, we will reuse the Python websocket client code from the previous post. That post has the instructions for the installation of the websocket-client module needed.
NOTE: This esp32 tutorial is written by Nuno Santos who is an kindly Electronics and Computers Engineer. live in Lisbon, Portugal. you could check the original article here.
ESP32 Arduino tutorial: Websocket server over soft AP
DFRobot
Nov 10 2017 265722
The objective of this esp32 tutorial is to explain how to set a Websocket server on the ESP32 operating as soft AP. The software framework used will be the Arduino core for the ESP32. The tests of this ESP32 tutorial were performed using a DFRobot’s ESP-WROOM-32 device integrated in a ESP32 FireBeetle board.
Introduction
The objective of this post is to explain how to set a Websocket server on the ESP32 operating as soft AP. The software framework used will be the Arduino core for the ESP32.
The code needed for setting a Websocket server was explained in detail in this previous post. We will use the same code here and thus the explanation will have less detail. We will also use a Python client for testing that can be analyzed in that same post.
Regarding the code needed for making the ESP32 work as a soft AP, you can also check it in more detail on this previous post.
In our application, the ESP32 will be acting as an echo Websocket server, which will return back to the client any content it sends.
Since the ESP32 will be operating as a soft AP, we don’t need an external WiFi network hosted by a router to establish the connection between the client and the server.
Thus, the computer that will run the Python code needs to connect to the WiFi network hosted by the ESP32 and then it can transparently send and receive data from it.
The tests of this ESP32 tutorial were performed using a DFRobot’s ESP-WROOM-32 device integrated in a ESP32 FireBeetle board.
The Python code
As said in the introductory section, we will reuse the Python websocket client code from the previous post. That post has the instructions for the installation of the websocket-client module needed.
So we will start our code by importing the websocket module and the time module. Then, we instantiate an object of class WebSocket and establish the connection to our ESP32 websocket server with a call to the connect method on that object.
Note that we need to use the correct IP address of the ESP32 in order to be able to reach the server. In this tutorial, since the ESP32 will act as soft AP, we need to use its own IP address, which we will print to the serial console on the Arduino code.
import websocket
import time

ws = websocket.WebSocket()
ws.connect("ws://192.168.4.1/")
After establishing the connection, we will do a loop where we will send data to the server and then obtain the response it echoes back. After finishing the interaction with the server, we close the connection with a call to the close method on our WebSocket object.
The final source code for the Python websocket client can be checked below.
import websocket
import time

ws = websocket.WebSocket()
ws.connect("ws://192.168.4.1/")

i = 0
nrOfMessages = 30

while i<nrOfMessages:
    ws.send("Soft AP mode: message nr " + str(i))
    result = ws.recv()
    print(result)
    i=i+1
    time.sleep(1)

ws.close()
The Arduino code
The Arduino code will also be very similar to the one on the previous tutorial. So, we start by including the WiFi.h library and the WebSocketServer.h library. The first one will be using for setting our soft AP and the second one to handle the Websocket related functionalities.
We will need an object of class WiFiServer, which we will use to create a TCP server that accepts connections from clients. The constructor of this class receives as optional input the port where the server will be listening. We will use port 80.
We will create the Websocket server on top of our TCP server. So, for the Websocket related functionalities, we will need an object of class WebSocketServer. This will be a wrapper that will handle the Websocket protocol details, so we only need to worry about exchanging data with the client.
We are also going to need the name for the network we will create (ssid) and the password for accessing it.
#include <WiFi.h>
#include <WebSocketServer.h>

WiFiServer server(80);
WebSocketServer webSocketServer;

const char *ssid = "MyESP32AP";
const char *password = "testpassword";
Moving on to the Arduino setup function, we will start by opening a serial connection to print the data received from the client.
Next we will set the soft AP with a call to the softAP method of the WiFi extern variable that is available from including the WiFi.h library. It is the same extern variable that we use when connecting to a WiFi network hosted by a router.
After that, to print the IP of the ESP32, we call the softAPIP method on the same WiFi variable. For more details on how to set a soft AP on the ESP32, please consult this previous post.
Serial.begin(115200);

delay(4000);

WiFi.softAP(ssid, password);
Serial.println(WiFi.softAPIP());
We finish the setup function by initializing the TCP server. This is done by calling the begin method on the global WiFiServer object we declared before.
server.begin();
Now, in the main loop function, we will check if a client has connected by calling the available method on our WiFiServer object.
This method call returns an object of type WiFiClient. To check if a client is connected, we then call the connected method on this object. This method will return true if the client is connected and false otherwise.
If the client is connected, we then need to perform the Websocket protocol handshake. This is done by calling the handshake method on the WebSocketServer global object we declared before.
This method will receive as input the WiFiClient object we obtained and returns true if the handshake is performed successfully.
if (client.connected() && webSocketServer.handshake(client)) {
   // Exchanging data with the client
}
Inside the previous conditional block, we will declare a variable to act as data buffer for receiving the data from the client. Then, we will loop while the client is connected and accept data from it, print it to the serial console and then echo the data back to the client.
We get data from the Websocket by calling the getData method on the WebSocketServer object. This method receives no parameters and returns a String with the data received.
To send the data back to the client, we simply call the sendData method and pass as input a string with the content. In our case, it will be the data previously received from the client, since our server is acting as an echo server.
The final source code can be seen below and already includes the exchange of data with the client. Note that when the previously mentioned loop ends, it means that the client has disconnected and thus we print that information to the serial console.
#include <WiFi.h>
#include <WebSocketServer.h>

WiFiServer server(80);
WebSocketServer webSocketServer;

const char *ssid = "MyESP32AP";
const char *password = "testpassword";

void setup() {

  Serial.begin(115200);

  delay(4000);

  WiFi.softAP(ssid, password);
  Serial.println(WiFi.softAPIP());

  server.begin();
  delay(100);
}

void loop() {

  WiFiClient client = server.available();

  if (client.connected() && webSocketServer.handshake(client)) {

    String data;

    while (client.connected()) {

      data = webSocketServer.getData();

      if (data.length() > 0) {
         Serial.println(data);
         webSocketServer.sendData(data);
      }

      delay(10); // Delay needed for receiving the data correctly
   }

   Serial.println("The client disconnected");
   delay(100);
  }

  delay(100);
}
Testing the code
To test the code, first compile it and upload it to your ESP32 using the Arduino IDE. After the procedure is finished, open the IDE serial monitor and copy the IP address that gets printed. You should use that IP address in the connect method on the Python program.
Once the ESP32 WiFi network is detected by your computer, just connect to it. You can check below at figure 1 how it looks on Windows 8.

Figure 1 – ESP32 WiFi network detected on Windows 8 (menus in Portuguese).
After that, simply run the Python code. You should get an output similar to figure 2 on the console. As can be seen, the messages sent to the server are echoed back to the client, as expected.

Figure 2 – Output of the Python program.
If you go back to the Arduino IDE serial monitor, you should get a result like the one shown in figure 3. As can be seen, the messages sent from the client were received and printed in the serial console.
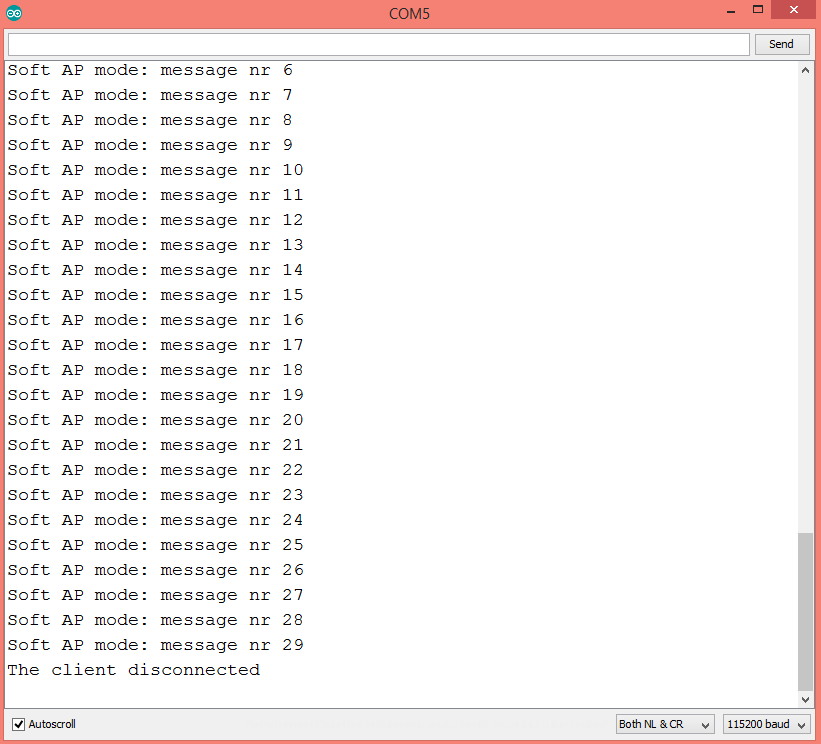 Figure 3 – Data received from the client printed on the serial console.
NOTE: This esp32 tutorial is written by Nuno Santos who is an kindly Electronics and Computers Engineer. live in Lisbon, Portugal. you could check the original article here.
He had written many useful tutorials and projects about ESP32, ESP8266, If you are interested, you could check his blog to know more.
DFRobot supply lots of esp32 arduino tutorials and esp32 projects for makers to learn.
Recent Blogs

Hands-On Test of 6 New 4K USB Cameras: Resolution, Color, Field of View, and Compatibility
Compare six 4K USB cameras using IMX415, IMX274, and IMX678 sensors across resolution, color, field of view, distortion, Linux, and low-light tests.
REVIEWS Jul 23 2026

Fermion BMI323 6-Axis IMU Engineering Test Notes: Accelerometer, Gyroscope, Step Counter, and I2C Address Verification
This article is an engineering test note, mainly intended to demonstrate the actual performance of the module in common development scenarios, rather than a laboratory calibration report.
REVIEWS Jul 15 2026

Meet DFRobot at FAB26 Boston 2026: AI, Open-Source Hardware & Maker Education
Visit DFRobot at FAB26 Boston for hands-on AI workshops, open-source hardware demos, and practical insights into K–12 maker education.
NEWS Jul 15 2026