Holiday Notice: We're away from Apr 30 to May 5, but our store is open 24/7! All orders placed now will be promptly processed and shipped on May 6.
Raspberry pi Project: IoT Treat Dispenser for Pets
I have two cats, and having to give them treats about 3 times a day became quite a nuisance. They would look up at me with their cute faces and intense stares, then running to a box full of cat greenies, meowing and begging for them. I had decided that enough was enough. No more getting up just to give a cat a couple of treats. Now was the time for a treat dispensing machine, because as the saying goes: "Programmers exist to make complicated stuff to do simple things less."
COMPONENTS
Raspberry Pi 3
Raspberry Pi Camera Module
Stepper Motor with Planetary Gear
I2C LCD 16x2
Barrel Jack to Terminal
DRV8825 Stepper Motor Driver
Capacitor 100 µF
Arduino UNO & Genuino UNO
Jumper wires (generic)
Instruction
1. Creating a Design
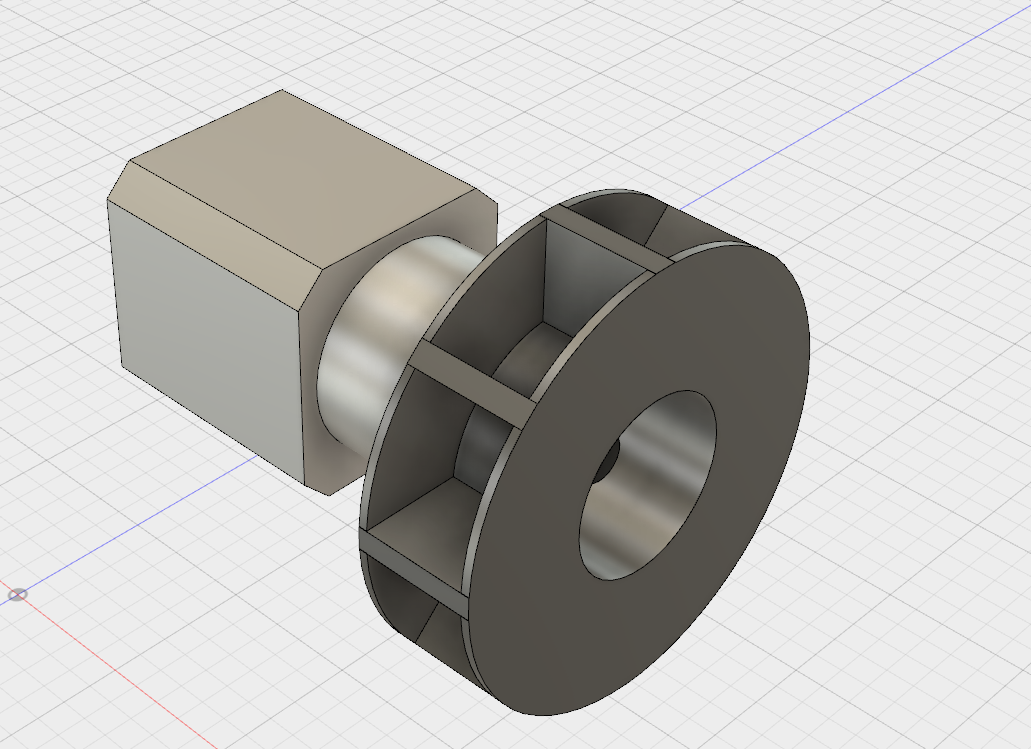
First was the choice of how to control my newly thought machine. Bluetooth would have had too short of a range, at only 30 feet with no obstructions. With this information, I opted to use WiFi. But now, how do I use WiFi to control the machine? A Raspberry Pi 3 has builtin WiFi capabilities, letting me use Flask to host a webpage. Next was the topic of the enclosure and how to dispense treats. I decided upon a rotating wheel design, where treats would fall into little sections, be rotated around, and then the treats would drop down onto a ramp and travel to the front of the machine.
2. Making the Fusion 360 Model
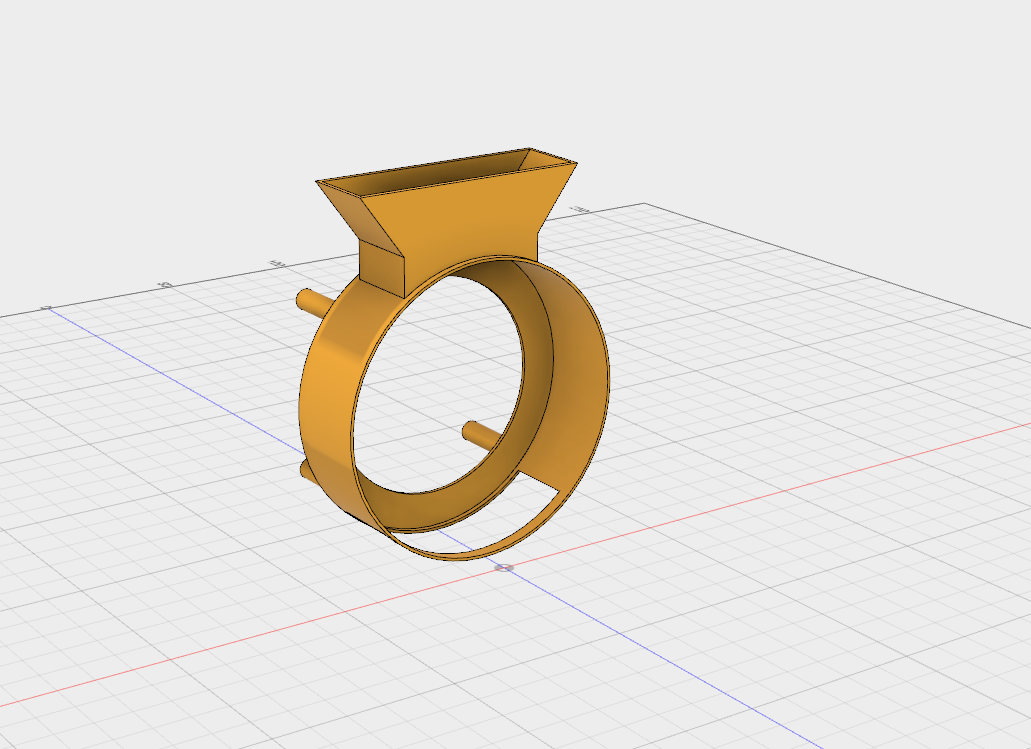
I began by creating a base model for the treat receptacle. Treats fall into a mini-hopper where they are then taken into a rotating wheel.
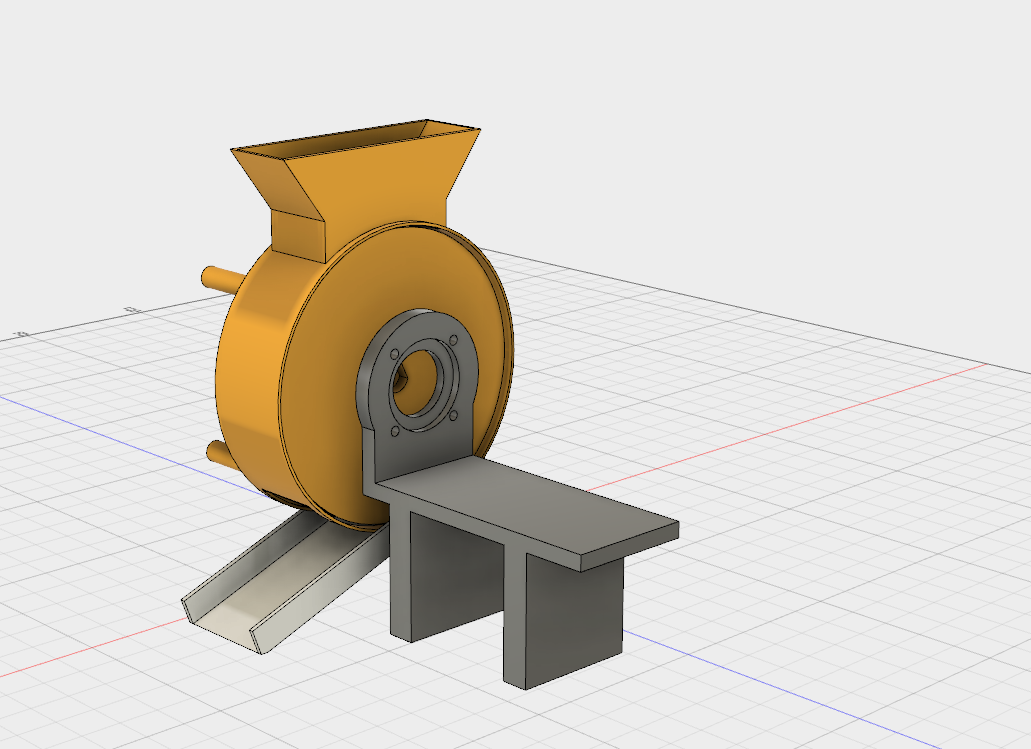
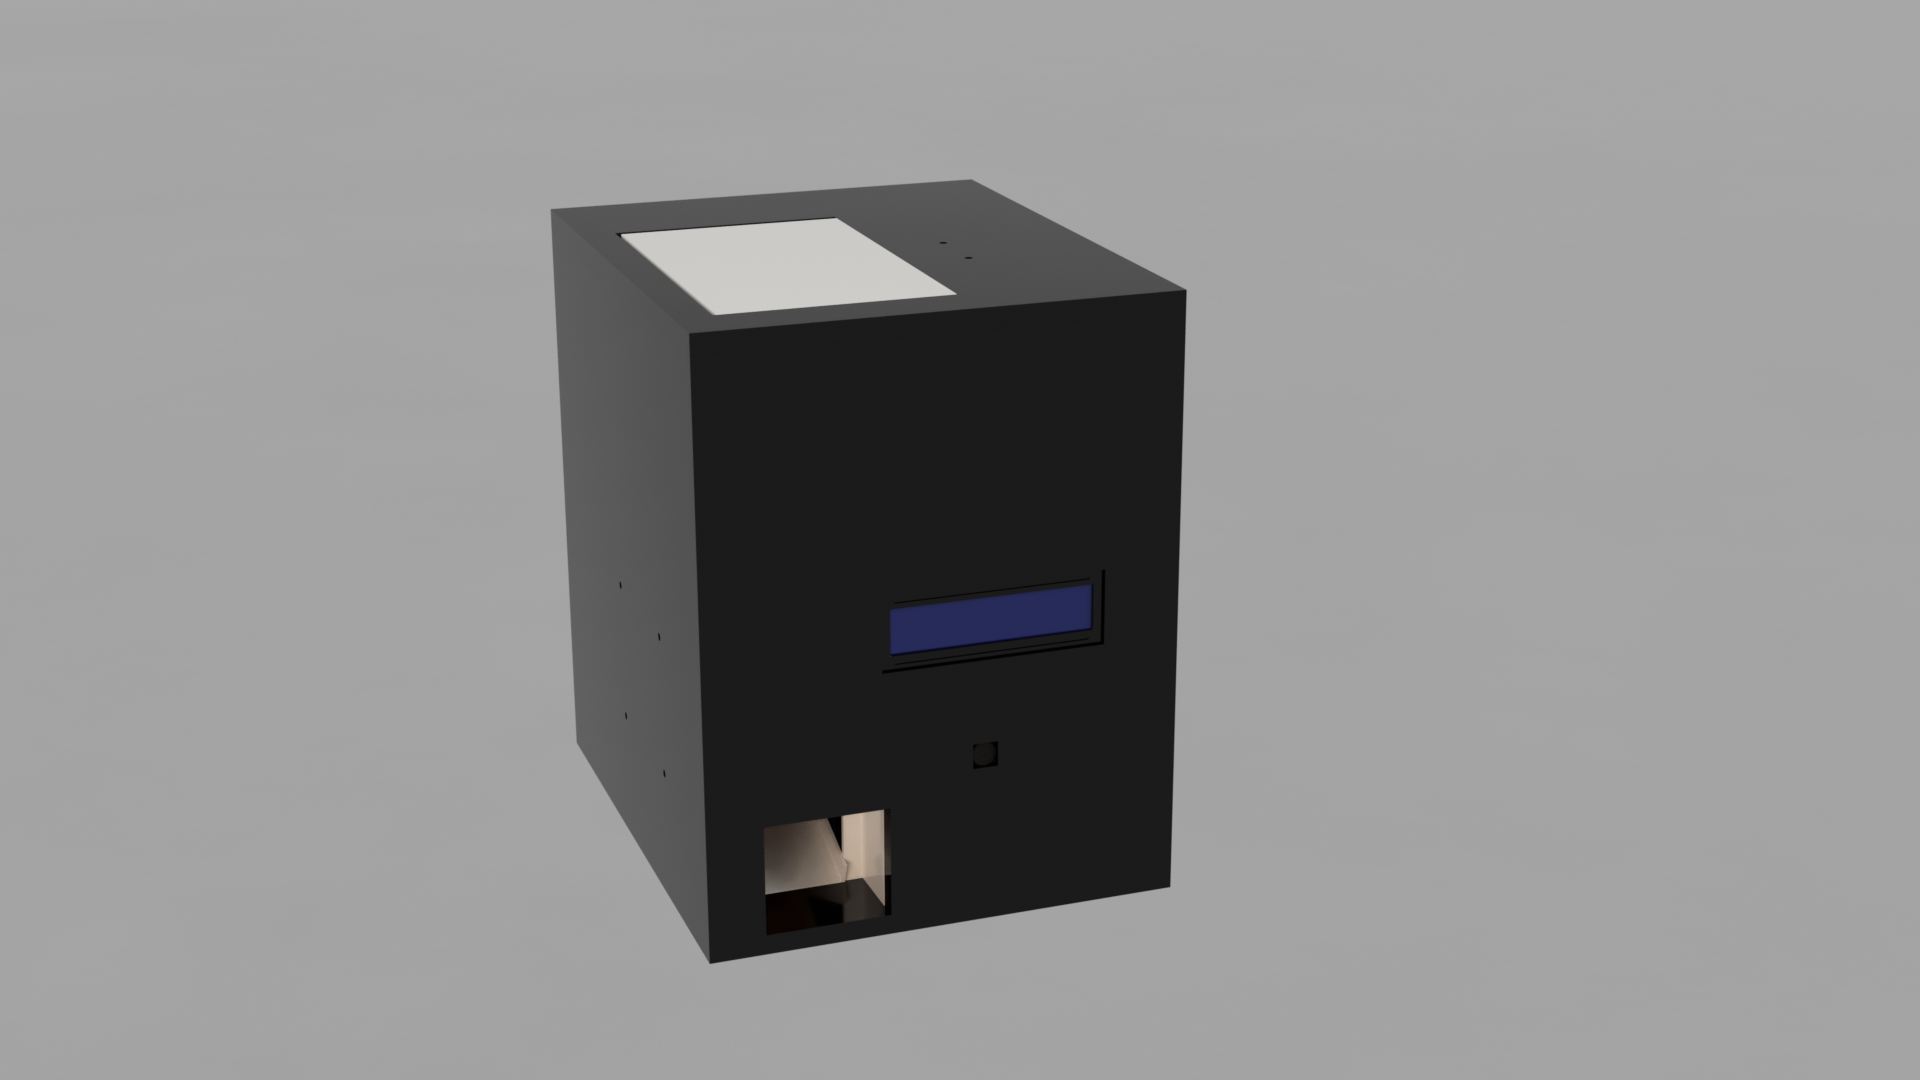
Next I added the Raspberry Pi 3 to the Fusion design, along with the other electronics, including an LCD and Raspberry Pi camera module. I also made a hopper that could store additional treats.
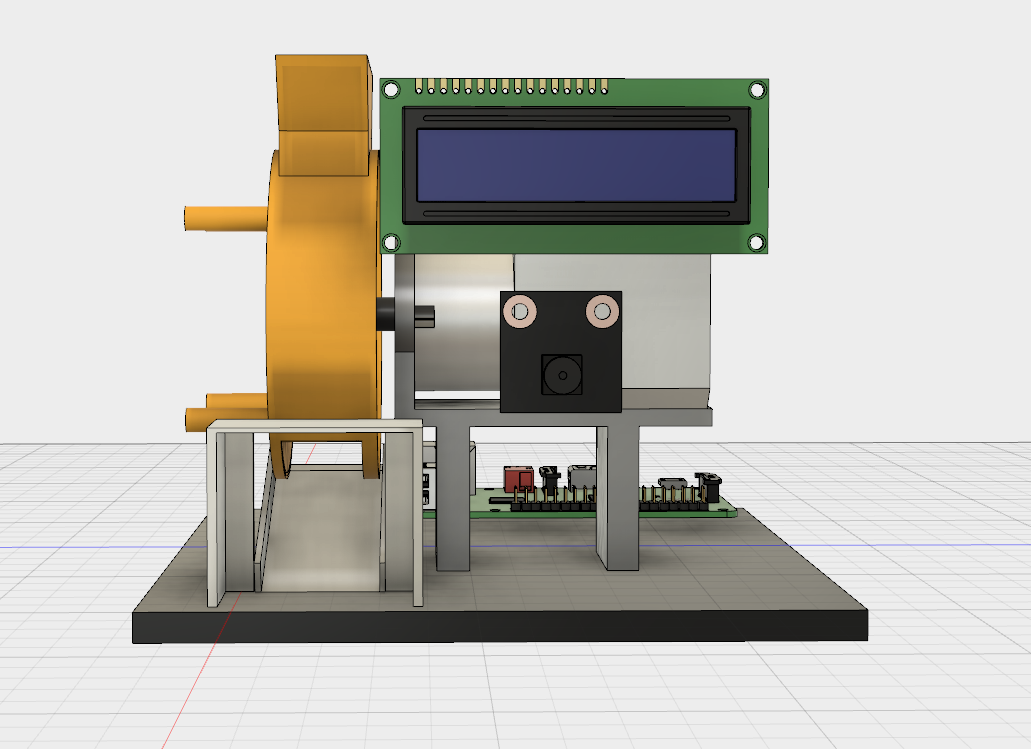
The walls for the treat dispenser are supposed to be cut out of 1/4 inch plywood on a CNC router. There are 7 pieces to it, 4 walls, a floor, and a top and lid piece that can open and close to expose the treats. Lastly, I created a "fancy" handle to open the lid.
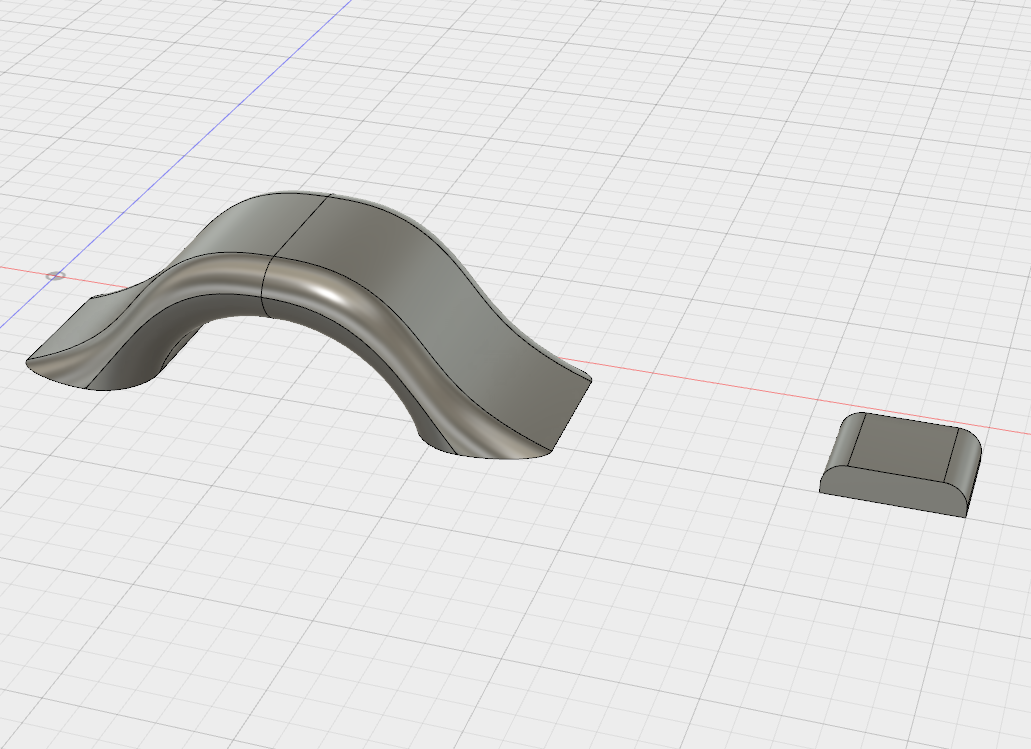
Here is a render of the final design:
3. Setting Up the Pi
DFRobot reached out to me and sent their Raspberry Pi 3 and Raspberry Pi Camera Module. So after I opened up the boxes I got right to work by setting up the SD card. First I went to the Raspberry Pi Downloads page and downloaded the most recent version of Raspbian. I then extracted the file and put it into a convenient directory. You can't just copy/paste a .img file to an SD card, you have to "burn it" onto the card. You can download a burning utility like Etcher.io to easily transfer the OS image. After the .img file was on my SD card I inserted it into the Raspberry Pi and gave it power. After about 50 seconds I unplugged the cord and removed the SD card. Next I put the SD card back into my PC and went to the "boot" directory. I opened up Notepad and saved it as a blank file named "ssh" with NO extension. There was also a file I added called "wpa_supplicant.conf" and put this text into it:
network={ ssid=<"SSID"> psk=<"PASSWD">}
Then I saved and ejected the card and put it back into the Raspberry Pi 3. This should now allow for the usage of SSH and connecting to WiFi.
4. Getting the Camera Ready
By default, the camera is disabled on the Pi, so you must open the terminal type:
sudo raspi-config
to bring up the menu. Go to "interfacing options" and then enable the camera. Now just select "Finish" and insert the ribbon cable of the camera module into the correct area of the Pi.
5. Installing Software
There are several different softwares that can stream video, such as VLC and motion, but I decided to use the mjpeg-streamer due to its low latency and easy installation. According to the instructions on the site, do a:
git clone https://github.com/jacksonliam/mjpg-streamer.git
Into a folder, then type:
sudo apt-get install cmake libjpeg8-dev
To install the needed libraries. Change your directory into the folder you downloaded and then type:
make
Followed by:
sudo make install
To compile the software. Finally enter:
export LD_LIBRARY_PATH=.
And to run it type:
./mjpg_streamer -o "output_http.so -w ./www" -i "input_raspicam.so"
You can access the stream by heading to:
http://<The Pi's Local IP>:8080/stream.html
To view the stream.
6. Setting Up a Webserver
In order to get the machine to be controlled externally by WiFi I needed a webserver. A webserver basically serves up webpages when requested, usually by a browser. I wanted something quick and simple to setup and use, taking Apache off the table. I also wanted to interface the webserver with Python so I could control the Arduino Uno with PySerial. This quest ultimately led me to Flask, a nice Python library that let's users quickly create a webserver. The full code is attached to this project page. The python script basically sets up 2 webpages, one that is hosted at the root directory, '/', and another that is hosted at '/dispense'. The index page has an HTML form that when submitted sends a post request to the dispense page. The dispense page then checks if the post value is correct, and if it is the message 'D\n' gets sent via serial to the Arduino Uno.
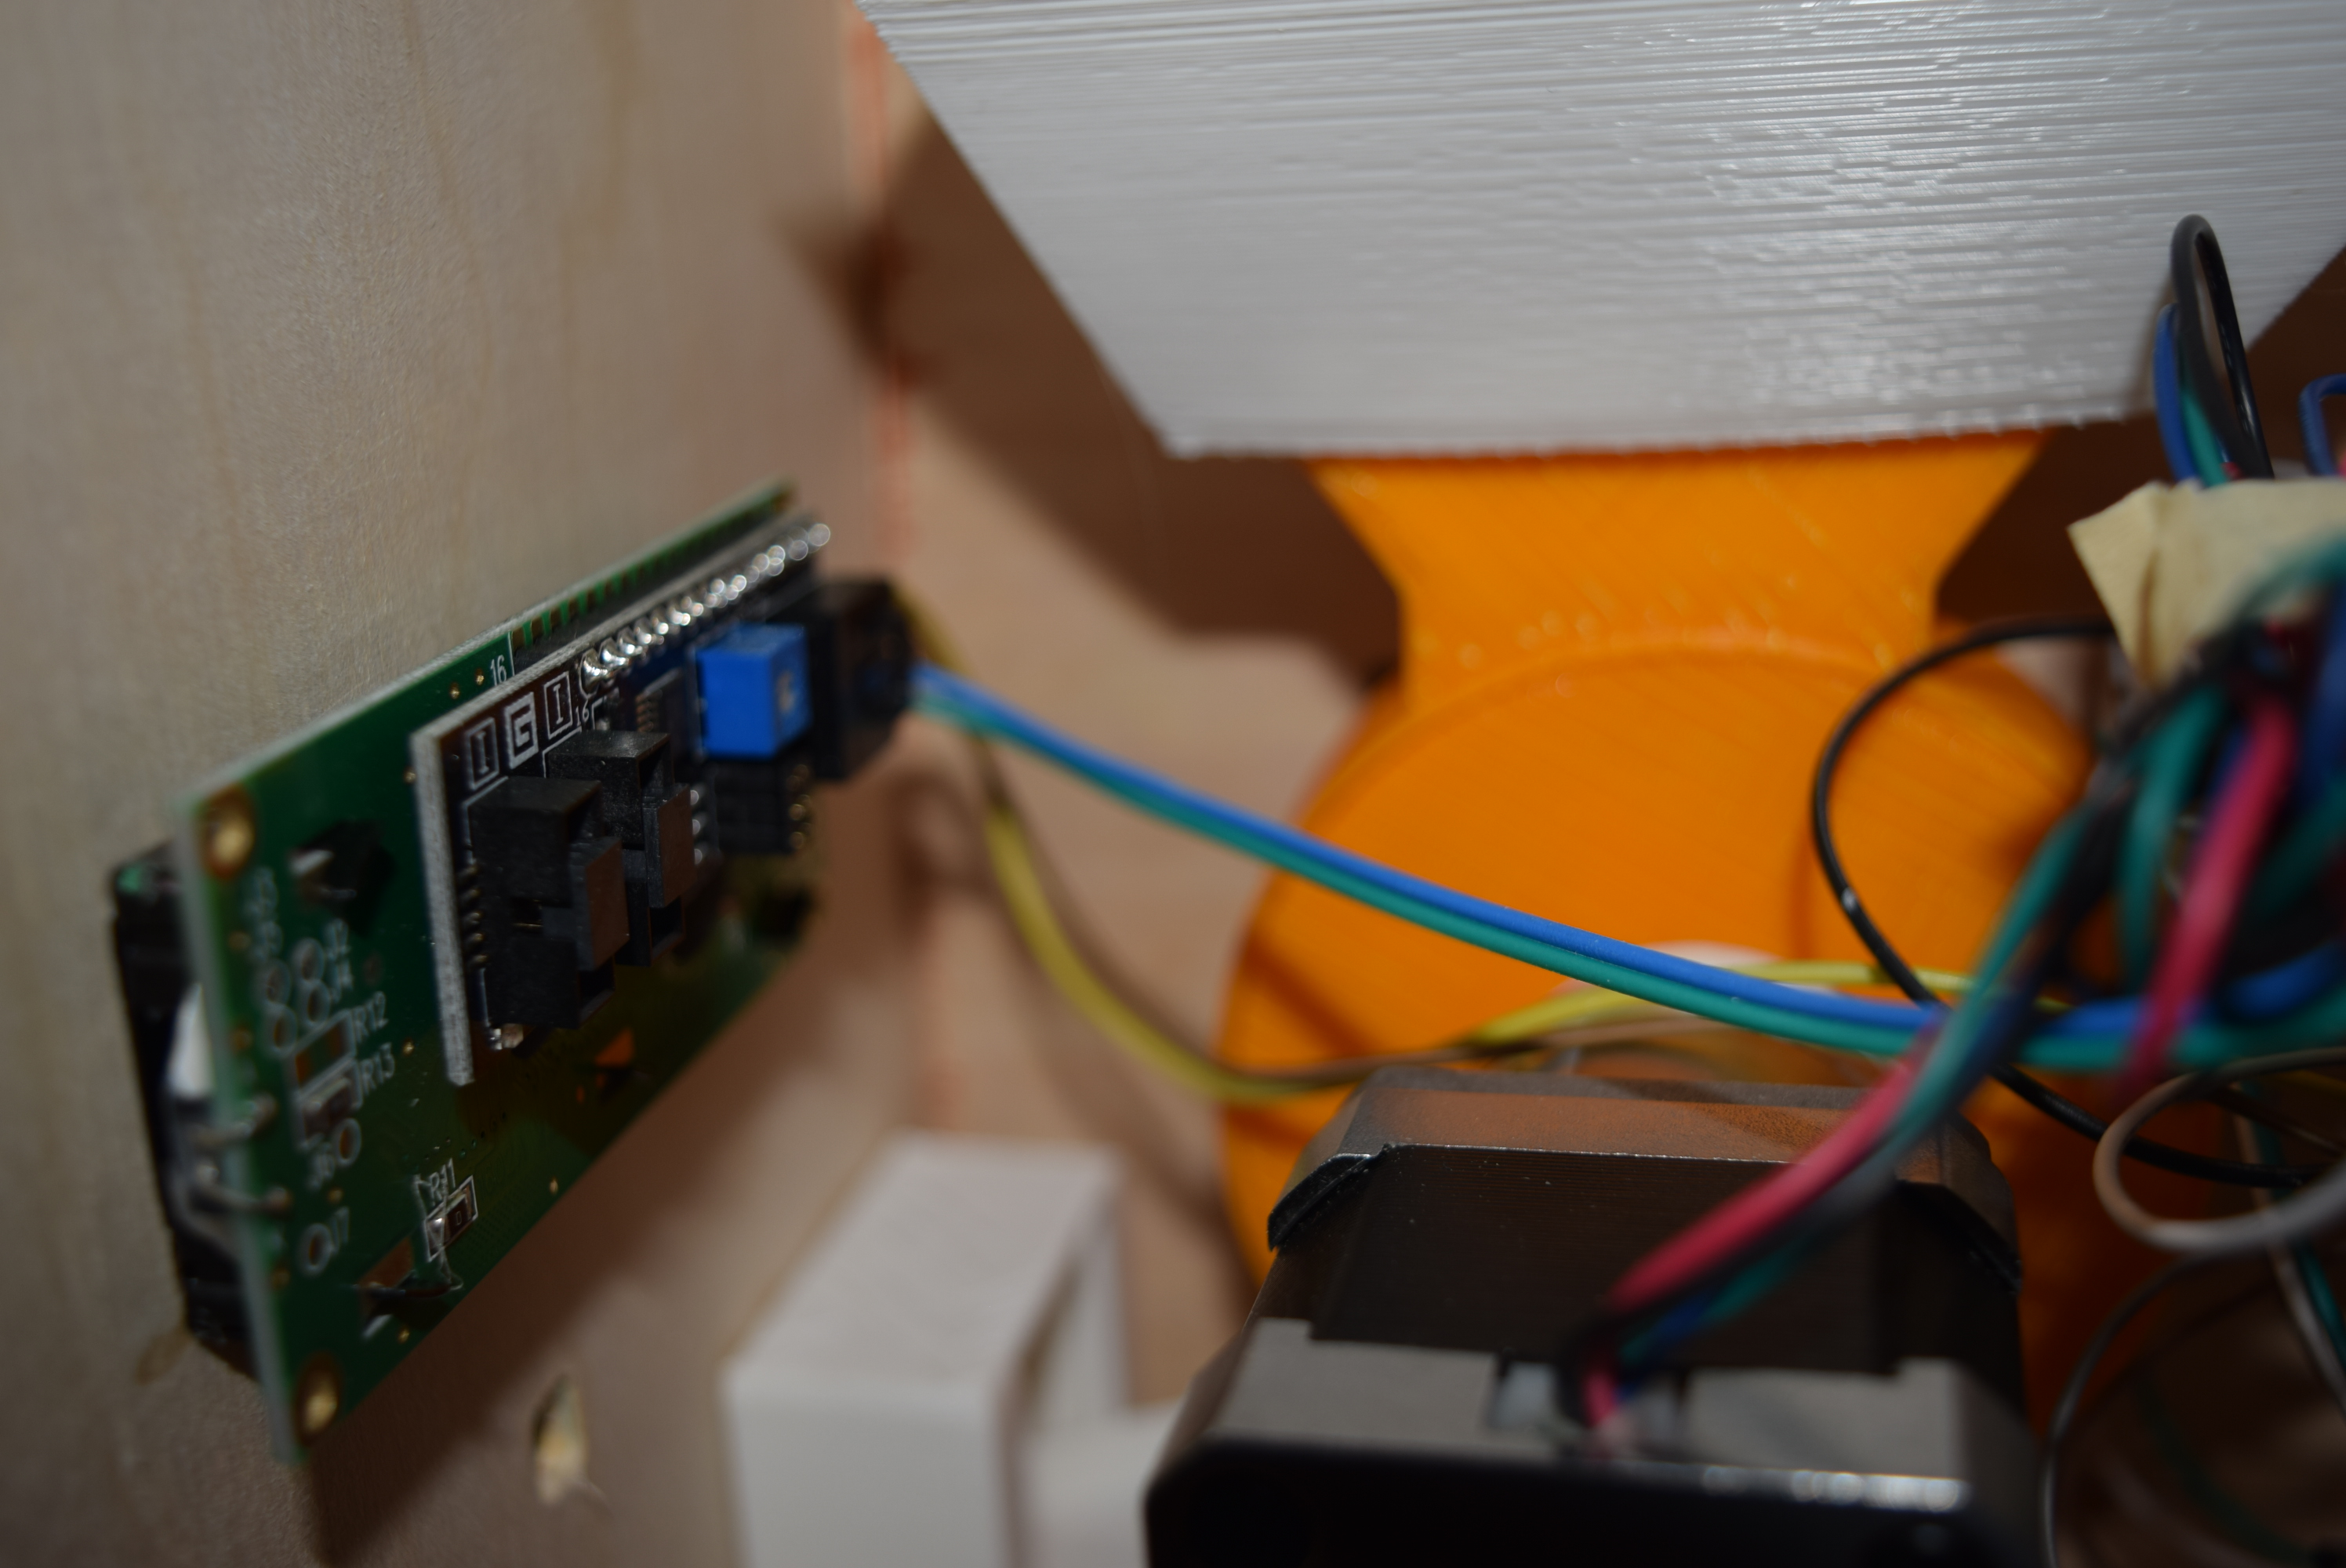
7. Controlling IO
I decided upon using the DRV8825 to drive my stepper motor, mainly due to it only needing 2 IO pins along with having adjustable current limiting. I tried using an L293D but it couldn't handle the load of the stepper motor. The DRV8825 is controlled by pulsing the STEP pin via PWM, and the direction is controlled by pulling the DIR pin high or low. The stepper motor I'm using has a 1.2 amp draw, so I adjusted the VREF voltage to .6V. Next was the LCD. I wanted to use I2C to reduce the amount of IO needed and to simplify the code. To install the library, simply search for "LiquidCrystal_I2C" and install it. Finally, the Arduino Uno checks for new information in the serial buffer and if it matches 'D'. If it does, the Uno causes the stepper motor to move 180 degrees and then -72 degrees to prevent treats from getting lodged.
8. Using the Machine
So now you have a brand new treat dispenser, but how should it be used? There is a livestream from the camera that is hosted at
http://<The Pi's Local IP>:8080/stream.html
and the page to control the treat dispenser is at http://<The Pi's local ip>:5000/ where you can go and click the button to get some treats.


Unlock advanced smart home automations with the $8.9 DFRobot C4002 mmWave sensor. Learn to extract raw speed, energy, and direction data using ESPHome.
REVIEWS
Need an ORP sensor? We compare entry-level Arduino meters, 24/7 online probes, and IP68 industrial RS485 sensors to help you build the best water IoT system.
SELECTION GUIDE
This guide provides a side-by-side comparison and selection analysis for 5 core Electrical Conductivity (EC) sensors from DFRobot, helping you quickly identify the most suitable product based on measurement range (K-value), application scenario (industrial/laboratory), and system architecture (Analog/RS485).
SELECTION GUIDE