New: seeMote Cube for visionOS Developers - Build physical input for Apple Vision Pro apps. Learn More ›
ESP32 Arduino: Getting temperature from a DHT22 sensor
In this ESP32 tutorial, we will check how to get temperature measurements on the Arduino core running on the ESP32, using a DHT22 temperature and humidity sensor. The tests were performed using a DFRobot’s ESP32 module integrated in a ESP32 development board.
Introduction
In this ESP32 tutorial, we will check how to get temperature measurements on the Arduino core running on the ESP32, using a DHT22 temperature and humidity sensor.
Note that DHT22 is the common name given to the device but its real name is AM2302 [1]. You can consult the datasheet here.
The interface with the DHT22 is quite simple since it uses a single wire protocol [2], meaning we just need to connect it to a single GPIO of our microcontroller.
It works with a supply voltage in the range of 3.3 V to 5.5 V [2], so it can be easily used with the ESP32.
In order to interact with the sensor using a higher level API that abstracts the lower level details of the one-wire communication, we will use this Arduino library.
To facilitate the interaction with the sensor, I’m using a DFRobot DHT22 module which already has all the electronics needed and exposes a wiring terminal that facilitates the connections.
The tests were performed using a DFRobot’s ESP32 module integrated in a ESP32 development board.
Installing the library
The easiest way to install the library is via the Arduino IDE library manager. To open it, go to Sketch -> Include library -> Manage libraries and the library manager should appear.
There, type “DHT22” on the search bar and install the one named “DHT sensor library for ESPx“, as highlighted in figure 1.
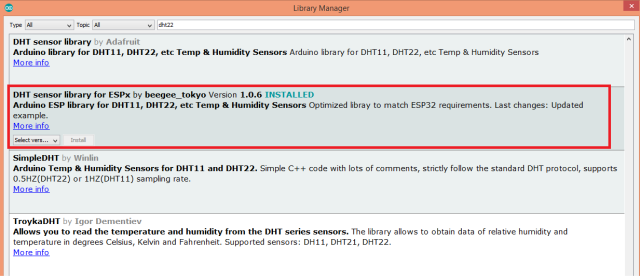
Figure 1 – Installing the DHT22 library for the ESP32.
The electric diagram
As mentioned, there’s only the need for a single pin of the microcontroller to be connected to the DHT22, so the schematic diagram for the connection of the ESP32 to the sensor is very simple, as can be seen in figure 2.

Figure 2 – Electric diagram to connect the ESP32 and the DHT22.
Depending on your sensor module, the data pin may be labeled differently, so it is represented in the previous schematic with the generic name “data”. Others may not even be labeled such as the module I’m using, where the pins can be distinguished by the colors of the wires:
- Black: GND
- Red: VCC
- Green: Data
Please check carefully the pins and labeling of your DHT22 module to avoid damaging it when connecting it to the ESP32.
Depending on your ESP32 board, it may have a 3.3 V output pin that is able to be used as power supply for the DHT22. Nonetheless, if you are not sure if the pin exists or what is the maximum current it can supply, the best option is to use an external power supply such as this. In that case, don’t forget to have a common GND connection between the ESP32 and the DHT22.
The code
The first think we need to do is including our newly installed DHT library, so we can have access to the functionalities needed to get temperature measurements.
#include "DHTesp.h"
Then we need to declare an object of class DHTesp, which will expose the methods we need to obtain the temperature. We will declare it globally so we can later access it both in the Arduino setup and the loop functions.
DHTesp dht;
Moving on to the Arduino setup, we start by opening a Serial connection, to later output the temperature measurements we will obtain from the DHT sensor.
Serial.begin(115200);
To finalize the Arduino setup function, we need to initialize the sensor interface and to specify the pin where it is connected. We do this by calling the setup method on our previously declared DHTesp object.
As input, it receives the number of the microcontroller pin where the sensor is connected [3]. I will be using GPIO 27, but you can try with others.
Note that this function call has an additional optional argument for specifying the sensor module we are using, since the library is compatible with sensors other than the DHT22 [3]. This value is passed as an enumerated value.
In case we don’t specify any argument for this parameter, then it will default to the enum value AUTO_DETECT [3], which means it will try to detect automatically the sensor type.
We will then take advantage of this feature and not pass any additional parameter, so the library tries do detect the sensor type automatically.
dht.setup(27);
Moving on to the main loop function, we will periodically get the current temperature by calling the getTemperature method on our previously initialized DHTesp object.
This function takes no arguments and returns the temperature in degree Centigrade, as a float [3].
float temperature = dht.getTemperature();
Then we will print the obtained value to the serial interface.
Serial.print("Temperature: ");
Serial.println(temperature);
To finalize, we will do a small 10 seconds delay before we get another temperature measurement.
delay(10000);
The final source code can be seen below.
#include "DHTesp.h"
DHTesp dht;
void setup()
{
Serial.begin(115200);
dht.setup(27);
}
void loop()
{
float temperature = dht.getTemperature();
Serial.print("Temperature: ");
Serial.println(temperature);
delay(10000);
}
Testing the code
To test the code, simply compile it and upload it to your ESP32 device using the Arduino IDE. When the whole procedure finishes, open the serial monitor and check the result.
You should get an output similar to figure 3, which shows multiple temperature measurements getting printed.

Figure 3 – Temperature measurements obtained from the DHT22 with the ESP32.
DFRobot supply lots of esp32 arduino tutorials and esp32 projects for makers to learn.


Compare six 4K USB cameras using IMX415, IMX274, and IMX678 sensors across resolution, color, field of view, distortion, Linux, and low-light tests.
REVIEWS
This article is an engineering test note, mainly intended to demonstrate the actual performance of the module in common development scenarios, rather than a laboratory calibration report.
REVIEWS
Visit DFRobot at FAB26 Boston for hands-on AI workshops, open-source hardware demos, and practical insights into K–12 maker education.
NEWS