New: seeMote Cube for visionOS Developers - Build physical input for Apple Vision Pro apps. Learn More ›
TUTORIALS ESP32 In this ESP32 tutorial we will check how to use structs as items in FreeRTOS queues. This will allow us to store more complex messages in queues, facilitating the process of inter-task communication. The tests were performed using a DFRobot’s ESP32 module device integrated in a ESP32 development board.
ESP32 Arduino: Using structs as items in FreeRTOS queues
DFRobot
Apr 19 2018 266608
In this ESP32 tutorial we will check how to use structs as items in FreeRTOS queues. This will allow us to store more complex messages in queues, facilitating the process of inter-task communication. The tests were performed using a DFRobot’s ESP32 module device integrated in a ESP32 development board.
Introduction
In this ESP32 tutorial we will check how to use structs as items in FreeRTOS queues. This will allow us to store more complex messages in queues, facilitating the process of inter- task communication.
You can check a more detailed introduction about FreeRTOS queues on this previous tutorial.
In our program, we will focus on the process of inserting and consuming items from the queue. Thus, we will create a simple data struct, create some variables of that data type, insert them in the queue and then consume them.
Our data struct will represent an IoT sensor measurement. In a real application use case, we could have, for example, one task (or multiple) obtaining measurements from different devices and then sending them to a dispatcher task that would send the measurements to the cloud. The communication mechanism used between the tasks could then be a queue, where each item would represent a measurement’s information.
Naturally this is one of that many possible use cases and you should adapt the data structure to the needs of your application’s architecture.
The tests were performed using a DFRobot’s ESP32 module device integrated in a ESP32 development board.
The code
The first thing we are going to do is declaring our struct. As mentioned, we will create a testing struct that represents an IoT sensor measurement, just for demonstration purposes. For a more detailed tutorial about using structs on the Arduino environment, please consult this blog post.
Our struct will be equal to the one presented on the mentioned tutorial and will have three fields: a device ID, a measurement type and a measurement value. The first two members will be of type int and the third will be of type float.
struct sensor {
  int deviceId;
  int measurementType;
  float value;
};
Now that we have finished our struct declaration, we will declare a global variable of type QueueHandle_t. This type is used to reference a FreeRTOS queue, which we will create later.
QueueHandle_t queue;
Moving on to the Arduino setup function, we will open a serial connection, in order to output the results of our program and obtain them on the Arduino IDE serial monitor when testing the code.
Serial.begin(115200);
After this, we will create the FreeRTOS queue. To do it, we simply need to call the xQueueCreate function. This function receives as first input the maximum number of items that the queue can hold and as second input the size, in bytes, of an element of the queue [1]. All the elements of the queue should have the same size.
For the first argument, we will pass the value 10, which means that the queue can hold, at most, 10 items at a single time. You can test with other value if you want.
The size of each item will be equal to the size of the structure we have previously declared. To get its value, in bytes, we can use the sizeof function.
If the queue is successfully created, the xQueueCreate returns an handle for the queue, which is of type QueueHandle_t. This type corresponds to the type of the global variable we declared at the beginning of the program and so we will assign result of the function to that variable.
queue = xQueueCreate( 10, sizeof( struct sensor ) );
In case the memory for the queue couldn’t be allocated, then the function returns NULL instead of a queue handle [1]. Thus, we will do an error checking a print a message in case the queue was not created.
if(queue == NULL){
    Serial.println("Error creating the queue");
}
Moving on to the Arduino loop function, we will start to insert items on the queue. We will do this in a loop with 10 iterations, which corresponds to the size of the queue.
for(int i = 0; i<10; i++){
    //Queue insertion code
}
In each iteration, we will create a variable with the type of our struct and assign values to its fields. We will assign the current iteration value to the deviceId field, so it varies for each message.
We will assign some arbitrary fixed values to the other fields.
struct sensor mySensor;

mySensor.deviceId = i;
mySensor.measurementType = 1;
mySensor.value = 20.4;
To insert the item in the queue, we need to call the xQueueSend function, which will insert it at the end of the queue [2].
As first argument, the function receives the queue handle we previously obtained. As second argument, it receives a pointer to the item we want to insert. Note that even tough we are passing a pointer to the item, it will actually be copied into the queue [2], not just referenced.
In our case, it means that the whole struct will be copied into the queue. For larger data structures, it may be a better option to use the queue to store references to those structures, but that is a more advanced use case that we will not cover here.
The last argument corresponds to the maximum amount of time the task should block waiting for space to become available on the queue, in case it is full, to be able to insert the item [2].
We will pass it the value portMAX_DELAY, which means that the task should wait indefinitely in case the queue is full. Nonetheless, we will design or program flow in such a way that ensures this never happen.
for(int i = 0; i<10; i++){

    struct sensor mySensor;
    mySensor.deviceId = i;
    mySensor.measurementType = 1;
    mySensor.value = 20.4;

    xQueueSend(queue, &mySensor, portMAX_DELAY);
}
Now that we have an insertion loop, we will also design a similar consumption loop, to get the inserted items and print their values to the serial port.
Before the loop, we will declare another variable with the type of our struct, which we will use as buffer to receive the item from the queue. Since we will get each item and print its value right away in the same iteration, we can reuse this variable to get all the items of the queue.
struct sensor element;
Then, inside another loop with 10 iterations, we will get each item with a call to the xQueueReceive function.
As first argument, the function receives the queue handle which we have stored on the global variable. As second argument, it receives a pointer to the buffer into which the item will be copied, which we declared before the loop. As third argument, it receives the maximum amount of time the task should block waiting for an item, in case the queue is empty [3]. Again, we will pass the portMAX_DELAY value, taking into account that the task will never block because we will never call the function when the queue is empty.
After receiving the item, which will be of our struct type, we will print the value of each of its members to confirm they match the values of the previously inserted items.
for(int i = 0; i<10; i++){
    xQueueReceive(queue, &element, portMAX_DELAY);

    Serial.print("Device ID: ");
    Serial.println(element.deviceId);

    Serial.print("Measurement type: ");
    Serial.println(element.measurementType);

    Serial.print("Value: ");
    Serial.println(element.value);

    Serial.println("----------------");
}
At the end, we will do a small four seconds delay between each iteration of the loop. The final source code can be seen below. It already includes this delay and, at the start of the Arduino loop, an error checking in case the queue was not successfully created.
struct sensor {
  int deviceId;
  int measurementType;
  float value;
};

QueueHandle_t queue;

void setup() {

  Serial.begin(115200);

  queue = xQueueCreate( 10, sizeof( struct sensor ) );

  if(queue == NULL){
    Serial.println("Error creating the queue");
  }

}

void loop() {

  if(queue == NULL){
    Serial.println("Queue was not created");
    return;
  }

  for(int i = 0; i<10; i++){

    struct sensor mySensor;
    mySensor.deviceId = i;
    mySensor.measurementType = 1;
    mySensor.value = 20.4;

    xQueueSend(queue, &mySensor, portMAX_DELAY);
  }

  struct sensor element;

  for(int i = 0; i<10; i++){
    xQueueReceive(queue, &element, portMAX_DELAY);

    Serial.print("Device ID: ");
    Serial.println(element.deviceId);

    Serial.print("Measurement type: ");
    Serial.println(element.measurementType);

    Serial.print("Value: ");
    Serial.println(element.value);

    Serial.println("----------------");
  }

  Serial.println();
  delay(4000);
}
Testing the code
To test the code, simply compile it and upload it to your ESP32 using the Arduino IDE. When it finishes, open the serial monitor and check the result. You should get an output similar to figure 1, which shows the values of the items obtained from the queue.
As expected, the items obtained are equal to the ones originally inserted on the queue. The device ID is incremented in each item and the remaining values are equal.
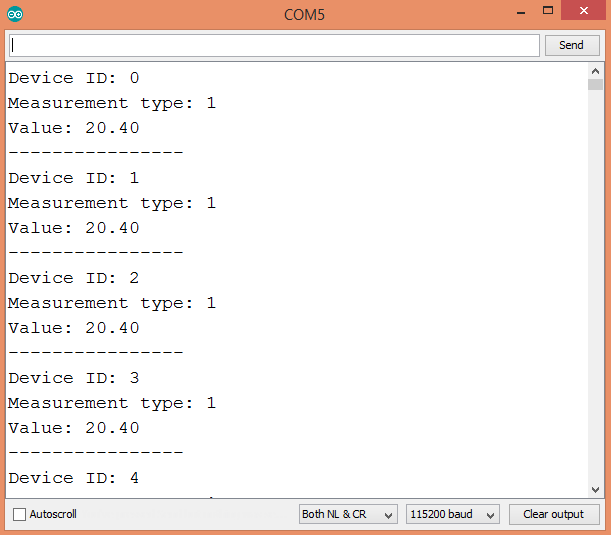
Figure 1 – Output of the program.
DFRobot supply lots of esp32 arduino tutorials and esp32 projects for makers to learn.
Recent Blogs

Hands-On Test of 6 New 4K USB Cameras: Resolution, Color, Field of View, and Compatibility
Compare six 4K USB cameras using IMX415, IMX274, and IMX678 sensors across resolution, color, field of view, distortion, Linux, and low-light tests.
REVIEWS Jul 23 2026

Fermion BMI323 6-Axis IMU Engineering Test Notes: Accelerometer, Gyroscope, Step Counter, and I2C Address Verification
This article is an engineering test note, mainly intended to demonstrate the actual performance of the module in common development scenarios, rather than a laboratory calibration report.
REVIEWS Jul 15 2026

Meet DFRobot at FAB26 Boston 2026: AI, Open-Source Hardware & Maker Education
Visit DFRobot at FAB26 Boston for hands-on AI workshops, open-source hardware demos, and practical insights into K–12 maker education.
NEWS Jul 15 2026