New: seeMote Cube for visionOS Developers - Build physical input for Apple Vision Pro apps. Learn More ›
TUTORIALS ESP32 The objective of this ESP32 Arduino Tutorial is to explain how to set a soft AP using the ESP32 and the Arduino core. The tests of this ESP32 tutorial were performed using a DFRobot’s ESP32 module device integrated in a ESP32 development board.
The tests of this ESP32 tutorial were performed using a DFRobot’s ESP32 module device integrated in a ESP32 development board.
ESP32 Arduino Tutorial: Setting a soft AP
DFRobot
Apr 24 2018 267945
The objective of this ESP32 Arduino Tutorial is to explain how to set a soft AP using the ESP32 and the Arduino core. The tests of this ESP32 tutorial were performed using a DFRobot’s ESP32 module device integrated in a ESP32 development board.
Introduction
The objective of this post is to explain how to set a soft AP using the ESP32 and the Arduino core. This way, other devices can connect to the ESP32 and exchange data with it without the need to connect to a conventional router.
This may useful, for example, to configure the ESP32 before actually connecting to a Wireless network, in a commercial product. With this feature, we can serve a simple HTML page that the user accesses to input the credentials from his home network, in order for the ESP32 to later connect to it.
In this introductory tutorial we are simply going to explore the basics of setting the soft AP, since many other functionality can then be built on top of it.
The tests of this ESP32 tutorial were performed using a DFRobot’s ESP32 module device integrated in a ESP32 development board.
The code
First of all, we are going to include the WiFi.h library, which exposes an extern variable called WiFi that we are going to use to set our soft AP. This is the same variable we have been using in other tutorials to connect to WiFi networks.
#include <WiFi.h>
Since we are going to set a soft AP, we need to specify the network name (SSID) that will be shown to stations that can connect to it. We also need to specify a password, in order to avoid undesirable stations to connect to our AP. We are going to specify both of these variables in global constants.
const char *ssid = "MyESP32AP";
const char *password = "testpassword";
After this, we will do the remaining code in the Arduino setup function. We begin by starting a serial connection, so we can output some results of our program. This way, we can check the results in the Arduino IDE serial monitor.
Serial.begin(115200);
After this, to set our soft AP, we simply need to call the softAP method of the WiFi extern variable, passing as input both the SSID and the password defined before.
Note that this function has some more optional parameters that have default values assigned. These are the channel, an integer specifying if the SSID should be hidden and the maximum number of connections. Besides that, the password is also an optional parameter that defaults to null, which would allow to connect to the AP without a password. Nonetheless, for our example, we specified it.
WiFi.softAP(ssid, password);
To finalize, we are going to obtain and print the IP of the soft AP by calling the softAPIP method of the WiFi extern variable. This method takes no arguments and will return the IP address.
Serial.println(WiFi.softAPIP());
The final source code for this ESP32 tutorial can be seen bellow. It includes all the previously analyzed code and some additional prints to make the output more easily readable.
#include <WiFi.h>

const char *ssid = "MyESP32AP";
const char *password = "testpassword";

void setup() {

  Serial.begin(115200);
WiFi.softAP(ssid, password);

  Serial.println();
  Serial.print("IP address: ");
  Serial.println(WiFi.softAPIP());

}

void loop() {}
Testing the code
To test the code, simply compile it and upload it to the ESP32 board using the Arduino IDE. After the procedure is finished, open the serial monitor of the Arduino IDE. You should get an output similar to figure 1, which shows the IP of the soft AP.
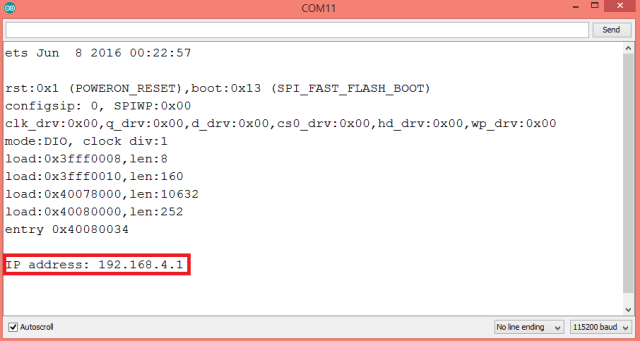
Figure 1 – Output of the program.Then, if you check the available networks on your computer, a new one should be listed, with the name we defined in the code, as shown in figure 2.
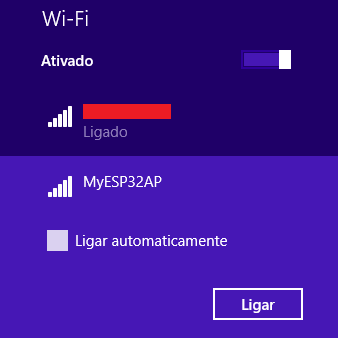
Figure 2 – ESP32 Soft AP appearing as available network (Windows 8, Portuguese interface).
DFRobot supply lots of esp32 arduino tutorials and esp32 projects for makers to learn.
Recent Blogs

Hands-On Test of 6 New 4K USB Cameras: Resolution, Color, Field of View, and Compatibility
Compare six 4K USB cameras using IMX415, IMX274, and IMX678 sensors across resolution, color, field of view, distortion, Linux, and low-light tests.
REVIEWS Jul 23 2026

Fermion BMI323 6-Axis IMU Engineering Test Notes: Accelerometer, Gyroscope, Step Counter, and I2C Address Verification
This article is an engineering test note, mainly intended to demonstrate the actual performance of the module in common development scenarios, rather than a laboratory calibration report.
REVIEWS Jul 15 2026

Meet DFRobot at FAB26 Boston 2026: AI, Open-Source Hardware & Maker Education
Visit DFRobot at FAB26 Boston for hands-on AI workshops, open-source hardware demos, and practical insights into K–12 maker education.
NEWS Jul 15 2026