New: seeMote Cube for visionOS Developers - Build physical input for Apple Vision Pro apps. Learn More ›
TUTORIALS ESP32ESP8266MicroPython The objective of this ESP32 / ESP8266 MicroPython Tutorial is to explain how to create a file in MicroPython. The code was tested on both the ESP32 and the ESP8266.
ESP32 / ESP8266 MicroPython Tutorial: Writing a file
DFRobot
Apr 26 2018 262740
The objective of this ESP32 / ESP8266 MicroPython Tutorial is to explain how to create a file in MicroPython. The code was tested on both the ESP32 and the ESP8266.
Introduction
The objective of this ESP32 / ESP8266 MicroPython Tutorial is to explain how to create a file in MicroPython. The code was tested on both the ESP32 and the ESP8266. The prints shown here were from the tests on the ESP32.
The file will be created on MicroPython’s internal file system, which uses a FAT format and is stored in the FLASH memory [1].
The code
First of all, we will start by opening the file for write. Note that the file doesn’t need to be previously created. To do so, we call the open function, passing as input the name of the file to create and the mode. We will create a file named “myTestFile.txt” and, as second argument, we pass the string “w“, indicating that we want to write content.
This call will return an object of class TextIOWrapper, which we will store in a variable called file. We will need this object to write the actual content to the file. Just to confirm, we will also print the type of the object returned.
file = open ("myTestFile.txt", "w")
print(type(file))
Check the expected output at figure 1. As can be seen, the object returned by the call is of class TextIOWrapper.
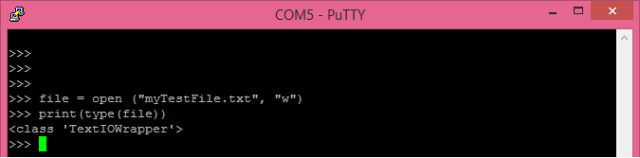
Figure 1 – Opening a file for writing with MicroPython.
Now, to write the actual content, we will call the write method on the file object, passing as input the content we want to write. This call will return the number of bytes written [1]. So, let’s write some content with the command shown bellow.
file.write("Writing content from MicroPython")
You should get an output similar to figure 2, which indicates 32 bytes were written to the file.
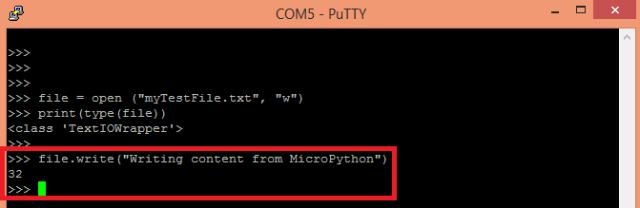
Figure 2 – Writing content to a file.
In the end, we need to close the file, by calling the close method on our file object.
file.close()
We can confirm the creation of the file by listing the existing files in the current directory. To do so, we just need to import the os module and call the listdir function.
import os
os.listdir()
Check the expected result in figure 3, which shows our created “myTestFile.txt“. Note that there is a pre-existing file called boot.py, which is a special file from MicroPython that runs when the board boots.
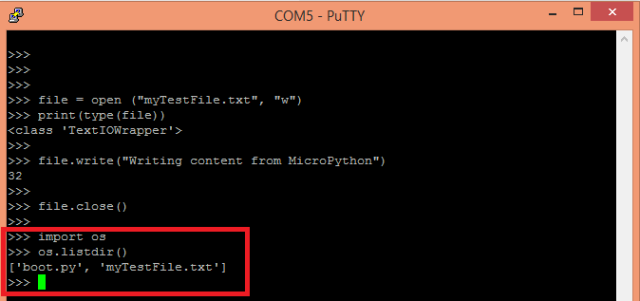
Figure 3 – Listing the files in the current directory.
Just to finish our tutorial, we will rename the newly created file from “myTestFile.txt” to just “testFile.txt”. To do so, we will use the rename function of the os module. This function receives as first argument the actual file name, and as second argument the new file name. After this method call, we will print the contents of the directory again.
os.rename('myTestFile.txt', 'testFile.txt')
os.listdir()
You can check bellow at figure 4 the expected result.

Figure 4 – Renaming the created file with the rename function.
DFRobot supply lots of esp32 arduino tutorials and esp32 projects for makers to learn.
Recent Blogs

Hands-On Test of 6 New 4K USB Cameras: Resolution, Color, Field of View, and Compatibility
Compare six 4K USB cameras using IMX415, IMX274, and IMX678 sensors across resolution, color, field of view, distortion, Linux, and low-light tests.
REVIEWS Jul 23 2026

Fermion BMI323 6-Axis IMU Engineering Test Notes: Accelerometer, Gyroscope, Step Counter, and I2C Address Verification
This article is an engineering test note, mainly intended to demonstrate the actual performance of the module in common development scenarios, rather than a laboratory calibration report.
REVIEWS Jul 15 2026

Meet DFRobot at FAB26 Boston 2026: AI, Open-Source Hardware & Maker Education
Visit DFRobot at FAB26 Boston for hands-on AI workshops, open-source hardware demos, and practical insights into K–12 maker education.
NEWS Jul 15 2026