New: seeMote Cube for visionOS Developers - Build physical input for Apple Vision Pro apps. Learn More ›
PROJECTS LattePanda Make a simple Arduino GUI in C# to control the LED.Tutorial about Serial communication between computer and Arduino.
LED (generic)
Microsoft Visual Studio 2015
What is Lattepanda?
Step 1: Hardware List
Step 2: Software Setup
Step 3: C# Code
When you click the 'ON' button the LED light will turn on.
LattePanda Project: C# Arduino GUI to control the LED
DFRobot
Apr 03 2018 264876
Make a simple Arduino GUI in C# to control the LED.Tutorial about Serial communication between computer and Arduino.
Hardware components:
LED (generic)
LattePanda 2GB/32GB - A Powerful Windows 10 Mini PC
Arduino UNO & Genuino UNO
Software apps and online services:
Microsoft Visual Studio 2015
Arduino IDE
STORY
This tutorial will tell you how to make a simplest GUI to control your arduino. Basicly, this post is about communication between C# and Arduino: Send data and commands from Computer to an Arduino. So, you will also learn something about C# serial communication.
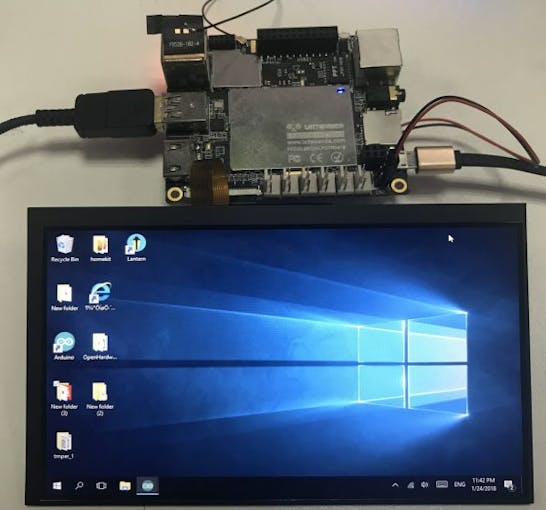
I will use LattePanda to do this project. Make the best use of its touch screen, I can just use my finger to play this GUI! LattePanda is a Win10 single board computer, it alsointegrated Arduino Compatible Processor, so you can control the physical world easily. If you don't have it, no worries, you can connect the Arduino to your PC instead!
What is Lattepanda?
A LattePanda is a complete Windows 10 single board computer. It has everything a regular PC has and can do anything that a regular PC does. It is compatible with almost every gadget you know: printers, joysticks, cameras and more. Any peripherals that work on your PC will work on a LattePanda.
A LattePanda also includes an integrated Arduino compatible co-processor, using hundreds of mature development platforms such as Johnny Five and Cylon, you can easily used it to control and sense the physical world! Whether you are a Windows developer, IoT developer, DIY fanatic, interactive designer, robotics whizz, or maker, a LattePanda single board computercan aid your creative process!
Step 1: Hardware List
LattePanda/ Arduino UNO
Step 2: Software Setup
Visual Studio
Arduino IDE
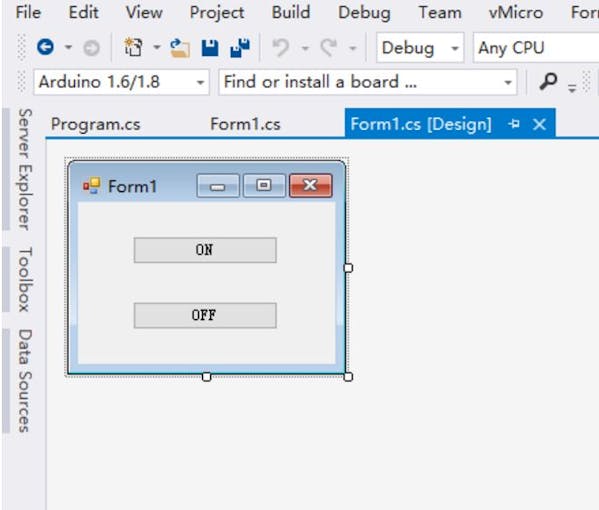
Step 3: C# Code
Creat a new windows Form project. In the Toolbox on the left side, drag out 2 button components from toolbox. Rename them,one is 'ON', one is 'OFF'.
public partial class Form1 : Form    {
        SerialPort port;        public Form1()
        {
            InitializeComponent();            this.FormClosed += new FormClosedEventHandler(Form1_FormClosed);            if (port == null)
            {
                //Change the portname according to your computer
                port = new SerialPort("COM4", 9600);
                port.Open();
            }
        }void Form1_FormClosed(object sender, FormClosedEventArgs e)        {
            if (port != null && port.IsOpen)
            {
                port.Close();
            }
        }private void button1_Click(object sender, EventArgs e)        {

                PortWrite("1");

        }
        private void button2_Click(object sender, EventArgs e)
        {

                PortWrite("0");

        }private void PortWrite(string message)        {
            if (port != null && port.IsOpen)
            {
                port.Write(message);
            }
        }
    }
Step 4: Arduino Sketch
Open Arduino IDE, Upload the following code to your board.
const int LedPin = 3;int ledState = 0;void setup()
{
  pinMode(LedPin, OUTPUT);

  Serial.begin(9600);
}void loop()
{
    char receiveVal;

    if(Serial.available() > 0)
    {
        receiveVal = Serial.read();

       if(receiveVal == '1')
          ledState = 1;
       else
          ledState = 0;
    }

    digitalWrite(LedPin, ledState);

    delay(50);
}
Step 5: Showtime

When you click the 'ON' button the LED light will turn on.
So far so good?
If you other things instead of the LED, then you can use your mouse to control everything!!
That's a very useful function. Hope this tutorial is useful for you! If you have any questions, please let me know!
Related Product


Recent Blogs

Hands-On Test of 6 New 4K USB Cameras: Resolution, Color, Field of View, and Compatibility
Compare six 4K USB cameras using IMX415, IMX274, and IMX678 sensors across resolution, color, field of view, distortion, Linux, and low-light tests.
REVIEWS Jul 23 2026

Fermion BMI323 6-Axis IMU Engineering Test Notes: Accelerometer, Gyroscope, Step Counter, and I2C Address Verification
This article is an engineering test note, mainly intended to demonstrate the actual performance of the module in common development scenarios, rather than a laboratory calibration report.
REVIEWS Jul 15 2026

Meet DFRobot at FAB26 Boston 2026: AI, Open-Source Hardware & Maker Education
Visit DFRobot at FAB26 Boston for hands-on AI workshops, open-source hardware demos, and practical insights into K–12 maker education.
NEWS Jul 15 2026